Loading ...
Loading ...
Loading ...
43
Care and Cleaning
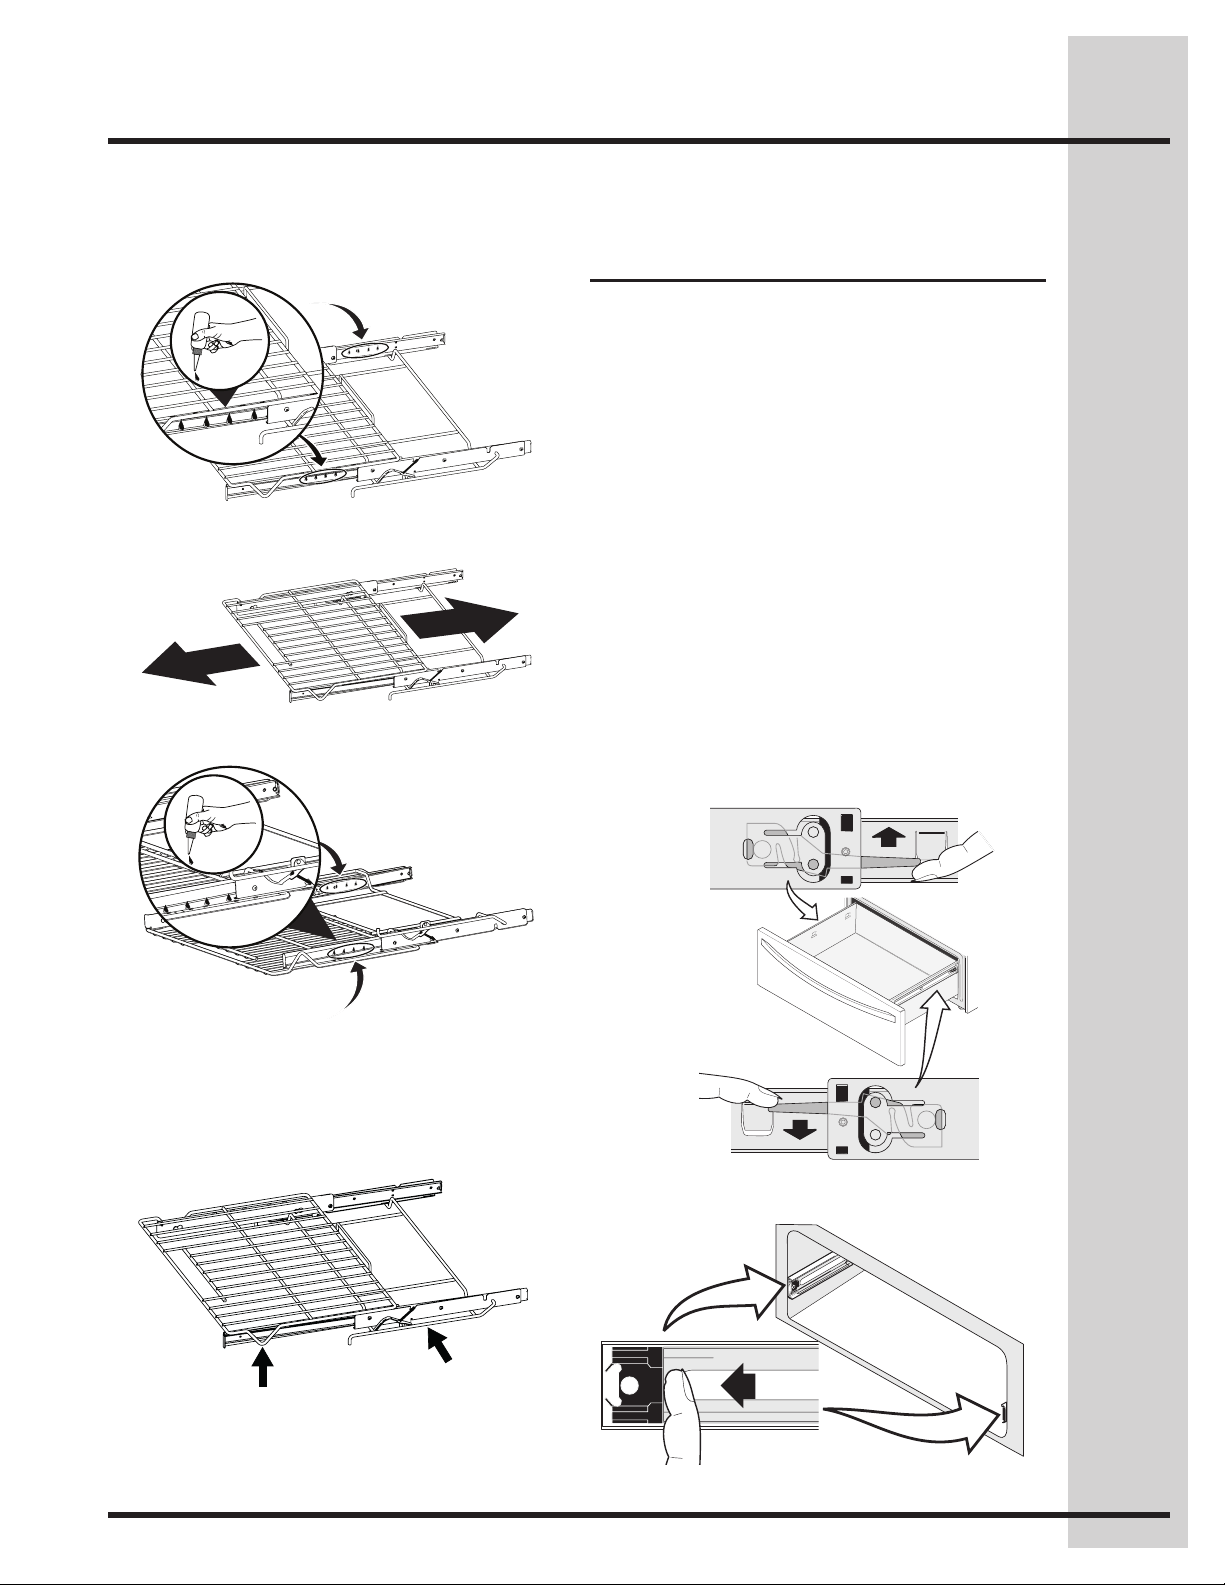
Figure 2
Figure 1
Lever
Lever
Left Glide
Right Glide
Pull up lever
with nger
Push down
lever with
nger
To Remove the Drawer:
1. Open the drawer to the fully opened position.
2. Locate glide lever on each side of drawer, pull up
on the left glide lever and push down on the right
glide lever (See Figure 1).
3. Pull the drawer away from the range.
To Replace the Drawer:
1. Pull the plastic slider to the front of the
glide slots on each side of the drawer cavity
(See Figure 2).
2. Align the glide on each side of the drawer with
the drawer cavity glide slot.
3. Push the drawer into the drawer cavity until
glide levers “click” (approximately 2”). If you do
not hear the glide levers “click” or the drawer
does not feel seated remove the drawer and
repeat steps 1 thru 3.
Removing and Replacing the
Drawer
3. Shake graphite lubrication very well before
applying. Apply to loading guides, and rotation
pin. Repeat on both sides of the glide rack.
4. Extend and return the glide rack several times
along the tracks to distribute the lubrication.
5. Turn the rack upside down and apply graphite
lubrication to the insides of the loading guides.
6. Extend and return the glide rack several times
along the tracks to distribute the lubrication.
7. Apply a thin layer of cooking oil to the bottom
of the “V” and the glide channels. Keeping the
frame sides lightly lubricated allows the entire
rack to slide easily when changing rack posi-
tions.
8. Replace rack in oven right-side up.
Loading ...
Loading ...
Loading ...