Loading ...
Loading ...
Loading ...
5
VENT CARE
General Cleaning
IMPORTANT: Before cleaning, make sure all controls are
OFFand the adjacent cooktops are cool. Always follow label
instructions oncleaning products. As extra reference, see the
cleaning instructions for the cooktop surface.
Soap, water, and a soft, damp cloth or sponge are suggested
rst unless otherwise noted.
Vent
Do not use steel wool, abrasive powder cleansers, chlorine
bleach, rust remover, or ammonia because damage may occur.
NOTE: Wipe in the direction of the brush lines to avoid damage.
Light to moderate soil
■ Can be cleaned with damp paper towels or sponge. Light
stains should be addressed with cleaner and cleaning pad.
Heavy soil, dark streaks, specks, and discoloration
■ Clean with affresh
®
Cooktop Cleaner or nonabrasive cleaner
and Cooktop Cleaning Pads.
Vent Filter
The grease lter for the vent should be cleaned regularly. Grease
build-up decreases the vent’s performance.
To Clean Metal Vent Filter:
1. Open the vent lter door and remove the vent lter.
2. Clean the lter using warm water with a mild dishwashing
soap.
Allow the lter to dry before installing in vent.
NOTE: The metal grease lter can be cleaned by handwashing
or in a dishwasher with a mild dishwashing soap at a low
temperature. Do not use aggressive or multi-phase cleaning
agents or clean at temperatures above 130°F (54°C)
Drip Pan
If a spill occurs on the cooktop and into the vent area, turn off
the cooktop and vent as soon as possible. Let the adjacent
cooking surfaces cool, remove the vent lter, and clean as
necessary. Wipe the vent area clean. The drip pan should always
be removed, emptied, and cleaned anytime there is a spill or
boilover. The drip pan should be removed, emptied, and cleaned
often to avoid drip pan overll and possible odors.
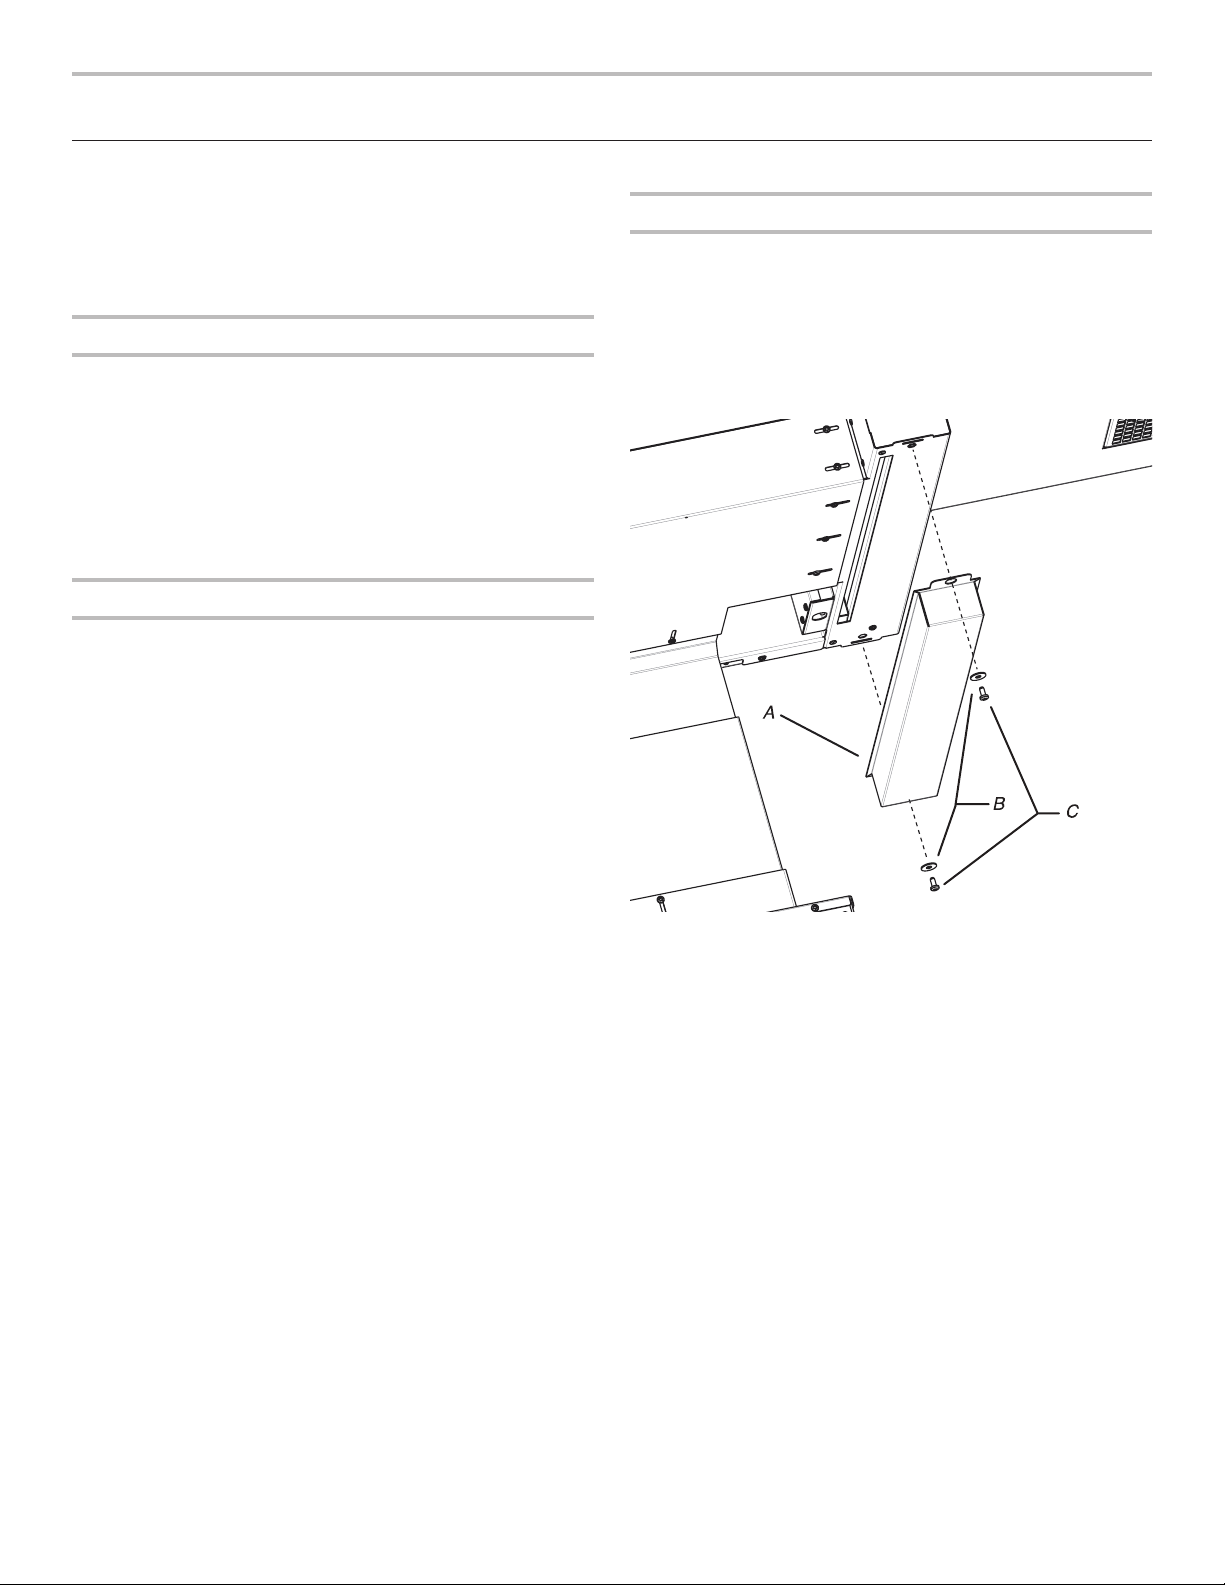
Drip pan removal:
1. Remove screws to remove pan.
NOTE: Loosen rear screw (do not remove) and remove front
screw to remove pan by sliding forward. This will make for easier
pan installation.
2. Remove the drip pan and dispose of the liquids and grease
buildup inside. Clean the drip pan inside and out with warm
soapy water, and then rinse and dry.
Drip Pan Installation:
NOTE: The drip pan should always be attached to the vent
except when it is removed for cleaning.
1. Replace pan by inserting rear tab in screw and fastening
front of pan with screw. Tighten both screws.
A. Drip pan
B. Flat washers (2)
C. Screws (2)
Loading ...
Loading ...
Loading ...