Loading ...
Loading ...
Loading ...
4
VENT USE
The vent removes cooking vapors, odors, and smoke from the
cooktop area. The vent consists of a vent lter, vent ducting, and
a vent fan.
■ For best results, the vent should be turned ON before
cooking is started.
■ A higher heat setting than normal may be needed when
thevent is operating.
■ The handle of the vent lter should be on the left-hand side
of the lter opening when facing the front of the vent. See
the previous illustration.
IMPORTANT: Only operate the vent with the vent lter properly
installed. Clean the lter regularly. Non-vented (recirculation) use
requires the installation of the Recirculation Kit Accessory.
To Use:
To Turn On Vent:
1. Push down on the right side of the vent door. Amagnet will
keep the vent door open.
NOTE: The vent will not operate if the vent door is closed.
2. Tap the bar ( ) above the “1” keypad for low speed. Tap
the bar ( ) above the “2” keypad for high speed.
NOTE: The vent has a Timer On mode. Tap the bar ( ) above
the “15 MIN” keypad. The vent will only run on low speed and
will automatically turn off after 15 minutes while in the Timer
Onmode.
To Turn Off Vent:
1. Tap the bar ( ) above the “OFF” keypad.
LED Illumination
There is an LED light below the vent door that comeson
automatically when the vent door is opened. Toturn the LED
light off when the door is open, pressthe LED lightswitch.
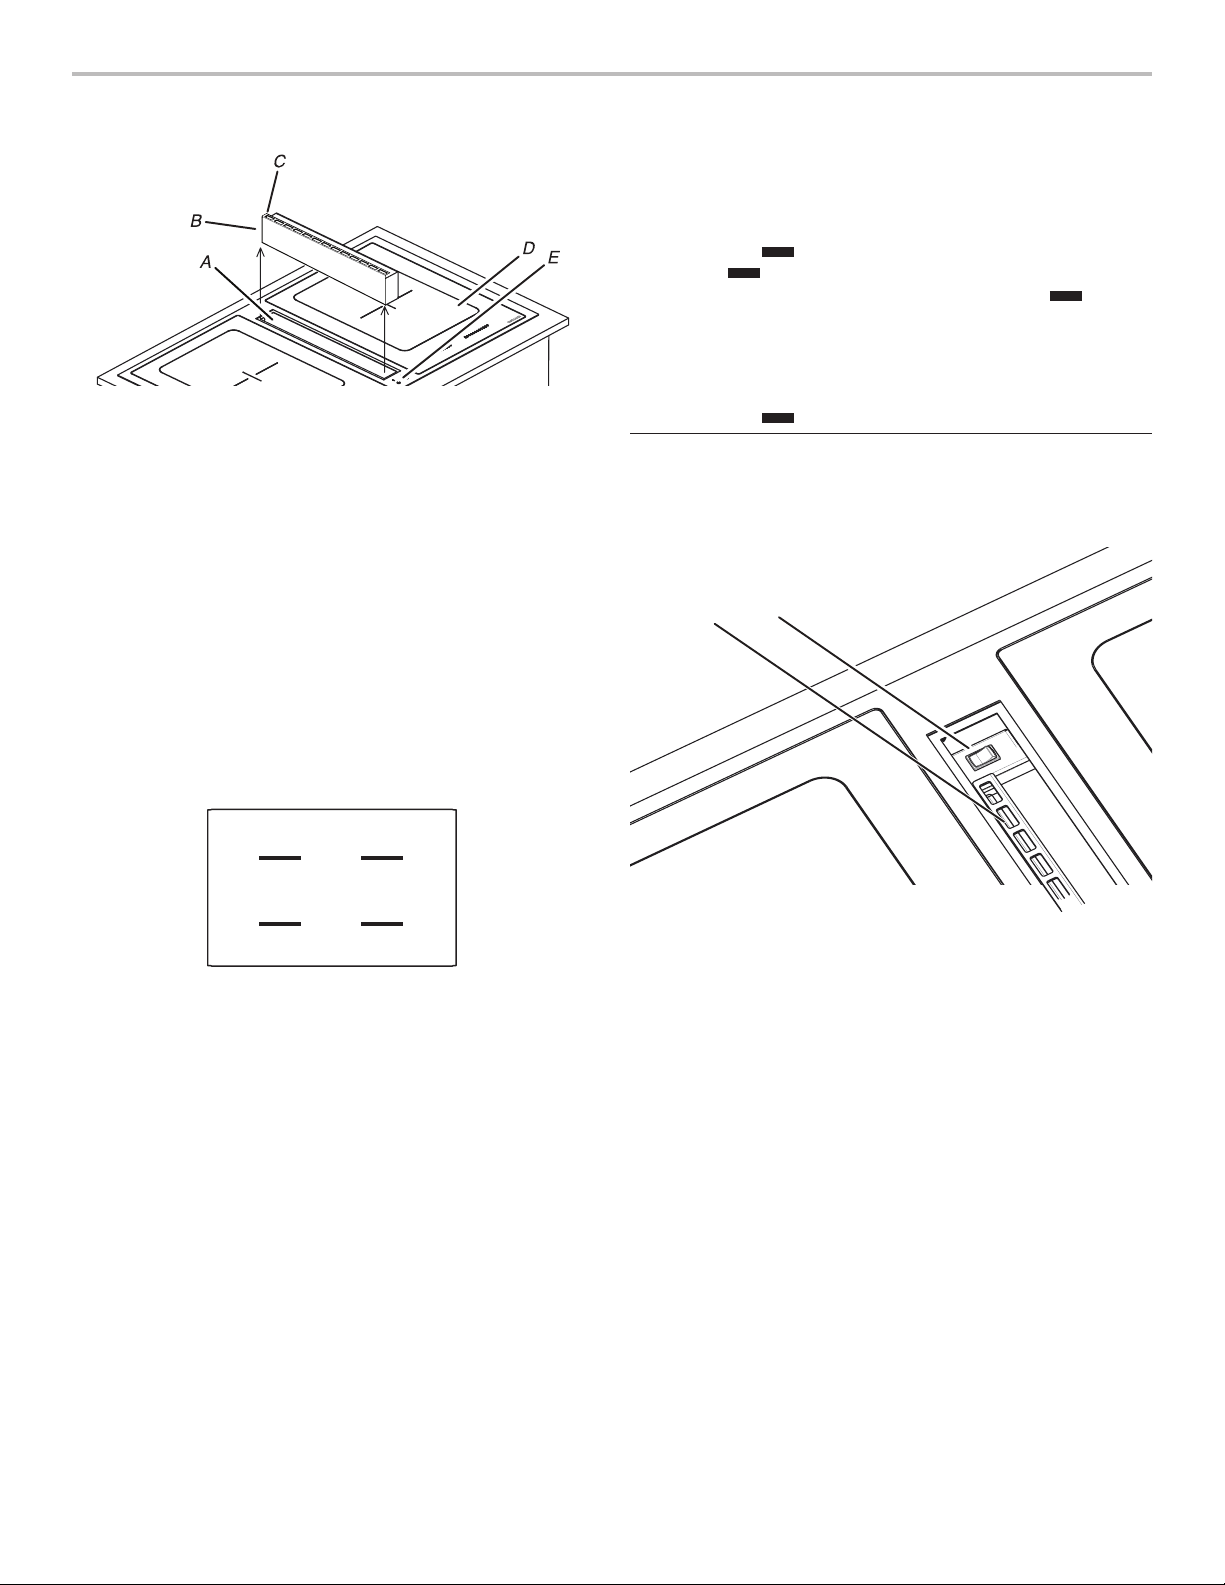
A. Vent door
B. Vent filter
C. Filter handle
D. Cooktop
E. Vent controls
A
B
A. LED light
B. LED light switch
OFF15 MIN
21
Loading ...
Loading ...
Loading ...