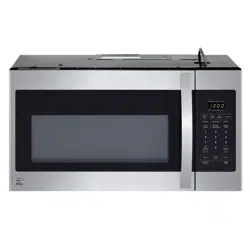
The following is a list of parts you may need for installing your Over-the-Range microwave oven. You will find the installation hardware contained in a packet with the unit. Check to make sure you have all these parts. Use this time to become familiar with each piece.
Tools
The following tools may be needed for installation of your microwave oven. Phillips screwdrivers, Electric Drill Motor, 1/2” & 5/8” Wood Bits & 3/16” Drill Bit, Saw to cut exhaust opening, (if needed) or Jig Saw, Tin Snips (if needed), Pencil, Tape Measure, Paper Tape & Duct Tape.
Mounting Space
Your Over-the-Range microwave oven requires mounting space on a wall as shown.
A minimum of 30” between wall hung side cabinets is required for installation. Make sure the bottom edge of the top cabinet is at least 66” from the floor and 30” from the cooking surface. The cabinet depth must be no less than 11 inches to secure top bolts, and no more than 12 inches for sufficient microwave door and control panel access.
For easier access to the hood lamp, the bottom of the microwave oven should be at least 2” above the range backsplash.
If you are going to vent your microwave oven to the outside, see exhaust duct preparation.
Designed to be installed in 30” wide cabinet opening.
Wall Construction
Your Over-the-Range microwave oven should be mounted against and supported by a flat, vertical wall. Wall construction should be a minimum of 2” x 4” wall studding and 3/8” or more, thick drywall or plaster/lath. The oven must be attached to a minimum of one 2” x 4” wall stud.
For proper installation the wall must be capable of supporting the cabinet load plus a minimum of 135 pounds, (the 85 pound weight of the microwave oven and load weight allowance of 50 pounds.) To find studs, use one of the following methods:
I. Stud finder-a magnetic device which locates nails.
II. Using a hammer, tap lightly across the mounting surface to find a solid sound. This will indicate a stud installation. After locating the stud(s), the center can be found by: Probing the wall with a small nail to find the edges of the stud and then placing a mark half way between the edges. The center of any adjacent studs should be 16” or 24” from this mark.
III. Draw a line down the center of the studs.
Hood Exhaust Duct
Outside ventilation requires HOOD EXHAUST DUCT. Read the following carefully.
EXHAUST CONNECTION: The hood exhaust has been designed to mate with a standard 3-1/4” x 10” rectangular duct.
If round duct is required, a rectangular-toround transition adapter must be used. Do not use less than a 6” diameter duct.
REAR EXHAUST: If rear or horizontal exhaust is to be used, care should be taken to align exhaust with space between studs, or wall should be prepared at the time it is constructed by leaving enough space between wall studs to accommodate exhaust.
MAXIMUM DUCT LENGTH: For satisfactory air movement, the total duct length of 3-1/4” x 10” rectangular or 6” diameter round duct should not exceed 140 feet of equivalent duct run.
ELBOWS, TRANSITIONS, WALL AND ROOF CAPS, etc., present additional resistance to air flow and are equivalent to a section of straight duct which is longer than their actual physical size. When calculating the total duct length add the equivalent lengths of all transitions and adaptors plus the lengths of all straight duct sections. The diagram below shows the approximate feet of equivalent length of some typical ducts.
Ventilation system Instructions
Your Over-the-Range microwave oven is designed for adaptation to the following three types of ventilation. Select the type of ventilation required for your installation and proceed to the appropriate section.
A. Horizontal Ventilation System
A-1. Ventilation motor
This blower motor has a damper and your microwave oven is shipped assembled for a Recirculation Application.
Step 1. Remove the screws (1) and (2) for opening the blower motor cover and save screws. Remove cover.
Step 2.
* Remove the screws (3) for Blower attachment and save screws.
* Lift blower unit out of mounting location.
CAUTION: Do not pull or stretch blower wiring
Step 3. Turn the blower unit so that the fan blade openings are facing back ( rear of unit ).
CAUTION: Wires to blower unit must be routed properly to avoid pinching wires before reinstallation of cover plate.
Use side cutters or tin snips to cut and remove parts B from back plate. be careful not to distort the plate.
Step 4. Place the blower unit into the opening and secure it to the oven with the screws(3) from step 2.
Carefully match the exhaust opening location of the microwave and attach the damper to the rear plate by sliding it into the guides at the rear plate.
Be sure that the damper hinge is on the top and the damper swings free into the wall outlet.
A-2. Install the Mounting Plate
Step 1. Setup position
a. Draw a line down the middle of the studs(See the Wall Construction, page 3)
b. Draw a vertical line on the wall at the center of the 30” wide space.
NOTE: Use the wall template for the rear wall.
Reference Wall Template prior to proceeding.
Step 2. Drilling
WARNING: Electrical shock hazard! To avoid serious injury from electrical shock:
- Locate and disconnect any electrical circuits that could be affected by installation of this product.
- Be careful when drilling holes. Electrical wires may be concealed behind wall and contact with wires can result in electrical shock.
Reference the MOUNTING PLATE INSTALLATION instructions in the Wall Template to perform the wall plate installation procedure.
IMPORTANT: Once the plate is installed, use a level to ensure that it is perfectly horizontal.
Using Toggle Screws
a. Insert toggle bolts through mounting plate at required locations and add the spring loaded toggles.
Be sure you leave space at least the thickness of the wall between the mounting plate and the end of the toggle nut, (in closed position). If you do not leave this space, the toggle nut will not open on the other side of the wall.
b.Position mounting plate on wall and insert toggle bolt assemblies through the drywall holes.
c. Next, secure mounting plate to the wall by tightening toggle bolt assemblies.
A-3. Mounting microwave oven
NOTE: IT IS VERY IMPORTANT THAT THIS OVEN BE INSTALLED BY TWO PEOPLE.
IMPORTANT: DO NOT GRIP OR USE HANDLE DURING INSTALLATION.
PREPARATION OF TOP CABINET
You need to drill holes for the top support screws and a hole large enough for the power cord to fit through.
Read the instructions on the TOP CABINET TEMPLATE
Tape the template to the underside of the top cabinet
Drill the holes, following the instructions on the template
Step 1. Protect the top of your range by placing a portion of the carton or some other heavy material over the cooking surface before mounting your oven.
Step 2.
Lift the microwave oven and tilt it forward.
Hang the two slots in the bottom back of the unit onto the two tabs on the bottom of the mounting plate.
Step 3. With the aid of an assistant, swing the unit upward until it is vertical against the wall. Have your assistant steady the unit in place while you insert and tighten the top bolts as instructed in Step 4 on the next page.
Step 4.
Obtain the aid of an assistant to steady the unit in place while you insert and tighten bolts as follows:
Place the 2 supplied washers onto the 2 supplied bolts. Insert the bolts through the drilled holes in the cabinet and screw them into the attachment holes in the top of the microwave oven. Tighten the screws to close the gap between the gap between the cabinet bottom and top of microwave oven.
NOTE: MICROWAVE OVEN MUST BE SECURED WITH TWO MOUNTING BOLTS.
Dress power cord nearly in top cabinet.
Install the grease filters.
* Using filler block for recessed bottom cabinet, insert a bolt with a 3/4” washer into one of the holes drilled previously in the top cabinet floor. (D & E on Top Cabinet Template.)
B. Vertical Ventilation System
B-1. Ventilation motor
Step 1 and 2. A-1 Ventilation motor.
Step 3. Turn the blower unit so that the fun blade openings are facing upward.
Step 4.
Place the blower unit into the opening.
Secure the Blower Motor Cover to the microwave oven with the screw(1, 2 and 3) from step 1 and 2.
Remove the screw (4) for the Blower Motor Cover and save screws.
Remove the Cover Motor Hole from Blower Motor Cover.
Carefully match the exhaust opening location of the microwave and attach the damper to blower motor cover by sliding it into the guides at the blower motor cover.
Be sure that the damper hinge is on the front and the damper swings free into the wall outlet.
B-2. Install the mounting plate
See the page 5, A-2. Install the mounting plate.
B-3. Mounting Microwave oven
See the page 6, A-3. Mounting the Microwave oven.
B-4. Adjust the Damper
For the vertical exhaust open the top cabinet and adjust the damper to the microwave through the cabinet bottom. For front to back or side to side adjustment, slide the damper as needed.
With the damper out, twist the damper to fit under the flaps of the blower plate.
Replace the damper and make sure it will move easily by the force of the exhaust air.
B-5. Connecting Ductwork
Extend the house duct down to connect to the exhaust adapter. Seal exhaust duct joints using duct tape.
C. Recirculation Ventilation System
Your over the range microwave oven has been provided with a charcoal filter for a recirculation venting application on some models. If replacement of the charcoal filter is required, contact your DAEWOO authorized dealer.
C-1. Ventilation motor
This ventilation motor has been assembled for Recirculation exhaust.
C-2. Install the Mounting plate
See the page 5, A-2. Install the mounting plate.
C-3. Mounting Microwave oven
See the page 6, A-3. Mounting the Microwave oven.
* You need not use damper for recirculation.
How to replace the Charcoal filter
Unplug the oven or turn off the power at the main power supply.
Remove the grille air mounting 3 screws and open the door.
Slide the grille air to the left, then pull it straight out.
Push the charcoal filter backwards and remove it.
Slide a new charcoal filter into place. The filter should rest at the angle.
Replace the grille air and 3 screws and close the door.
Plug the oven in or turn on the power at the main power supply
Checklist for Installation
Make sure oven has been installed according to these instructions and top cabinet template.
Remove all packing material from the oven.
Plug in power cord.
Read Use and Care manual.
Keep installation instructions and template for the local electrical inspector’s use.