Loading ...
Loading ...
Loading ...
en
7
Connecting the appliance
After setting up the appliance, wait for at least 1 hour
before starting the appliance up. The oil contained in
the compressor may have been displaced into the
refrigeration system during transport.
Before starting the appliance up for the first time, clean
its interior (see section “Cleaning the appliance”).
It is imperative to connect the appliance to the water
supply before establishing the electrical connections.
Do not remove the transit locks from the shelves and
trays until the appliance has been installed.
Water connection
m Warning
Risk of electric shock and damage to property.
Disconnect the appliance from the electricity mains
before carrying out any work on the water connection.
The water connection must only be installed by a
qualified plumber and in accordance with local
legislation and regulations governing water quality.
A 3/4-inch water connection is required to connect the
appliance.
Connect the appliance to a domestic water supply with
the following specifications:
ʋ Minimum pressure: 1.0 bar
ʋ Maximum pressure: 8.0 bar
Contact a plumbing professional if you are uncertain
how to check the current water pressure.
m Caution
If the water pressure is more than 5.5 bar, a pressure-
reducing valve must be fitted; otherwise there is a risk
of water damage. If the water pressure is below
1.0 bar, the ice-maker will not function.
The water tap to which the connecting hose supplied is
connected should be easily accessible.
The appliance may only be connected to a cold water
pipe.
The taste and smell of the water can be improved by
installing the filter cartridge supplied. If doing so, take
note of the different connection specifications (see
section headed Water filter).
Note
After the appliance has been switched on, water can
drip from the water dispenser. After approx. 24 hours,
when the appliance has reached its operating
temperature, the dripping stops.
Connecting
m Caution
Risk of leaks and water damage.
Observe the following points:
ʋ Do not bend the connecting hose.
ʋ Cut off the connecting hose evenly.
ʋ Do not cut off the connection hose with pliers.
ʋ Put the connection hose all the way onto the screw
socket and the return stop valve.
ʋ Tighten the screw socket by hand. Do not use pliers.
ʋ Check the flow direction of the return stop valve.
Arrows on the return stop valve indicate the flow
direction.
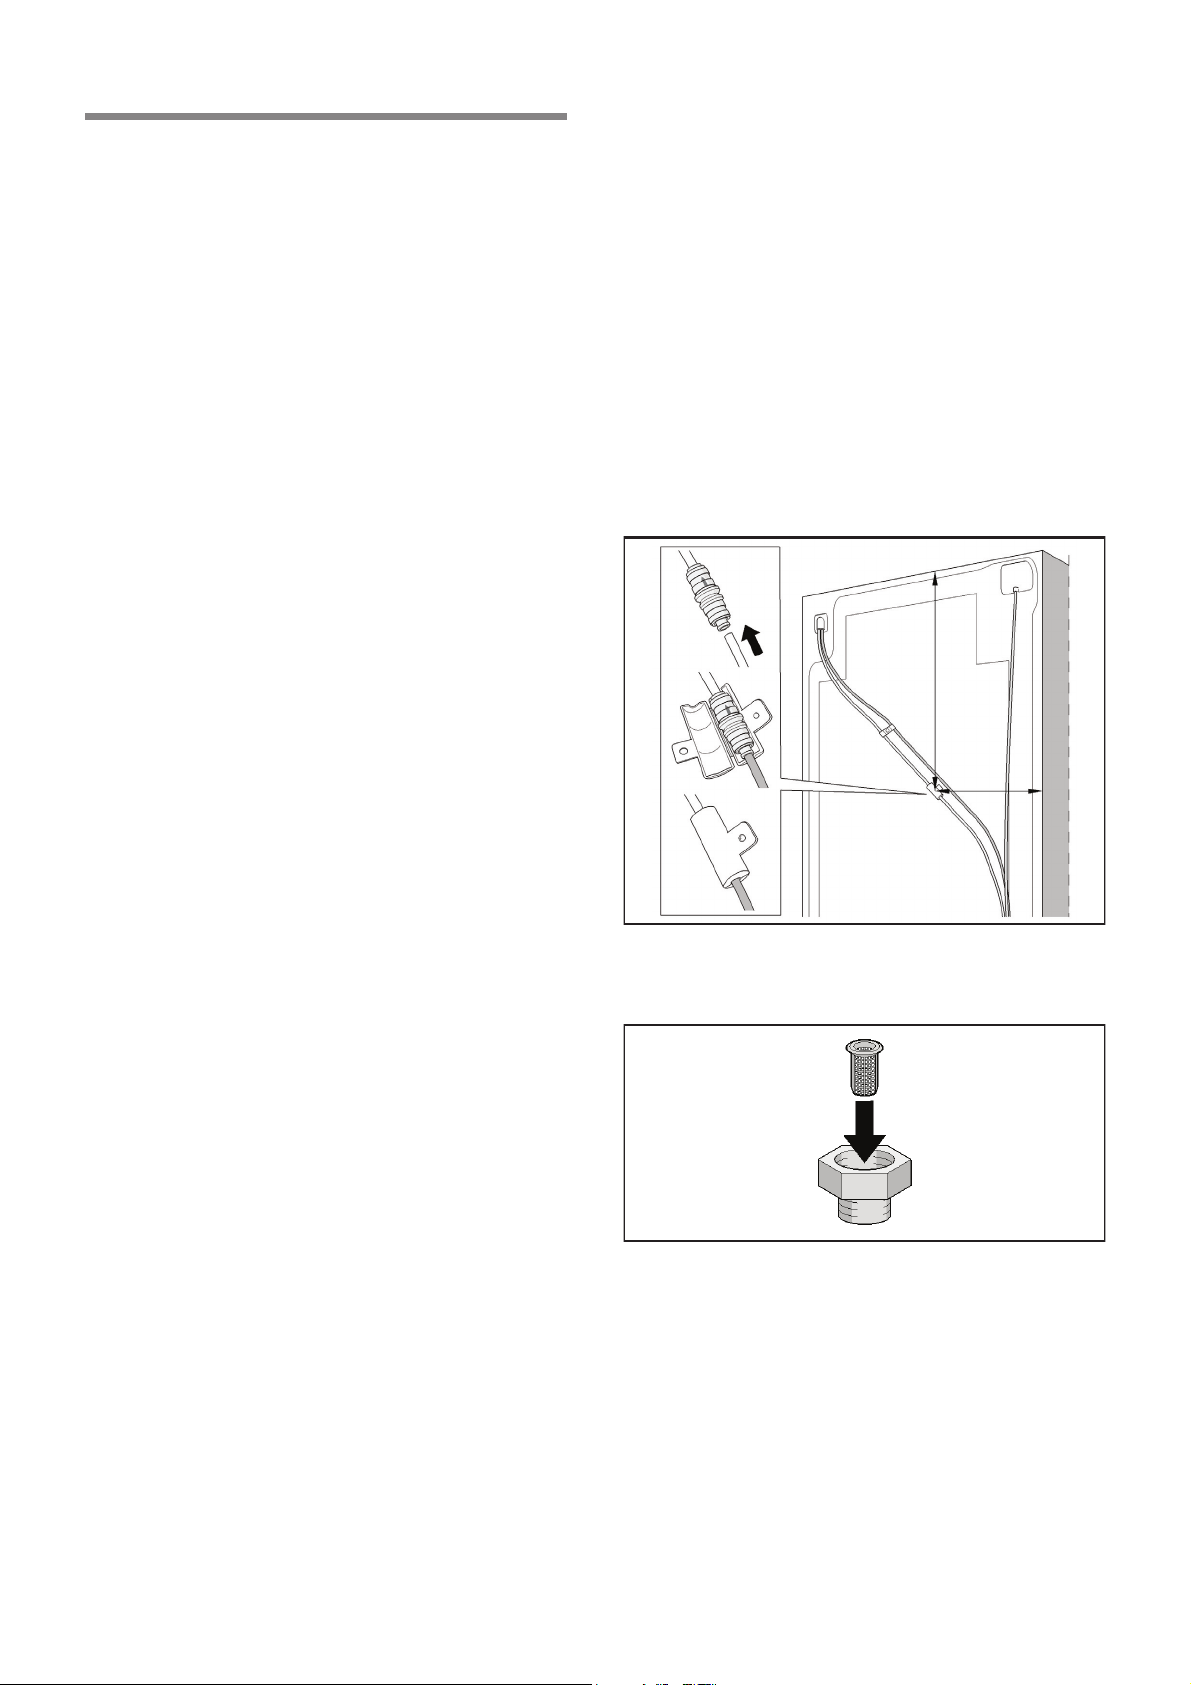
1. Insert the connecting hose all the way into the return
stop valve.
2. Close the sleeve at the return stop valve and fasten
with a screw.
3. Insert the sieve into the reducing piece.
Note
Clean the sieve every year. If there are many particles
in the water, clean the sieve more frequently.
approx.
65 cm
approx.
33 cm
Loading ...
Loading ...
Loading ...