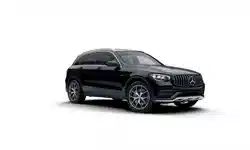
Mercedes-Benz 2019 AMG GLC 43 SUV
Product's Documents
Below are documents related to this product, you can read online or download:
- Owner's manual - (English) Read Online | Download pdf


 Information on displaying the outside temperature in the multifunction display can be found under "Outside temperature display" (
 page 221).

Vehicles with Audio 20 multimedia system:
Vehicles with COMAND multimedia system: you can find further information

Center console, lower section (except Mercedes-AMG vehicles)


Panic alarm

 To arm: press and hold the
  button : for approximately one second. A visual and audible alarm is triggered if the alarm system is armed.
To disarm: press the button  again. or
Insert the SmartKey into the ignition lock. or
Press the Start/Stop button. The SmartKey must be in the vehicle.
Occupant safety
Introduction to the restraint system The restraint system can reduce the risk of vehicle occupants coming into contact with parts of the vehicle's interior in the event of an accident. The restraint system can also reduce the forces towhich vehicle occupants are subjected during an accident. The restraint system comprises:
The components of the restraint system work in conjunction with each other. They can only deploy their protective function if, at alltimes, all vehicle occupants:
page 47) page 99)As the driver, you also have to make sure that the steering wheel is adjusted correctly. Observe the information relating to the correct driver's seat position (Y page 99). You also have to make sure that an air bag can inflate properly if deployed (Y page 49). An air bag supplements a correctly worn seat belt. As an additional safety device, the air bag increases the level of protection for vehicle occupants in the event of an accident. For example, if, in the event of an accident, the protection offered by the seat belt is sufficient, the air bags are not deployed. When an accident occurs, only the air bags that increase protection in that particular accident situation are deployed. However, seat belts and air bags generally do not protect against objects penetrating the vehicle from the outside.
Information on restraint system operation can be found under "Triggering of the Emergency Tensioning Devices and air bags" (page 56). See "Children in the vehicle" for information on children traveling with you in the vehicle as well as on child restraint systems (page 60).
Important safety notes
WARNING Modifications to the restraint system may cause it to no longer work as intended. The restraint system may then not perform its intended protective function and may fail in an accident ortrigger unexpectedly, for example. This poses an increased risk of injury or even fatal injury.
Never modify parts of the restraint system. Never tamper with the wiring, the electronic components or their software.
If it is necessary to modify components of the restraint system to accommodate a person with disabilities, contact an authorized MercedesBenz Center for details. USA only: for further information contact our Customer Assistance Center at 1-800 FOR-MERCEDES (1‑800‑367‑6372).
Mercedes-Benz recommends that you only use driving aids which have been approved specifically for your vehicle by Mercedes-Benz.
Restraint system warning lamp
The functions of the restraint system are checked after the ignition is switched on and at regular intervals while the engine is running. Therefore, malfunctions can be detected in good time.
The  restraint system warning lamp on the instrument cluster lights up when the ignition is switched on. It goes out no later than a few seconds after the vehicle is started. The components of the restraint system are in operational readiness.
A malfunction has occurred if therestraint system warning lamp:
WARNING
If the restraint system is malfunctioning, restraint system components may be triggered unintentionally or may not deploy as intended during an accident. This can affect for example the Emergency Tensioning
Device or the air bag. This poses an increased risk of injury or even fatal injury.
Have the restraint system checked and repaired in a qualified specialist workshop as soon as possible.
PASSENGER AIR BAG indicator lamp

PASSENGER AIR BAG ON indicator lamp and PASSENGER AIR BAG OFF indicator lamp  are part of the Occupant Classification System (OCS).
The indicator lamps display the status of the front-passenger front air bag.
If the PASSENGER AIR BAG ON indicator lamp is off, only the PASSENGER AIR BAG OFF indicator lamp shows the status of the front-passenger front air bag. The PASSENGER AIR BAG OFF indicator lamp may be lit continuously or be off.
Depending on the person in the front-passenger seat, the front-passenger front air bag must either be deactivated or enabled; see the following points. You must make sure of this both before and during a journey.
page 52) and on "Children in the vehicle" ( page 60). There you will also find instructions on rearward and forward-facing child restraint systems on the front-passenger seat.page 52). Be sure to observe the notes on "Seat belts“ ( page 45) and "Air bags" page 49). There you can also find information on the correct seat position.Seat belts
Introduction
Seat belts are the most effective means of restricting the movement of vehicle occupants in the event of an accident or the vehicle rolling over. This reduces the risk of vehicle occupants coming into contact with parts of the vehicle interior or being ejected from the vehicle. Furthermore, the seat belt helps to keep the vehicle occupant in the best position in relation to the air bag.
The seat belt system comprises:
If the seat belt is pulled out of the belt outlet quickly or with a jerky movement, the belt retractor locks. The belt strap cannot be extracted any further.
The Emergency Tensioning Device tightens the seat belt in an accident, pulling the belt close against the body. However it does not pull the vehicle occupant back in the direction of the backrest.
The Emergency Tensioning Device does not correct an incorrect seat position or the routing of an incorrectly fastened seat belt.
When triggered, a seat belt force limiter helps to reduce the force exerted by the seat belt on the vehicle occupant.
The seat beltforce limiters forthe front seats are synchronized with the front air bags, which absorb part of the deceleration force. This can reduce the force exerted on the vehicle occupants during an accident.
 If the front-passenger seat is not occupied, do not engage the seat belt tongue in the buckle on the front-passenger seat. Otherwise, in the event of an accident the Emergency Tensioning Device and the side impact air bag, in addition to other systems, may be triggered and have to be replaced.
Important safety notes
The use of seat belts and child restraint systems is required by law in:
all 50 states
Evenwhere this is notrequired by law, all vehicle occupants should correctly fasten their seat belts before starting the journey.
WARNING If the seat belt is not worn correctly, it cannot perform its intended protective function. An incorrectly fastened seat belt can also cause injuries, for example, in the event of an accident or when braking or changing direction abruptly. This poses an increased risk of injury or even fatal injury. Always ensure that all vehicle occupants have their seat belts fastened correctly and are sitting properly.
The components of the restraint system work in conjunction with each other. They can only deploy their protective function if, at alltimes, all vehicle occupants:
page 47)page 99)WARNING The seat belt does not offer the intended level of protection if you have not moved the backrest to an almost vertical position. When braking or in the event of an accident, you could slide underneath the seat belt and sustain abdomen or neck injuries, for example. This poses an increased risk of injury or even fatal injury.
Adjust the seat properly before beginning your journey. Always ensure that the backrest is in an almost vertical position and that the shoulder section of your seat belt is routed across the center of your shoulder.
WARNING Persons less than 5 ft (1.50 m) tall cannot wear the seat belt correctly without an additional and suitable restraint system. If the seat belt is not worn correctly, it cannot perform its intended protective function. An incorrectly fastened seat belt can also cause injuries, for example, in the event of an accident or when braking or changing direction abruptly. This poses an increased risk of injury or even fatal injury. For this reason, always secure persons under 5 ft(1.50 m)tall in suitable additionalrestraint systems.
If a child younger than twelve years old and under 5 ft (1.50 m) in height is traveling in the vehicle:
page 60) in addition to the child restraint system manufacturer's installation and operating instructions page 52)Proper use of the seat belts
Observe the safety notes on the seat belt (page 46).
All vehicle occupants must be wearing the seat belt correctly before beginning the journey. Also make sure that all vehicle occupants are always wearing the seat belt correctly while the vehicle is in motion.
When fastening the seat belt, always make sure that:
Also ensure that there are never objects between a person and the seat, e.g. cushions.
Seat belts are only intended to secure and restrain vehicle occupants. Always observe the "Loading guidelines" for securing objects, luggage or loads ( page 290).
Fastening and adjusting the seat belts
Observe the safety notes on the seat belt (page 46) and the notes on correct use of seat belts (page 47).
If the center rear seat belt is being used, also observe the information about the seat belt for the center rear seat (page 48).

page 99). The seat backrest must be in an almost upright position. into belt buckle. The seat belt on the driver’s seat and the front-passenger seat may be tightened automatically, see "Belt adjustment" ( page 48).The shoulder section of the seat belt must always be routed across the center of the shoulder. Adjust the belt outlet if necessary.
 and slide the belt outlet down. in the desired position and make sure that the belt outlet engages.
All seat belts except the driver's seat belt are equipped with a special seat belt retractor to securely fasten child restraint systems in the vehicle. Further information can be found under "Special seat belt retractor" (page 60).
Seat belt for the center rear seat
If the left-hand rear seat backrest is folded down and back up again, the rear center seat belt may lock. The seat belt can then not be pulled out.
Releasing seat belts
Make sure that the seat belt is fully rolled up. Otherwise, the seat belt or belt tongue will be trapped in the door or in the seat mechanism. This could damage the door, the door trim panel and the seat belt. Damaged seat belts can no longer fulfill their protective function and must be replaced. Visit a qualified specialist workshop.
Seat belt adjustment
The belt adjustment is a convenience function integrated into PRE-SAFE®. With this function, the driver's and front-passenger seat belts are adjusted to the upper body of the vehicle occupant.
The seat belt strap will slightly tighten if:
The seat belt adjustment will apply a certain tightening force if any slack is detected between the vehicle occupant and the seat belt. Do not grab hold of the seat belt.
You can switch the seat belt adjustment on and off using the multimedia system. Information on switching the seat belt adjustment on and off can be found in the Digital Operating Instructions.
Important safety notes
WARNING
If children are left unsupervised in the vehicle, they could:
Additionally, children could set the vehicle in motion if, for example, they:
There is a risk of an accident and injury.
When leaving the vehicle, always take the SmartKeywith you and lock the vehicle.Never leave children or animals unattended in the vehicle. Always keep the SmartKey out of reach of children.
WARNING If you attach heavy or large objects to the SmartKey, the SmartKey could be unintentionally turned in the ignition lock. This could cause the engine to be switched off. There is a risk of an accident. Do not attach any heavy or large objects to the SmartKey. Remove any bulky key rings before inserting the SmartKey into the ignition lock.
Keep the SmartKey away from strong magnetic fields. Otherwise, the remote control function could be affected.
Strong magnetic fields can occur in the vicinity of powerful electrical installations.
Do not keep the SmartKey:
Vehicles with KEYLESS-GO startfunction: do not keep the SmartKey in the cargo compartment. Otherwise, the SmartKey may not be detected, e.g. when starting the engine using the Start/Stop button.
A brief radio connection between the vehicle and the SmartKey determines whether a valid SmartKey is in, or in the direct vicinity of, the vehicle. This occurs, for example:
SmartKey functions


 To unlock centrally: press
  button. If you do not open the vehicle within approximately 40 seconds of unlocking:
To lock centrally: press the  button.
The SmartKey centrally locks and unlocks the following components:
The turn signals flash once when unlocking and three times when locking.
You can also set an audible signal to confirm that the vehicle has been locked. The audible signal can be activated and deactivated via the multimedia system; see the Digital Operator's Manual.
You will receive visual and acoustic locking confirmation if all components were able to be locked.
When the locator lighting is activated via the multimedia system, it lights up when it is dark after the vehicle is unlocked with the SmartKey; see the Digital Operator's Manual.
To open the tailgate automatically from outside the vehicle: press and hold the button until the tailgate opens.
To close the tailgate automatically from outside the vehicle: if the SmartKey is located in the immediate vicinity of the vehicle, press thebutton on the SmartKey. When the tailgate closes you can then release the button.
KEYLESS-GO
General notes
Bear in mind that the engine can be started by any of the vehicle occupants if there is a SmartKey in the vehicle (Y page 138).
Locking/unlocking centrally
You can start, lock or unlock the vehicle using KEYLESS-GO. To do this, you only need carry the SmartKey with you. You can combine the functions of KEYLESS-GO with those of a conventional SmartKey. Unlock the vehicle by using KEYLESS-GO, for instance, and lock it using the button on the SmartKey.
The driver's door and the door at which the handle is used, must both be closed. The SmartKey must be outside the vehicle. When locking or unlocking with KEYLESS-GO, the distance between the SmartKey and the corresponding door handle must not be greater than 3 ft (1 m).
A brief radio connection between the vehicle and the SmartKey determines whether a valid
SmartKey is in, or in the direct vicinity of, the vehicle. This occurs, for example:

To unlock the vehicle: touch the inner surface of the door handle.
To lock the vehicle: touch sensor surface or.
Make sure that you do not touch the inner surface of the door handle.
Convenience closing feature: touch recessed sensor surface for an extended period.
Further information on the convenience closing feature ( page 92).
To unlock the tailgate: pull the tailgate handle.
Deactivating and activating
If you do not intend to use a SmartKey for an extended period of time, you can deactivate the KEYLESS-GO function of the SmartKey. The SmartKey will then use very little power, thereby conserving battery power. For the purposes of activation/deactivation, the vehicle must not be nearby.
To deactivate: press thebutton on the SmartKey twice in rapid succession.
The battery check lamp (page 81) of the SmartKey flashes twice briefly and lights up once, then KEYLESS-GO is deactivated.
To activate: press any button on the SmartKey.
Insert the SmartKey into the ignition lock. KEYLESS-GO and all of its associated features are available again.
KEYLESS-GO start function
General notes
Bear in mind that the engine can be started by any of the vehicle occupants if there is a SmartKey in the vehicle ( page 138).
Changing the settings of the locking system
You can change the settings of the locking system. This means that only the driver's door and the fuel filler flap are unlocked when the vehicle is unlocked. This is useful if you frequently travel alone.
To change the setting: press and hold down the andbuttons simultaneously for approximately six seconds until the battery check lamp (page 81) flashes twice. If the setting of the locking system is changed within the signal range of the vehicle, pressing theorbutton:
The SmartKey now functions as follows:
To unlock: press thebutton once.
To unlock centrally: press thebutton twice.
To lock: press thebutton.
To restore the factory settings: press and hold theandbuttons simultaneously for approximately six seconds until the battery check lamp ( page 81) flashes twice.
The KEYLESS-GO functions can be changed as follows:
To unlock the driver's door: touch the inner surface of the door handle on the driver's door.
To unlock centrally: touch the inner surface of the door handle on the front-passenger door or the rear door.
To lock centrally: touch the outer sensor surface on one of the door handles.
Mechanical key
General notes
If the vehicle can no longer be locked or unlocked with the SmartKey or KEYLESS-GO, use the mechanical key.
If you use the mechanical key to unlock and open the driver's door, the anti-theft alarm system will be triggered. Switch off the alarm (page 77).
If you unlock the vehicle using the mechanical key, the fuel filler flap will not be unlocked automatically.
To unlock the fuel filler flap: insert the SmartKey into the ignition lock.
Removing the mechanical key

Push release catch in the direction of the arrow and at the same time remove mechanical key from the SmartKey.
For further information about:
page 85)page 90)Inserting the mechanical key
Push mechanical key completely into the SmartKey until it engages and release catch is back in its basic position.
SmartKey battery
Important safety notes
WARNING Batteries contain toxic and corrosive substances. If batteries are swallowed, it can result in severe health problems. There is a risk of fatal injury. Keep batteries out of the reach of children. If a battery is swallowed, seek medical attention immediately.
Environmental note
 Batteries contain dangerous substances. It is against the law to dispose of them with the household rubbish. They must be collected separately and recycled to protect the environment.
 Dispose of batteries in an environmentally friendly manner. Take discharged batteries to a qualified specialist workshop or a special collection point for used batteries.
Checking the battery

Press theorbutton. The battery is working properly if battery check lamp lights up briefly.
The battery is discharged if battery check lamp does not light up briefly.
Change the battery ( page 81).
If the SmartKey battery is checked within the signal reception range of the vehicle, pressing theorbutton:
You can get a battery at any qualified specialist workshop
Replacing the battery
You require a CR 2025 3 V cell battery.
Take the mechanical key out of the SmartKey ( page 80).

Press mechanical key into the SmartKey opening in the direction of the arrow until battery compartment cover opens. Do not hold battery compartment cover closed while doing so.
Remove battery compartment cover .

Repeatedly tap the SmartKey against your palm until battery  falls out.
Insert the new battery with the positive terminal facing upwards. Use a lint-free cloth to do so.
Make sure that the surface of the battery is free of lint, grease and other contaminants.
Insert the front tabs of battery compartment cover into the housing first and then press to close it.
Insert mechanical key into the SmartKey (page 80).
Check the function of all SmartKey buttons on the vehicle.
Problems with the SmartKey
| Problem | Possible causes/consequences and Solutions |
| You can no longer lock or unlock the vehicle using the SmartKey. |
The SmartKey battery is discharged or nearly discharged.
If this does not work:
There is interference from a powerful source of radio waves.
The SmartKey is faulty.
|
| You can no longer lock or unlock the vehicle using KEYLESS-GO. |
KEYLESS-GO was deactivated.
The SmartKey battery is discharged or nearly discharged.
If this does not work:
There is interference from a powerful source of radio waves.
KEYLESS-GO is malfunctioning.
If the vehicle can also not be locked/unlocked using the remote control function:
|
| The engine cannot be started using the SmartKey. |
The on-board voltage is too low.
If this does not work:
|
| The engine cannot be started using the Start/ Stop button. The SmartKey is in the vehicle. |
The vehicle is locked.
The SmartKey battery is discharged or nearly discharged.
If this does not work:
There is interference from a powerful source of radio waves.
|
| You have lost a SmartKey. |
|
| You have lost the mechanical key. |
|
Important safety notes
WARNING
If children are left unsupervised in the vehicle, they could:
Additionally, children could set the vehicle in motion if, for example, they:
There is a risk of an accident and injury.
When leaving the vehicle, always take the SmartKeywith you and lock the vehicle. Never leave children or animals unattended in the vehicle. Always keep the SmartKey out of reach of children.
Unlocking and opening doors from the inside
You can open a door from inside the vehicle even if it has been locked. You can only open the rear doors from inside the vehicle if they are not secured by the child-proof locks (page 65). If the vehicle has been locked with the SmartKey or with KEYLESS-GO, opening a door from the inside will trigger the anti-theft alarm system. Switch off the alarm (page 77).

To unlock and open a front door pull door handle
If the door is locked, locking knobpops up. The door is unlocked and opens.
To unlock a rear door: pull the rear door handle.
The locking knob on the rear door pops up and the rear door unlocks.
To open a rear door: pull the rear door handle again.
The rear door opens.
Centrally locking and unlocking the vehicle from the inside
You can centrally lock and unlock the vehicle from the inside. The buttons are on the driver’s door.

To unlock: press button
To lock: press button . When the front-passenger door is closed, the vehicle is locked.
Meanwhile, the fuel filler flap will not be locked or unlocked.
You cannot unlock the vehicle centrally from the inside if the vehicle has been locked with the SmartKey or KEYLESS-GO.
If the vehicle has been lockedwith the SmartKey or with KEYLESS-GO, opening a door from the inside will trigger the anti-theft alarm system. Switch off the alarm (page 77).
If a locked door is opened from the inside, the previous unlock status of the vehicle will be taken into consideration if:
The vehicle will be fully unlocked if it had previously been fully unlocked. If only the driver's door had been previously unlocked, only the door which has been opened from the inside is unlocked.
Automatic locking feature

To deactivate: press and hold button for approximately five seconds until a tone sounds.
To activate: press and hold button for approximately five seconds until a tone sounds.
If you press one of the two buttons and do not hear a tone, the relevant setting has already been selected.
The vehicle is locked automatically when the ignition is switched on and the wheels are turning.
You could therefore be locked out if:
You can activate and deactivate the automatic locking mechanism via the multimedia system see the Digital Operator's Manual).
Locking/unlocking the driver's door with the mechanical key
If you want to centrally lock the vehicle using the mechanical key, begin by pressing the locking button for the interior locking mechanism while the driver's door is open. Then lock the driver's door using the mechanical key.

Insert the mechanical key into opening in the protective cap.
Pull and hold the door handle.
Pull the protective cap on the mechanical key as straight as possible away from the vehicle until it releases.
Release the door handle.

To lock:turn themechanical key clockwise as far as it will go to position 1.
To unlock: turn the mechanical key counterclockwise as far as it will go to position 1.
If you use the mechanical key to unlock and open the driver's door, the anti-theft alarm system will be triggered. Switch off the alarm (page 77).
Opening and closing manually
Opening

Press thebutton on the SmartKey.
Pull handle The tailgate opens.
Closing

Pull the tailgate down using recesses : and push it closed.
Lock the vehicle if necessary with the& button on the SmartKey or with KEYLESS-GO (page 79).
Opening/closing automatically from the outside
Important safety notes
DANGER Combustion engines emit poisonous exhaust gases such as carbon monoxide. Exhaust gases can enter the vehicle interior if the tailgate is open while the engine is running, especially if the vehicle is in motion. There is a risk of poisoning. Always switch off the engine before opening the tailgate. Never drive with the tailgate open.
WARNING Parts of the body could become trapped during automatic closing of the tailgate. Moreover, people, e.g. children, may be standing in the closing area or may enter the closing area during the closing process. There is a risk of injury. Make sure that nobody is in the vicinity of the closing area during the closing process.
Use one of the following options to stop the closing process:
button on the SmartKey.Vehicles with HANDS-FREE ACCESS:
You can also stop the closing process by performing a kicking movement under the rear bumper.
The tailgate swings upwards and to the rear when opened. Therefore, make sure that there is sufficient clearance above and behind the tailgate.
Two warning tones sound while the tailgate is opening or closing.
The opening dimensions of the tailgate can be found in the "Vehicle data" section ( page 376).
Opening automatically
You can open the tailgate automatically with the SmartKey or the handle in the tailgate.
Press and hold thebutton on the SmartKey until the tailgate opens.
If the tailgate is unlocked, pull the handle and let it go again immediately.
With the tailgate stopped in an intermediate position, pull the tailgate upwards. You can release the tailgate as soon as the tailgate starts to open.
Closing automatically

Press closing button in the tailgate.
Pull the tailgate down slightly. You can release the tailgate as soon as the tailgate starts to close.
When the driver's door is closed, you can simultaneously close the tailgate and lock the vehicle. The SmartKey must be at the rear of the vehicle in the detection range of KEYLESS-GO.
Press locking button in the tailgate.
If KEYLESS-GO detects a SmartKey outside the vehicle, the tailgate closes. The vehicle is locked.
Vehicles with EASY-PACK tailgate and KEYLESS-GO or KEYLESS-GO start function: if the SmartKey is located in the immediate vicinity of the vehicle, press the button on the SmartKey.
You can release the button as soon as the tailgate starts to close.
If KEYLESS-GO detects a SmartKey in the cargo compartment, the tailgate is unlocked again after closing.
If KEYLESS-GO detects a second SmartKey outside the vehicle, the tailgate remains locked.
If KEYLESS-GO detects a SmartKey in the cargo compartment before the closing procedure starts, the tailgate remains open.
HANDS-FREE ACCESS
General notes
With KEYLESS-GO and HANDS-FREE ACCESS, you can open or close the tailgate or stop the procedure without using your hands. This is useful if you have your hands full. To do this, make a kicking movement underthe bumperwith your foot.
Observe the following points:

The tailgate could thus be opened or closed unintentionally, for example, if you:
- install or remove the ball coupling.
- couple or uncouple a trailer.
- install or remove a rear-mounted bicycle rack.
- load/unload bicycles on/from a rearmounted bicycle rack.
- sit on the edge of the cargo compartment.
- set something down or lift something up behind the vehicle.
- polish the rear of the vehicle.
Do not carry the KEYLESS-GO key about your person in these situations orin situations similar to these. This will prevent unintentional opening or closing of the tailgate.
Important safety notes
WARNING The vehicle exhaust system can become very hot. If you use HANDS-FREE ACCESS, you could burn yourself by touching the exhaust system. There is a risk of injury. Always ensure that you make the kicking movement onlywithin the detection range ofthe sensors.
If the SmartKey is within the rear detection range of KEYLESS-GO, the following situations, for example, could lead to the unintentional opening of the tailgate:
Make sure that the SmartKey is at least 10 ft (3 m) away from the vehicle.
Operation

To open or close: kick with your foot into sensor detection range beneath the bumper. Two warning tones sound while the tailgate is opening or closing.
If the tailgate does not open or close after several attempts: wait at least ten seconds then kick under the bumper once again.
If you hold your foot under the bumper for too long, the tailgate does not open or close. Repeat the leg movement more quickly if this occurs.
To stop the opening or closing procedure, you have the following options:
beneath the bumper.button on the SmartKey.If the tailgate closing procedure has been stopped:
If the tailgate opening procedure has been stopped:
Opening/closing automatically from inside
Important safety notes
DANGER Combustion engines emit poisonous exhaust gases such as carbon monoxide. Exhaust gases can enter the vehicle interior if the tailgate is open while the engine is running, especially if the vehicle is in motion. There is a risk of poisoning. Always switch off the engine before opening the tailgate. Never drive with the tailgate open.
WARNING Parts of the body could become trapped during automatic closing of the tailgate. In addition, people may be standing in the closing area or may enter the closing area, e.g. children, during the closing procedure. There is a risk of injury. Make sure that nobody is in the vicinity of the closing area during the closing process. Release the remote operating switch immediately if somebody becomes trapped. To reopen the tailgate pull on the remote operating switch.
Vehicles with HANDS-FREE ACCESS:
You can also stop the closing process by performing a kicking movement under the rear bumper.
The tailgate swings upwards and to the rear when opened. Therefore, make sure that there is sufficient clearance above and behind the tailgate.
Two warning tones sound while the tailgate is opening or closing.
The opening dimensions of the tailgate can be found in the "Vehicle data" section ( page 376).
Opening and closing

To open: pull remote operating switch for the tailgate until the tailgate opens.
To close: turn the SmartKey to position or
or  in the ignition lock.
Press and hold remote operating switch for tailgate until the tailgate is completely closed.
When the vehicle is stationary, you can close the tailgate from the driver's seat. When the vehicle is also unlocked, you can also open the tailgate from inside.
Limiting the opening angle of the tailgate
General notes
Make sure there is sufficient clearance to open the tailgate fully when setting the opening angle. The tailgate could otherwise be damaged. Ideally, set the opening angle outside.
You can limit the opening angle of the tailgate. This is possible in the top half of its opening range, up to approximately 8 in (20 cm) before the stop.
To open the tailgate fully, pull the handle on the outside of the tailgate again after it has stopped automatically. This does not delete the stored position.
Activating
To open the tailgate: pull the handle on the tailgate.
To stop the opening procedure at the desired position: press the closing button in the tailgate or pull the handle on the outside of the tailgate again.
To store the position: press and hold the closing button in the tailgate until you hear a short tone.
The opening angle limiter is activated. The tailgate will now stop in the stored position when opening.
Deactivating
Press and hold the closing button on the tailgate until two short tones sound.
Unlocking the tailgate using the mechanical key
General notes
Use the mechanical key if the tailgate can no longer be unlocked:
The tailgate swings upwards and to the rear when opened. Therefore, make sure that there is sufficient clearance above and behind the tailgate.
Unlocking

Remove the cargo compartment cover ( page 296).
Fold the rear seat backrest forward ( page 293).
Insert mechanical key into opening in the paneling and push it in.
Open the tailgate.
When you lock the vehicle, the cargo compartment is also locked again.
Reference file: Mercedes-Benz 2019 AMG GLC 43 SUV
Additionally, the document applies to other Mercedes-Benz models: GLC43