
Loading ...
Loading ...
Loading ...
BUILT-IN STITCHES ————————————————————————————————————————————————————————————————————————————————————————————————————————————————————————————————
—
——————————————————————————————————————————————————————————————————————————————————————————
—————
31
c
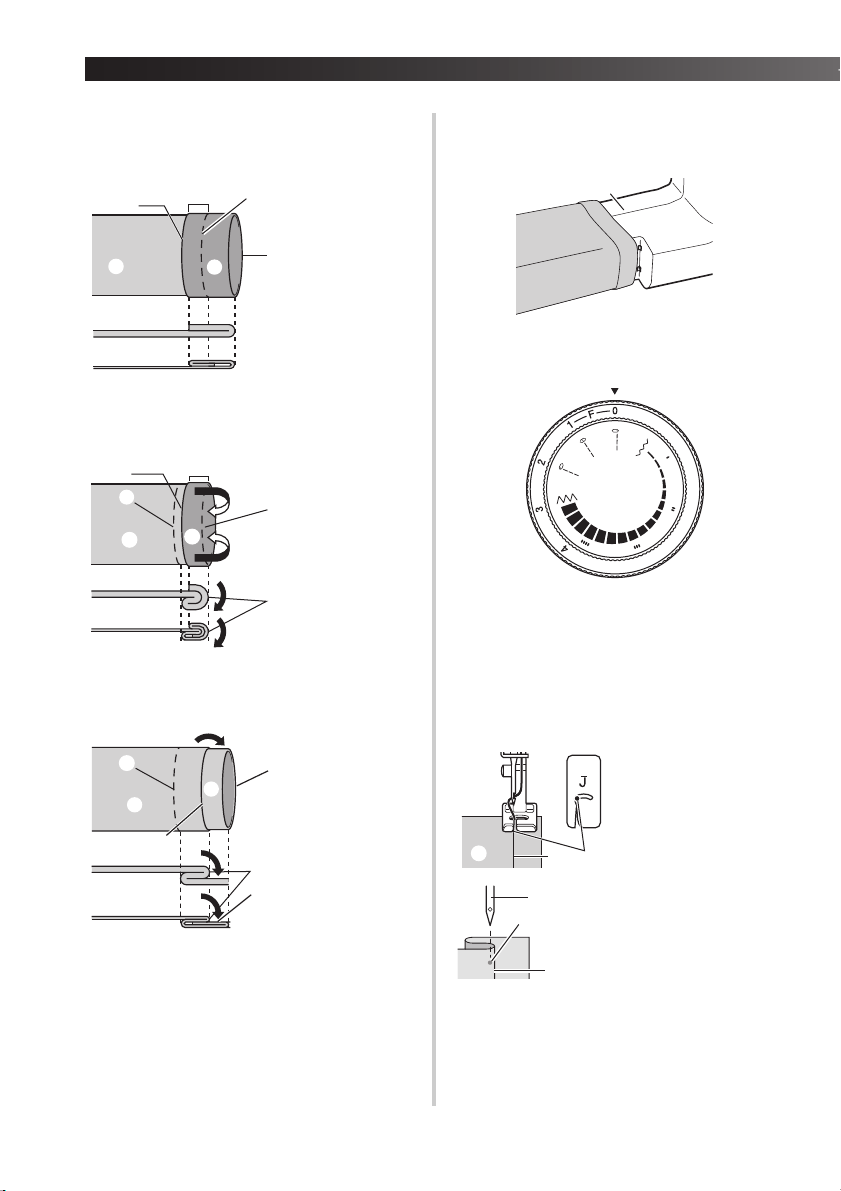
Use a chalk to mark on the fabric about
5 mm (3/16 inch) from the edge of the
fabric, and then baste it.
d
Fold back the fabric inside along the
basting.
e
Unfold the edge of fabric, and position the
fabric with the wrong side facing up.
f
Remove the flat bed attachment and make
free-arm sewing possible.
• For details on free-arm sewing, refer to
“Stitching cylindrical pieces” (Page 25).
g
Slide the part that you wish to sew onto
the arm, make sure that the fabric feeds
correctly, and then start sewing.
1 Arm
h
Set the stitch length to 0, stitch width to
the right needle position.
i
Slowly turn the handwheel toward you
(counterclockwise) until the needle has
moved from the right side to the left.
j
Position the fabric under the presser foot,
and then adjust the fabric position until
the needle slightly catches the fold of the
hem when the needle comes to the left
end of the stitch.
k
Lower the presser foot lever.
1 Wrong side of
fabric
2 Right side of
fabric
3 Edge of fabric
4 Basting stitching
5 5 mm (3/16 inch)
6 Desired edge of
hem
<Thick fabric>
<Normal fabric>
<Seen from the side>
1 Wrong side of
fabric
2 Edge of fabric
3 Basting
4 5 mm (3/16 inch)
5 Desired edge of
hem
6 Right side of
fabric
7 Basting point
<Thick fabric>
<Normal fabric>
<Seen from the side>
1 Wrong side of
fabric
2 Right side of
fabric
3 Basting
4 Edge of fabric
5 Desired edge of
hem
6 Basting point
<Thick fabric>
<Normal fabric>
<Seen from the side>
1
2
1
2
3
5
6
4
1
2
1
2
3
4
1
1
6
7
5
6
1
1
1
1
1
2
3
4
5
1 Wrong side of fabric
2 Fold of hem
3 Needle drop point
1 Needle
2 Needle drop point
3 Fold of hem
1
1
2
3
1
2
3
Loading ...
Loading ...
Loading ...