Loading ...
Loading ...
Loading ...
7. Programmable Features
31
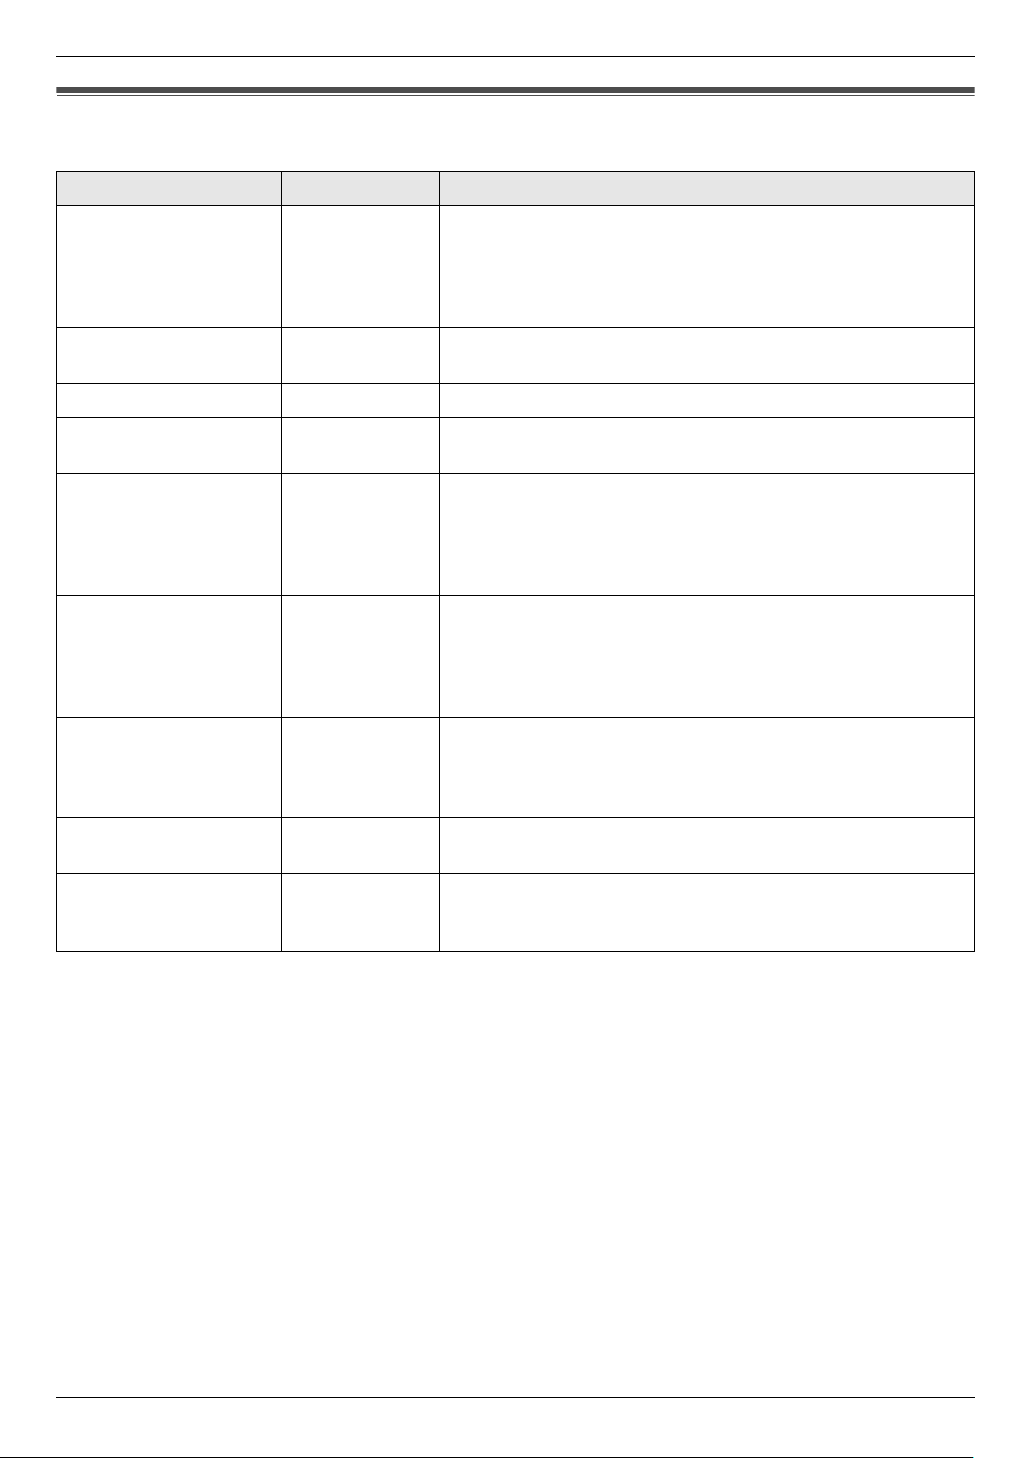
7.2 Basic features
Feature Feature code Selection
Setting the quick setup {#}{0}{0}{1} “FAX ONLY” (default)
{2} “DIST. RING”
{3} “EXT. TAM”
{4} “TEL ONLY”
See page 13 for details.
Setting the date and
time
{#}{0}{1} Enter the date and time using the dial keypad. See page 14 for
details.
Setting your logo {#}{0}{2} Enter your logo using the dial keypad. See page 14 for details.
Setting your fax
number
{#}{0}{3} Enter your fax number using the dial keypad. See page 15 for
details.
Printing a confirmation
report
{#}{0}{4}{0} “OFF”: Confirmation reports will not be printed.
{1} “ON”: A confirmation report will be printed after every fax
transmission.
{2} “ERROR” (default): A confirmation report will be printed only
when a fax transmission fails.
Changing the ring
count in FAX ONLY
mode
{#}{0}{6}{1} “1”
{2} “2”
{3} “3” (default)
{4} “4”
{5} “5 EXT. TAM” (External Telephone Answering Machine)
Setting the dialing
mode
{#}{1}{3} If you cannot make calls, change this setting according to your
telephone line service.
{1} “PULSE”: For rotary pulse dial service.
{2} “TONE” (default): For tone dial service.
Setting the recording
paper size
{#}{1}{6}{1} “LETTER” (default): Letter size paper.
{2} “A4”: A4 size paper.
Setting the ringer tone {#}{1}{7}{1} “TONE 1” (default)
{2} “TONE 2”
{3} “TONE 3”
FP205-PFQX2559ZA-en.book Page 31 Friday, March 10, 2006 3:55 PM
Loading ...
Loading ...
Loading ...