Loading ...
Loading ...
Loading ...
16
49-80550-4
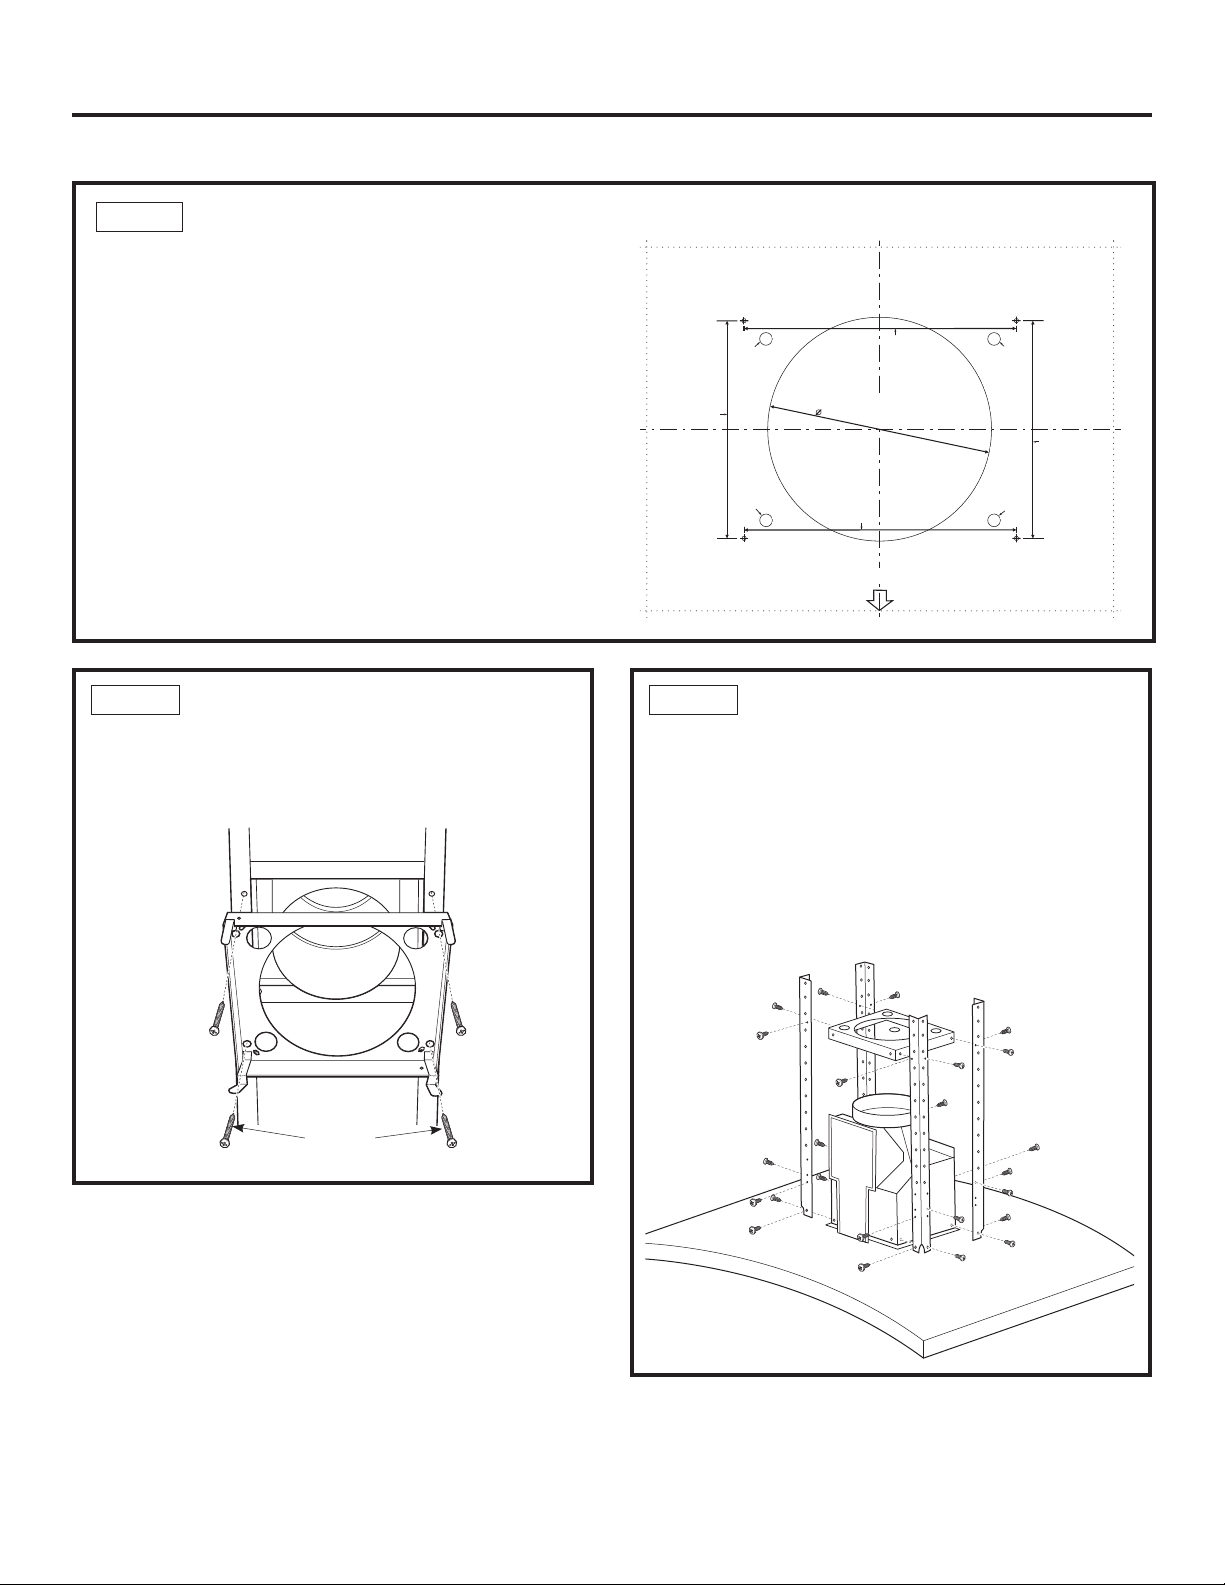
• Align the template with the marks on the ceiling
and tape in place.
– Be sure the template is oriented correctly
with the front of the hood.
• Use a plumb bob to be sure the mounting holes
will provide parallel alignment with the countertop
below.
• Determine wire access hole location.
• Center punch all screw and determined wire hole
locations.
'ULOOSLORWKROHVLQWKHVFUHZORFDWLRQV8VHDµ
ELWDQGGULOODSSUR[LPDWHO\µGHHS
'ULOORQHµKROHIRUZLUHV
&XWWKHµGXFWRSHQLQJWKURXJKWKHFHLOLQJ
STEP 1 MOUNT TEMPLATE
STEP 2 INSTALL CEILING SUPPORT
• Using 4 wood screws provided, attach the ceiling
support to the ceiling over duct opening hole
using pilot holes drilled in step 1.
STEP 3 INSTALL LOWER VERTICAL
AND HORIZONTAL SUPPORTS
TO HOOD ASSEMBLY
• Using screws provided, attach the 4 lower
vertical supports to the hood assembly with 4
screws per support.
• Using screws provided, install the horizontal
support in the top outer holes of the vertical
supports.
36" HOOD
TEMPLATE
Cut one 1/2" Dia.
Wire Access Hole
as Needed
8-1/4" To
Centerline of
Pilot Holes
8-
1
/2"
FRONT OF HOOD
Cut one 1/2" Dia.
Wire Access Hole
as Needed
Cut one 1/2" Dia.
Wire Access Hole
as Needed
Cut one 1/2" Dia.
Wire Access Hole
as Needed
Drill 3/16" Pilot Holes
Approx. 1-1/2" Deep
4 Places
8-1/4" To
Centerline of
Pilot Holes
10-5/16" To
Centerline of
Pilot Holes
10-5/16" To
Centerline of
Pilot Holes
31-14772
Printed in Mexico
12-08 JR
Screws
Front
Installation Preparation
,167$//$7,21³9(17('727+(2876,'(
Loading ...
Loading ...
Loading ...