Loading ...
Loading ...
Loading ...
4
. PROGRAMMING COOKING
You will need to select a function before you can start
programming cooking.
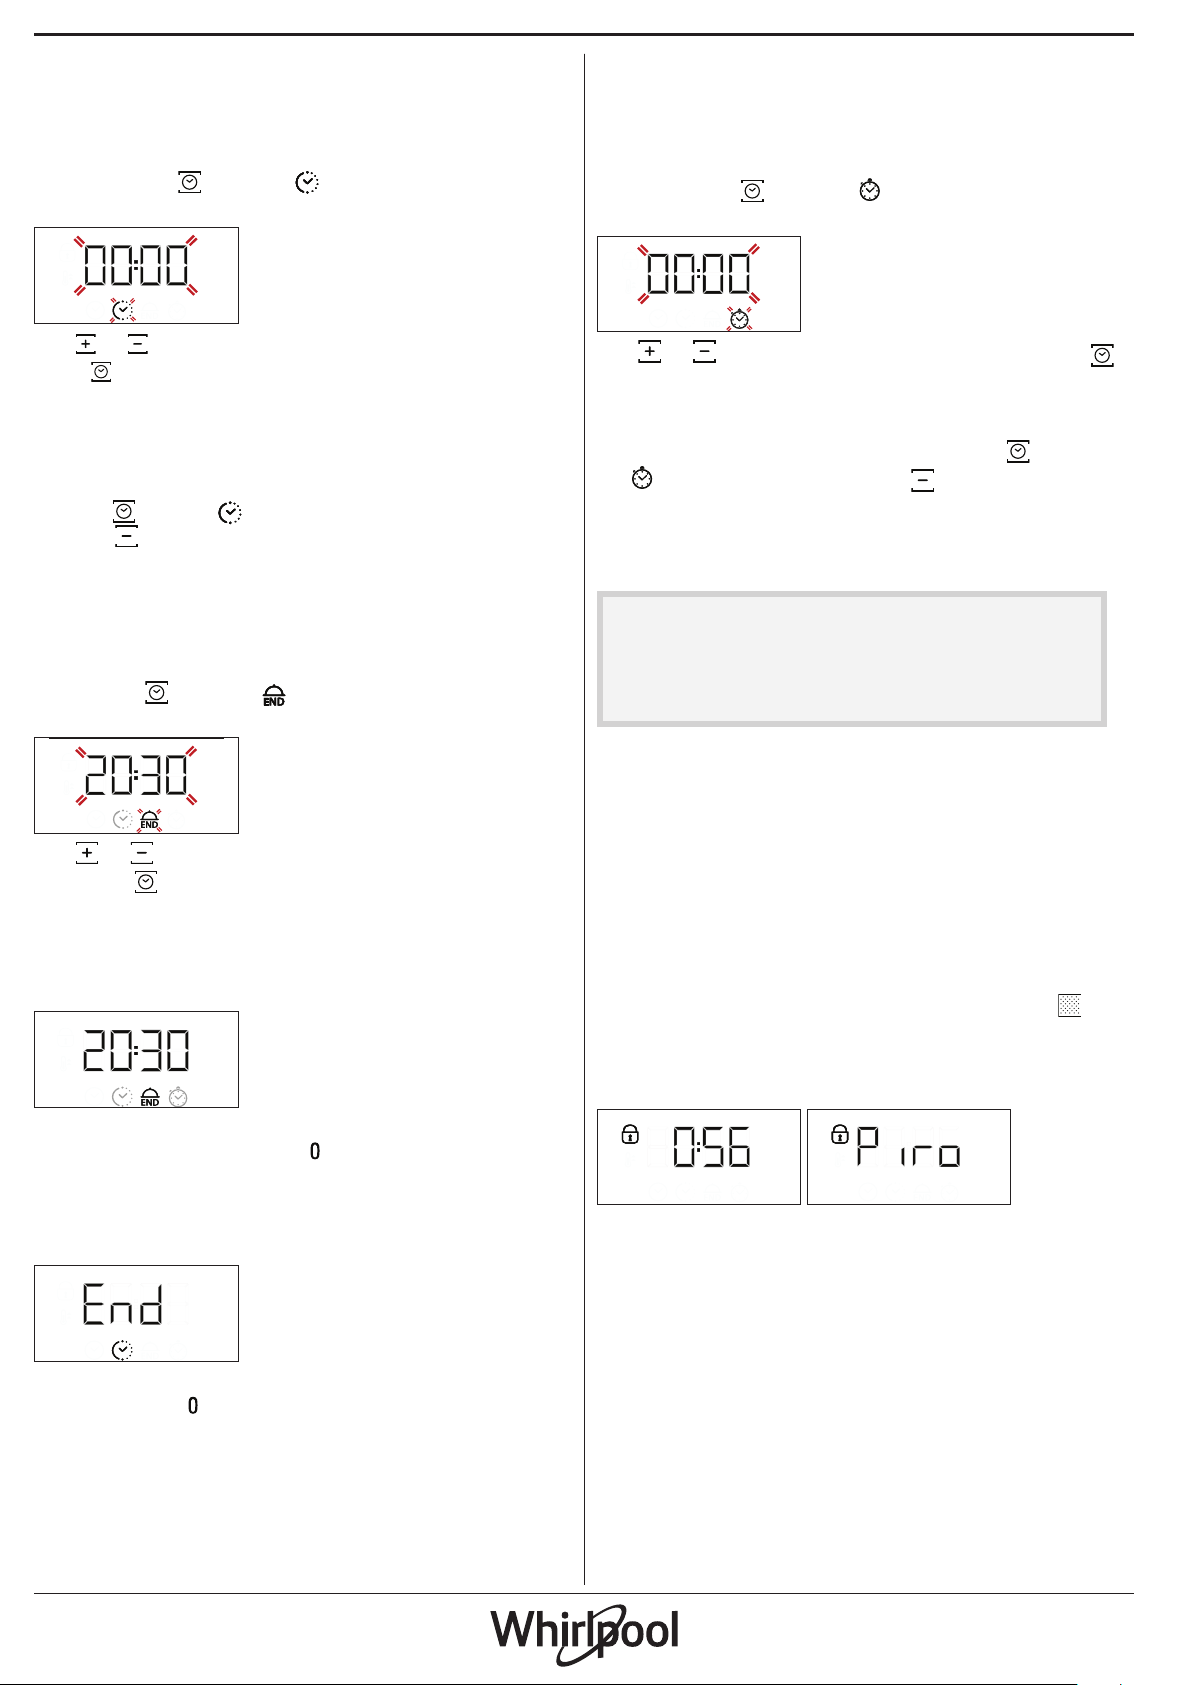
DURATION
Keep pressing until the icon and “00:00” start
flashing on the display.
Use or to set the cooking time you require, then
press
to confirm.
Activate the function by turning the thermostat knob
to the temperature you require: An audible signal will
sound and the display will indicate that cooking is
complete.
Notes: To cancel the cooking time you have set, keep
pressing until the icon starts ashing on the display,
then use to reset the cooking time to “00:00”.
This cooking time includes a preheating phase.
PROGRAMMING THE END COOKING TIME/
DELAYED START
After a cooking time has been set, starting the
function can be delayed by programming its end
time: Press
until the icon and the current time
start flashing on the display.
Use or to set the time you want cooking to end
and press
to confirm.
Activate the function by turning the thermostat knob
to the temperature you require: The function will
remain paused until it starts automatically after the
period of time that has been calculated in order for
cooking to finish at the time you have set.
Notes: To cancel the setting, switch the oven o by turning
the selection knob to position “ ”.
END OF COOKING
An audible signal will sound and the display will
indicate that the function has finished.
Turn the selection knob to select a different function
or to position “
” to switch the oven off.
Please note: If the timer is active, the display will show “END”
alternately with the remaining time.
. SETTING THE TIMER
This option does not interrupt or program cooking
but allows you to use the display as a timer, either
during while a function is active or when the oven is
off.
Keep pressing
until the icon and “00:00” start
flashing on the display.
Use or to set the time you require and press
to confirm.
An audible signal will sound once the timer has
finished counting down the selected time.
Please note: To cancel the timer, keep pressing until
the icon starts ashing, then use to reset the time to
“00:00”.
. AUTOMATIC CLEANING FUNCTION PYRO
Do not touch the oven during the Pyro cycle.
Keep children and animals away from the oven
during and after (until the room has nished
airing) running the Pyro cycle.
Remove all accessories (including the shelf guides)
from the oven before running the function.
If the oven is installed below a hob, make sure that
all the burners or electric hotplates are switched off
while running the self-cleaning cycle.
For optimum cleaning results, remove the worst
soiling with a damp sponge before using the Pyro
function. We recommend only running the Pyro
function if the appliance contains heavy soiling or
gives off bad odours during cooking.
To activate the automatic cleaning function, turn the
selection knob and the thermostat knob to the
icon.
The function will be activated automatically, the door
locked and the light inside the oven switched off:
The display will show the time remaining to the end,
alternating with “Piro” (Pyro).
Please note: It is only possible to programme the end time
of this function. The duration is automatically set to 120
minutes.
Once the cycle has been completed, the door remains
locked until the temperature inside the oven has
returned to a safe level. Air the room during and after
running the Pyro cycle.
Loading ...
Loading ...
Loading ...