Loading ...
Loading ...
Loading ...
A1
A2
2.
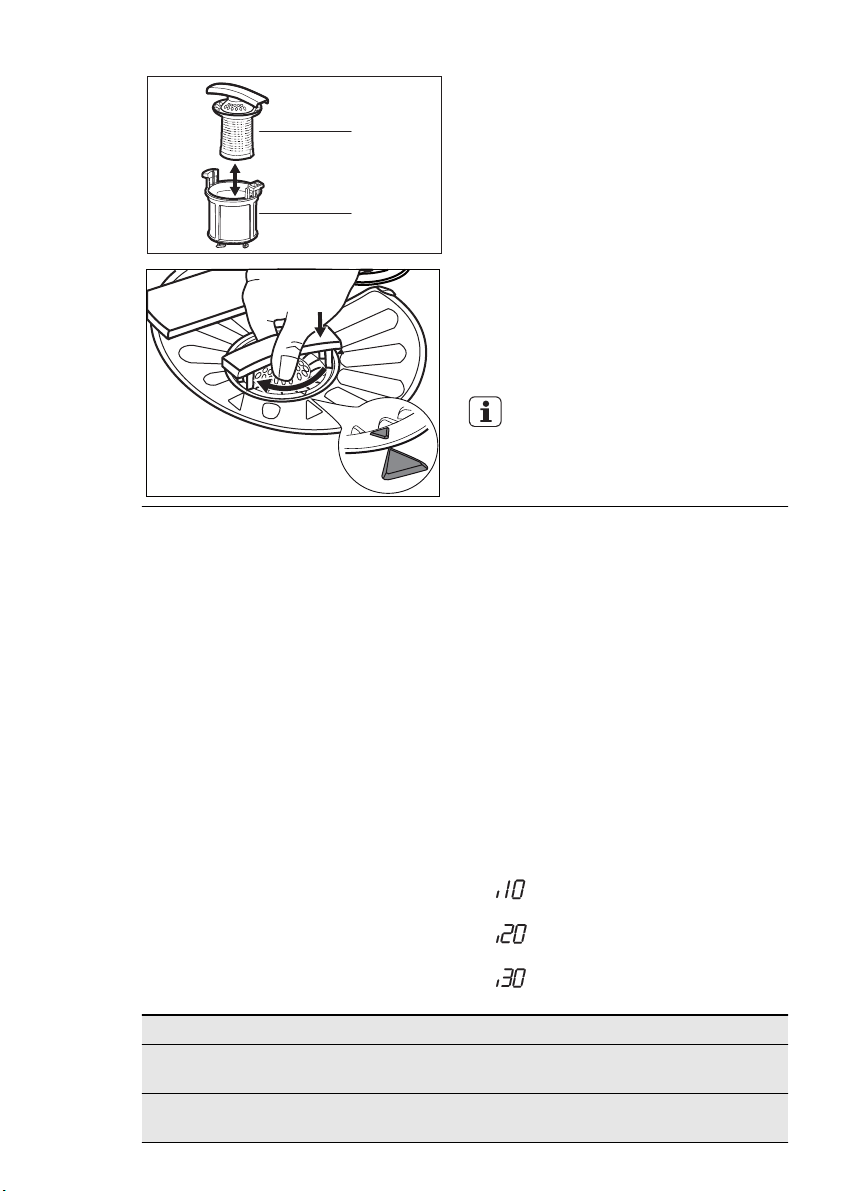
To disassemble the filter (A), pull
apart (A1) and (A2).
3.
Remove the filter (B).
4.
Wash the filters with water.
5.
Before you put the filter (B) back,
make sure that there are no residues
of food or soil in or around the edge
of the sump.
6.
Make sure that the filter (B) is cor-
rectly positioned under the 2 guides
(C).
7.
Assemble the filter (A) and put it back
in filter (B). Turn it clockwise until it
locks.
An incorrect position of the filters
can cause bad washing results
and damage to the appliance.
9.2 Cleaning the spray arms
Do not remove the spray arms.
If the holes in the spray arms are clogged,
remove remaining parts of soil with a thin
pointed object.
9.3 External cleaning
Clean the appliance with a moist soft
cloth.
Only use neutral detergents. Do not use
abrasive products, abrasive cleaning pads
or solvents.
9.4 Internal cleaning
If you regularly use short duration pro-
grams, these can leave deposits of grease
and limescale inside the appliance.
To prevent this, we recommend to run
long duration programs at least 2 times
per month.
10. TROUBLESHOOTING
The appliance does not start or it stops
during operation.
Before you contact the Service, refer to
the information that follows for a solution
to the problem.
With some problems, the display
shows an alarm code:
•
- The appliance does not fill with
water.
•
- The appliance does not drain the
water.
•
- The anti-flood device is on.
Problem Possible solution
You cannot activate the appli-
ance.
Make sure that the mains plug is connected
to the mains socket.
Make sure that there is not a damaged fuse in
the fuse box.
16
www.electrolux.com
Loading ...
Loading ...
Loading ...