Loading ...
Loading ...
Loading ...
RS-232C
30
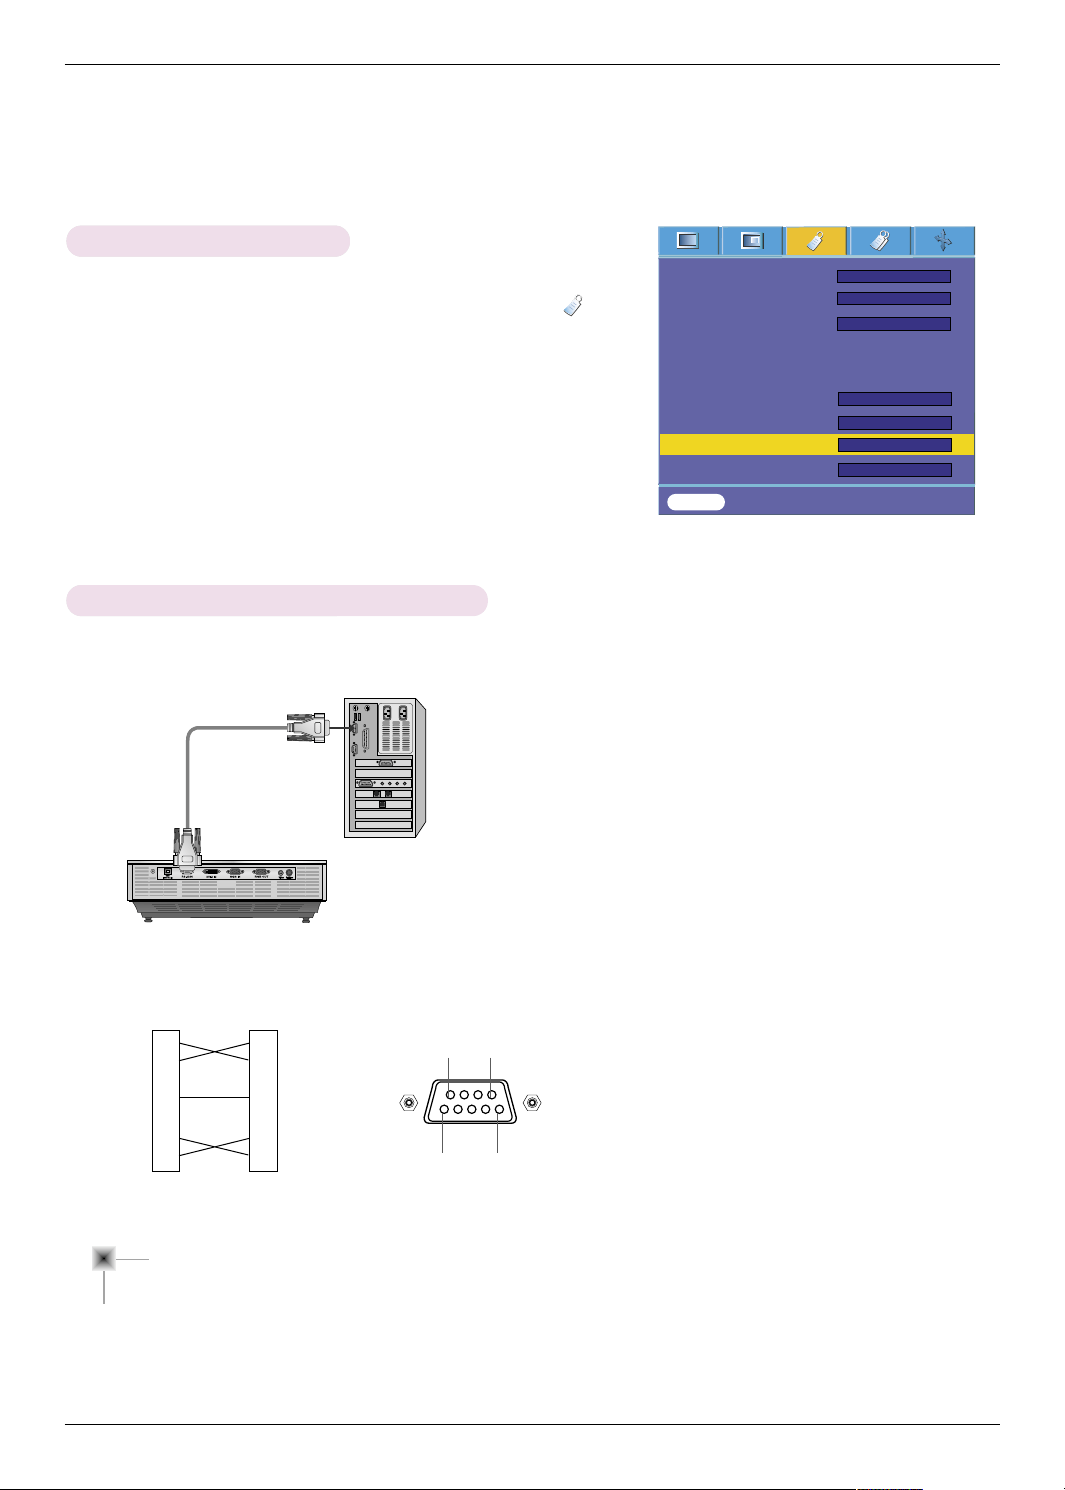
External Control Device Setup
SET ID
How to connect external control equipment
*
Connect the RS-232C input jack to an external control device (such as a computer) and control the Projector’s
functions externally.
1. Press the MENU button and then use F, G button to select the menu.
2. Press the AOK button and then use D , E button to select Set ID item.
3. Press the
F, G button to select your desired number.
Press the
AOK button to save the selected number.
●
The adjustment range of Set ID is 1~99.
●
Only the projector with the specified ID number will operate from the remote control.
●
To exit the menu display, repeatedly press the MENU button.
• Connect the serial port of the PC to the RS-232C jack on the projector back panel.
• RS-232C cable is not supplied with the projector.
2
3
4
5
6
7
8
External
Device
RXD
TXD
DTR
GND
DSR
RTS
CTS
RXD
96
15
TXD
DTR
GND
DSR
RTS
CTS
Projector
* 1, 9 Pin No Connection
<Fig.1, RS-232 Interface Cable>
2
3
4
5
6
7
8
• Use the RS232C cable to control the projector externally (Refer to Fig.1).
Communication Parameter Setup
• Baud Rate : 9600 bps(UART)
• Data Length : 8 bit
• Parity : none
• Stop bit : 1 bit
• Flow Control : none
• Communication code : ASCII code
Language
ARC
Overscan
Flip horizontal
Flip vertical
Sleep time
Auto off
Set ID
Presentation time
FG
English
FG
4 : 3
FG
1
MENU Prev. Move Select
D
E
FG
FG
10%
FG
Off
FG
Off
FG
Off
Loading ...
Loading ...
Loading ...