Overview
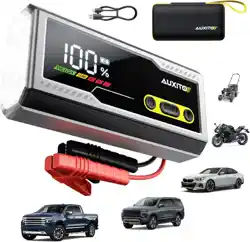
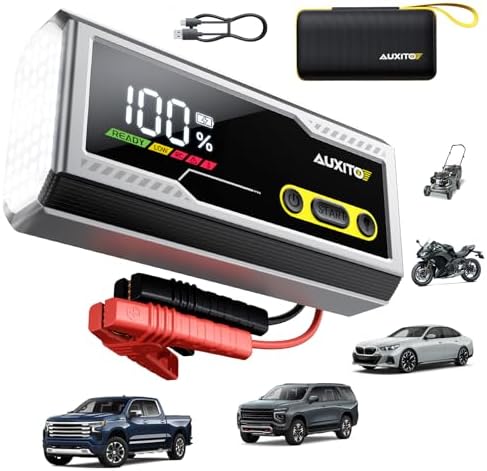
The AUXITO T4-8000A is a portable jump starter designed to revive dead 12V vehicle batteries. It integrates a power bank for USB devices, an emergency LED flashlight, and features a large LCD screen for monitoring status. The unit is intended for use with gasoline and diesel engines in cars, trucks, motorcycles, RVs, boats, and other 12V vehicles.

Features and Components
Physical Components
- Main Unit: Houses the lithium-ion battery, LCD display, control buttons, and ports.
- Smart Jumper Cables: Heavy-duty cables with red (positive) and black (negative) clamps. Clamps include protective covers.
- USB Charging Cable: Type-C cable for recharging the jump starter.
- Storage Case: EVA carrying case for all components.
Control Panel and Indicators
The front panel contains the following elements:
- Large LCD Display: Shows numeric battery percentage and operational status.
- Flashlight Button: Press to cycle through flashlight modes: Steady On, Strobe, SOS. Press and hold to turn off.
- Power/Jump Start Button: Press to activate jump start mode. The unit must be connected to a battery first.
- USB-A Output Port: 5V/2.4A port for charging smartphones, tablets, or other USB devices.
- Type-C Input Port: For recharging the jump starter's internal battery.
Specifications
- Peak Current: 8000A
- Battery Type: Lithium-Ion
- Battery Capacity: 16000mAh
- Output Voltage: 12V DC
- USB Output: 5V/2.4A
- Flashlight: LED with Steady, Strobe, SOS modes
- Dimensions: 5.2"D x 9.69"W x 4.84"H
- Compatible Vehicles: All 12V gasoline engines and up to 8.0L diesel engines (e.g., cars, trucks, motorcycles, RVs, boats, lawn mowers, ATVs).
Safety Information
WARNING: Failure to follow safety instructions can result in fire, explosion, severe injury, or damage to equipment.
- Read all instructions before use.
- Do not use the jump starter if it is damaged, has been dropped, or shows signs of leakage.
- Keep away from fire, heat, and direct sunlight. Do not expose to temperatures above 140°F (60°C).
- The smart clamps include reverse polarity protection. However, always confirm correct battery terminal polarity before connecting.
- Do not touch the metal parts of the clamps together when the unit is activated.
- Keep the unit dry. Do not submerge in water.
- Do not use the jump starter to charge non-rechargeable batteries.
- Keep out of reach of children.
Initial Charging
Before first use, fully charge the jump starter.
- Connect the provided Type-C cable to the Type-C input port on the jump starter.
- Connect the other end of the cable to a standard USB power adapter (5V/2.4A or greater recommended) or a computer USB port.
- The LCD display will show the charging progress. A full charge is indicated by 100% on the display.
- A full charge may take several hours. The unit can be used while charging, but this is not recommended for jump starting.
Using the Jump Starter
Preparing the Vehicle
- Turn off the vehicle's ignition and all electrical accessories (lights, radio, etc.).
- Place the jump starter on a stable, flat surface away from the vehicle's battery.
- Ensure the jump starter's power switch is off (the LCD should be on, showing battery level, but the jump start function should not be active).
Connecting the Clamps
IMPORTANT: Connect clamps in the exact order specified to minimize sparking risk.
- Connect the RED positive (+) clamp to the positive (+) terminal of the dead vehicle battery.
- Connect the BLACK negative (-) clamp to a clean, unpainted metal part of the vehicle's engine block or chassis, away from the battery and fuel lines. This is the grounding point.
- Double-check that connections are secure and correct.

Starting the Vehicle
- Press the Power/Jump Start button on the jump starter. The LCD may show an active status indicator.
- Within 30 seconds of activation, start the vehicle. Turn the ignition key as you normally would.
- If the vehicle does not start within 5-6 seconds, wait 10-20 seconds before attempting again.
- Once the vehicle engine is running smoothly, press the Power/Jump Start button on the jump starter to turn off the jump start function.
Disconnecting the Clamps
- Disconnect the BLACK negative (-) clamp from the vehicle's grounding point.
- Disconnect the RED positive (+) clamp from the vehicle battery's positive terminal.
- Store the cables neatly. Allow the jump starter to cool down if it feels warm.
Using the Power Bank Function
- Ensure the jump starter is charged (check LCD percentage).
- Use a standard USB cable to connect your device (phone, tablet, etc.) to the USB-A output port on the jump starter.
- Your device should begin charging automatically. The LCD will display the jump starter's remaining battery level.
- Disconnect your device when charging is complete.
Using the Emergency Flashlight
- Press the Flashlight button once for a steady beam.
- Press the Flashlight button a second time for a flashing strobe mode.
- Press the Flashlight button a third time for an SOS signal mode.
- Press and hold the Flashlight button for 2 seconds to turn the light off.
Maintenance and Storage
- Recharging: Recharge the jump starter every 3-6 months if not in use to maintain battery health. The LCD display shows the current charge level.
- Cleaning: Wipe the exterior with a dry, soft cloth. Do not use liquids or solvents.
- Storage: Store in the provided case in a cool, dry place. Ideal storage temperature is between 32°F and 77°F (0°C and 25°C).
- Cable Care: Inspect jumper cables for cracks or exposed wire before each use. Do not use if damaged.
Troubleshooting
- Jump starter does not power on: Recharge the unit fully. If the problem persists, the internal battery may be depleted and require a longer charging time.
- Vehicle does not start:
- Ensure clamps are connected securely in the correct order.
- Check that the jump starter has sufficient charge (above 20%).
- The vehicle's problem may not be the battery (e.g., starter motor, fuel system).
- Wait 1-2 minutes before attempting again.
- LCD shows an error icon or flashes: Refer to the quick start guide for specific icon meanings. Common causes are reverse polarity detection, overload, or high internal temperature. Disconnect clamps and allow the unit to cool.
- USB device does not charge: Try a different USB cable. Ensure the jump starter has adequate charge.
Warranty and Support
This product is covered by a 24-month limited warranty from the date of purchase. For warranty service or technical support, contact the seller through your Amazon purchase history or visit the AUXITO Store on Amazon.