1. Overview
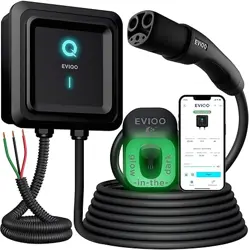
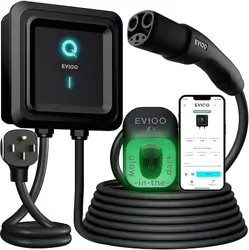
The AIMILER ZA05 is a portable Level 2 Electric Vehicle (EV) Charging Station. It is designed for home use with a NEMA 14-50 plug and a J1772 connector for vehicles sold in North America. The unit features a smart touch screen, Wi-Fi connectivity for app control, and an adjustable charging current.

2. Package Contents
- Aimiler Level 2 EV Charger unit
- 25ft Charging cable with NEMA 14-50 Plug
- J1772 Connector (charging gun)
- 1 Wall-mounted EV Charger Nozzle and Cable Holder
- 1 Fixing Cover
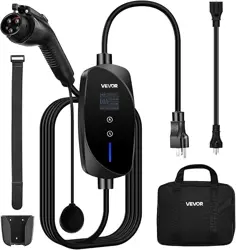
- 1 Portable Hand Bag
- User Manual
Note: A 3-year quality warranty is included.
3. Key Features & Specifications
3.1 Electrical Specifications
- Input Voltage: 220V-240V AC
- Input Plug: NEMA 14-50P
- Output Connector: SAE J1772
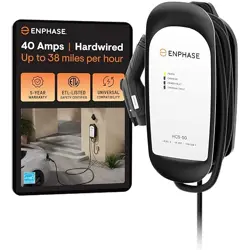
- Max Output Current: 32 Amps (adjustable from 16A to 32A)
- Max Charging Power: Up to 7.68 kW
- Frequency: 60Hz ±1Hz
3.2 Physical & Connectivity Features
- Cable Length: 25 feet
- Protection Rating: NEMA Type 4 / IP66 (Water and dust resistant)
- Smart Features: Wi-Fi and Bluetooth connectivity for smartphone app control.
- Display: LED touch screen showing amperage, charging speed, voltage, and delay time.
- Safety Certifications: ETL Listed, FCC. Meets safety standards: SAE J1772, UL2231, UL 2594, etc.
- Built-in Protection: CCID20 leakage detection (GFCI). No additional GFCI breaker required for NEMA 14-50 outlets.
4. Installation & Setup
4.1 Electrical Requirements
The charger requires a dedicated 240V circuit with a NEMA 14-50R receptacle. The circuit breaker must match the intended charging current:
- 40A Circuit Breaker: Supports max 32A output.
- 30A Circuit Breaker: Supports max 24A output.
- 20A Circuit Breaker: Supports max 16A output.
Warning: Installation of the outlet should be performed by a qualified electrician in accordance with all local and national electrical codes.
4.2 Using with a 120V Adapter (Optional)
The unit is compatible with a separate NEMA 5-15P to 14-50R EV adapter cable (not included). Note:
- This enables Level 1 (slow) charging.
- Maximum rate is 1.32-1.8 kW (110V*12A to 120V*15A). Some vehicles may limit current to 12A.
- Ensure you use an adapter cable designed for EVs, not for RVs.
4.3 Mounting the Holder
Use the included wall-mounted nozzle and cable holder to store the connector and manage the cable when not in use.
5. Use Guide
5.1 Basic Plug-and-Charge Operation (Default Mode)
- Ensure the charger is unplugged from the electrical outlet.
- Plug the NEMA 14-50 plug into the dedicated 240V outlet.
- The LED screen will illuminate. It will perform a self-check.
- Insert the J1772 connector into your vehicle's charging port until it clicks securely.
- Charging will begin automatically. The screen will display real-time charging information (Amps, Voltage, Power).
- To stop charging, press the button on the J1772 connector to unlock it from the vehicle, then remove it. You may then unplug the unit from the wall.
5.2 Understanding the Control Screen & Buttons
The touch screen displays status and has two touch buttons: "Ⓐ" (Amperage) and "Time".
Important Rule: You must pull the charging gun out of the vehicle (stop charging) before pressing any screen buttons for them to respond.
- Adjusting Charging Current (Amps): Pull out the connector. Long press the "Ⓐ" button for 3-5 seconds. Use subsequent taps to adjust the current between 16A and 32A. Confirm the setting.
- Setting a Delay Timer: Pull out the connector. Long press the "Time" button for 3-5 seconds. Set the delay time (e.g., 06:00:00 for 6 hours). The charger will start automatically after the delay.
5.3 Using the Smartphone App
5.3.1 Initial App Setup
- Download the "Smart Life" app from the Apple App Store or Google Play Store. Create an account.
- Ensure your smartphone is connected to a 2.4GHz Wi-Fi network (not a 5GHz network). Enable both Wi-Fi and Bluetooth on your phone.
- In the app, tap the "+" or "Add Device" button. The app will search for devices.
- Select the device named "Aimiler-EV_Charger".
- Enter your 2.4GHz Wi-Fi password when prompted to connect the charger to your network.
5.3.2 App Functions
Once connected, you can use the app to:
- Start or stop charging remotely.
- Adjust charging current (must be done before charging starts).
- Set scheduled charging periods (e.g., for off-peak electricity rates).
- View charging history, cost estimates, and status.
- Receive notifications when charging is complete.
6. Troubleshooting & Resets
6.1 Common Issues
- Cannot find device in the app:
- Confirm phone is on 2.4GHz Wi-Fi, not 5GHz.
- Ensure phone's Wi-Fi and Bluetooth are enabled.
- Perform a Factory/Wi-Fi Reset (see below).
- Charger stops working or won't charge: Perform a Factory/Wi-Fi Reset.
- Screen buttons do not respond: Ensure the charging gun is disconnected from the vehicle.
- High temperature reading: Temperatures up to 185°F (85°C) during charging are normal, especially in warm environments. If current decreases due to temperature, it can be reset for the next session.
6.2 Performing a Factory / Wi-Fi Reset
Use this if you cannot connect to the app, get a new phone/router, or the charger malfunctions.
- Ensure the charging gun is disconnected from the vehicle.
- Simultaneously press and hold the "Ⓐ" button and the "Time" button on the screen for several seconds until "Factory Reset" appears on the display.
- The unit will restart. You can now set it up again in the "Smart Life" app as a new device.
7. Safety & Maintenance
- Environment: The unit has NEMA 4/IP66 rating for water resistance. However, it is not recommended for permanent installation in direct sunlight or exposed rainy conditions.
- Inspection: Regularly inspect the cable, plug, and connector for any signs of damage, wear, or overheating before use.
- Storage: Use the provided portable hand bag for storage and transport. Coil the cable loosely to avoid kinks.
- Compatibility: This charger with a J1772 connector is compatible with most EVs and PHEVs in North America. Tesla vehicles require a separate J1772 to Tesla adapter.
- Note on Newer Vehicles: Not compatible with native NACS connector vehicles (e.g., 2025 Kia EV6/EV9, 2025 Nissan Ariya, 2025 Hyundai Ioniq 5) without a J1772 to Tesla adapter.
8. Warranty and Support
This product is backed by a 3-year quality warranty from the date of purchase. For warranty service or support, contact the seller through your Amazon purchase history or visit the AIMILER Store on Amazon.
Model Number: ZA05-U007KBF-F001
ASIN: B0CG8D445Q