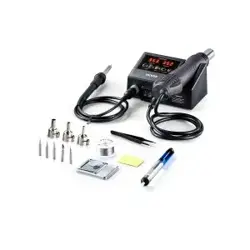
1. Overview
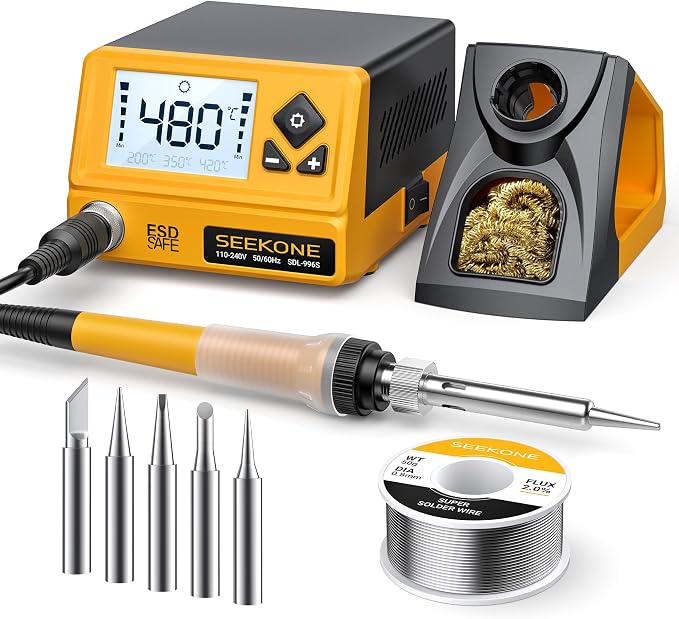
This manual provides instructions for the SEEKONE 60W Digital Soldering Station. The station features a digital LCD display, adjustable temperature control from 200℃ to 480℃ (392°F to 896°F), and includes multiple soldering tips and accessories for various electronic soldering tasks.
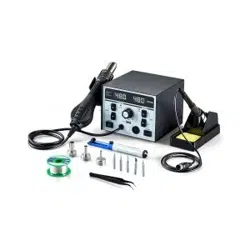
2. Package Contents
- 1 x Soldering Station (Main Unit)
- 1 x Soldering Iron Handle
- 1 x Soldering Iron Holder (including copper wire cleaning ball)
- 1 x Power Cable
- 5 x Soldering Tips
- 1 x Instruction Manual
- 1 x Solder Wire (0.8mm, 50g)

3. Specifications
| Parameter | Specification |
|---|---|
| Output Power | 60W (Max) |
| Input Voltage | AC 110-240V |
| Temperature Range | 200℃ - 480℃ / 392℉ - 896℉ |
| Temperature Display | LCD Digital |
| Heating Core Model | Ceramic Heating Core |
| Iron Tip to Ground Resistance | ≤2Ω |
| Iron Tip to Ground Voltage | ≤2mV |
| ESD Safe | Yes |
| Net Weight | 0.8 kg / 1.76 lb |
| Main Unit Dimensions | 128 x 104 x 79 mm / 5 x 4 x 3 in |
4. Control Panel and Interface

4.1 LCD Display
The digital LCD screen shows the current set temperature and the actual iron tip temperature.
4.2 Control Buttons
- Power Switch: Located on the side of the unit. Turns the station on and off.
- Temperature Up (+): Increases the set temperature.
- Temperature Down (-): Decreases the set temperature.
- Preset Button (℃/℉): Used for unit conversion and accessing preset temperatures.
5. Key Features and Functions
5.1 Adjustable Temperature & Fast Heating
The 60W ceramic heating core allows the iron to heat up to 480°C within seconds. The working temperature is adjustable between 200℃ and 480℃.
5.2 ℃/℉ Conversion Function

To switch the temperature display between Celsius and Fahrenheit, press and hold the ℃/℉ button for 2 seconds.
5.3 Power-On Memory Function

The station remembers the last used temperature setting. When powered on, it will automatically return to that temperature.
5.4 Three Preset Temperature Channels

Quickly switch to three commonly used temperatures by pressing the Preset Button (℃/℉) repeatedly to cycle through:
- Preset 1: 200°C
- Preset 2: 350°C
- Preset 3: 420°C
5.5 10-Minute Auto Sleep Mode

If the soldering iron is idle and stationary in its holder for 10 minutes, the station will automatically enter sleep mode, reducing the tip temperature to 180°C (356°F) to conserve energy and reduce tip oxidation.
To wake the station, press any button on the front panel or lift the iron handle from its holder.
5.6 Short Circuit & Sensor Protection

The station has built-in fuses for short circuit protection. If the error code "-2E" appears on the LCD display:
- Check the connection of the soldering iron cable to the main unit.
- If the connection is secure, the heating core in the soldering iron may be faulty.
5.7 Rigid Front Panel

The iron stand's front panel is made from aluminum alloy and GF30 material, designed to resist burning when placing the hot soldering iron.
6. Use Guide
6.1 Initial Setup
- Place the main unit on a stable, flat, heat-resistant surface.
- Insert the soldering iron handle plug firmly into the socket on the front of the station.
- Place the soldering iron holder (with sponge and copper ball) in a convenient location.
- Select a suitable soldering tip from the included set and screw it securely into the iron handle.
- Connect the power cable to the station and a suitable AC power outlet (110-240V).
6.2 Basic Operation
- Turn on the station using the side power switch. The LCD will illuminate.
- Use the + and - buttons to set your desired temperature. The LCD will show the set value.
- Wait for the iron to heat up. The display may show the actual tip temperature rising until it matches the set point.
- While soldering, periodically clean the tip using the damp sponge or the brass wire ball in the holder.
- When not in use, always place the iron back in its holder.
- To turn off, use the side power switch. Allow the iron to cool completely before storing.
6.3 Tip Maintenance and Replacement
- Always ensure the iron is cool before attempting to change the tip.
- Unscrew the old tip by hand and screw in the new tip firmly.
- Apply a small amount of solder to the new tip's surface ("tin" the tip) after heating to protect it from oxidation.
- Clean the tip regularly during use to maintain good heat transfer and soldering performance.

⚠️ Safety Warnings
- The soldering iron tip and metal parts of the holder become extremely hot during and after use. Never touch them.
- Operate in a well-ventilated area. Soldering can produce fumes that may be harmful if inhaled.
- Keep the unit away from flammable materials and liquids.
- Always unplug the station and allow it to cool completely before cleaning or performing any maintenance.
- This product is ESD (Electrostatic Discharge) safe, but it is good practice to ground yourself when working on sensitive electronic components.
7. Troubleshooting
| Problem | Possible Cause | Solution |
|---|---|---|
| Station does not power on. | Power cable not connected. Power switch off. | Check power connections and ensure the side switch is in the "ON" position. |
| Iron does not heat up. | Iron handle not connected properly. Faulty heating core. | Check and reseat the handle plug. If error "-2E" appears, contact support. |
| Temperature fluctuates or is inaccurate. | Loose tip. Dirty or oxidized tip. | Ensure the tip is screwed in tightly. Clean and re-tin the tip. |
| Display shows "-2E". | Short circuit or faulty heating core connection. | Check cable connections. If problem persists, the heating core may need service. |