Model: 6V/12V 4A Fully Automatic 8-Stage Charger/Maintainer
1. Overview
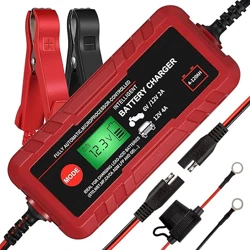
The Adakiit 4A Smart Battery Charger is a fully automatic charger and maintainer designed for 6V and 12V lead-acid batteries. It features an 8-stage charging process, an LCD screen for status monitoring, and multiple safety protections.

The charger is suitable for maintaining and charging batteries in vehicles and equipment such as cars, motorcycles, lawn mowers, boats, ATVs, and scooters.
2. Features & Specifications
2.1 Key Features
- Multi-Purpose Charging: Compatible with 6V and 12V Pb, SLA, VRLA, GEL, and AGM lead-acid batteries.
- 8-Stage Smart Charging: Fully automatic process including Diagnosis, Desulfation, Soft Start, Bulk Charge, Absorption, Test Mode, Recondition, and Float stages.
- Intuitive LCD Screen: Displays real-time charging voltage, current, mode, battery type, and charge percentage (25%, 50%, 75%, 100%).
- Intelligent Detection: Automatically detects battery voltage and sulfation, attempting repair if possible. Restores last used settings when powered on.
- Multi Safety Protections: Includes protection against reverse polarity, short circuits, over-voltage, over-current, over-charge, over-discharge, overload, and overheating.
- Maintenance Mode: Features a constant pulse current maintenance function to avoid overcharge and discharge, ideal for long-term storage.
- Portable Design: Compact unit with dimensions of 9"D x 5"W x 2"H and a weight of 1.1 lbs.
2.2 Technical Specifications
| Specification | Detail |
|---|
| Input Voltage | 120V / 60Hz |
| Output Voltage | 14.4 Volts (DC) |
| Charging Current | 4 Amps |
| Output Power | 60W |
| Battery Compatibility | 6V / 12V Lead-Acid (Pb, SLA, VRLA, GEL, AGM) |
| Battery Capacity Range | 4Ah to 120Ah |
| Operating Temperature | -4°F to 113°F (-20°C to +45°C) |
| Protection Class | IP65 |
| SUPPLY Function Max Output | 3A |

3. Package Contents
- 1 x Adakiit 4A Smart Battery Charger/Maintainer Unit
- 1 x Set of Battery Clamp Connectors (with alligator clips)
- 1 x Set of Fused Ring Terminal Connectors (with 50A fuse)
- 1 x User Manual
4. Use Guide
4.1 Safety Instructions
WARNING:
- Read all instructions before use.
- Ensure the charger is disconnected from AC power before connecting or disconnecting the output cables.
- Connect and disconnect the clamps only at the battery terminals. Do not touch the clamps together.
- Use only in a dry, well-ventilated area.
- Do not use the charger to jump-start a vehicle. It is for charging and maintenance only.
- This charger is not intended for charging non-rechargeable batteries.
4.2 Understanding the LCD Screen & Controls
The LCD screen provides the following information:
- Battery Voltage: Shows detected battery voltage (e.g., 12.6V).
- Charging Current: Displays real-time charging amperage.
- Charge Percentage: Indicates progress as 25%, 50%, 75%, or 100%.
- Charging Mode: Displays the current stage of the 8-stage process.
- Battery Type Icon: Indicates detected battery type (e.g., Standard, AGM).
The charger automatically selects 6V or 12V based on the connected battery. No manual voltage selection is required.
4.3 Connection Methods
You can connect the charger to the battery using either the provided clamp connectors or ring terminals.
Method A: Using Battery Clamps (For Temporary Connection)
- Ensure the charger is unplugged from the AC outlet.
- Identify the battery terminals: RED is Positive (+), BLACK is Negative (-).
- Connect the RED clamp to the battery's Positive (+) terminal.
- Connect the BLACK clamp to the battery's Negative (-) terminal or a solid, unpainted metal point on the vehicle chassis (ground).
- Plug the charger into a standard 120V AC wall outlet.
Method B: Using Ring Terminals (For Permanent/Semi-Permanent Connection)
- Ensure the charger is unplugged from the AC outlet.
- Attach the ring terminals to the corresponding battery posts: RED to Positive (+), BLACK to Negative (-). Secure with the battery post nuts.
- The fused ring terminal (50A fuse) provides additional protection for the positive connection.
- Plug the charger into a standard 120V AC wall outlet when maintenance is required.
NOTE: The ring terminal connection is ideal for long-term maintenance, such as for seasonal vehicles. The clamps are suitable for occasional charging.
4.4 Charging Process
- After making the correct connections and plugging in the charger, the LCD screen will illuminate.
- The charger will automatically begin its 8-stage process:
- Diagnosis: Tests battery voltage and health.
- Desulfation: Applies pulses to break down sulfate crystals on battery plates (if detected).
- Soft Start: Begins charging at a low current.
- Bulk Charge: Delivers the majority of the charge at constant current.
- Absorption: Holds voltage at a constant level while current tapers.
- Test Mode: Checks if the battery can hold a charge.
- Recondition: Applies a corrective charge for deeply discharged batteries.
- Float/Maintenance: Maintains the battery at full charge with a low, constant voltage.
- The LCD will show the current stage, voltage, current, and charge percentage.
- When charging is complete, the charger will automatically switch to maintenance mode. The screen will indicate a full charge (100%).
4.5 Using as a Maintainer (Trickle Charger)
For long-term storage (e.g., winterizing a vehicle):
- Connect the charger to the battery using either method. The ring terminal connection is recommended for extended periods.
- Plug the charger into an AC outlet.
- The charger will complete a full charge cycle and then enter Float/Maintenance mode. In this mode, it monitors the battery and provides a small pulse of current only when needed to maintain full charge, preventing overcharging.
- The charger can be left connected indefinitely during storage.
5. Troubleshooting & Indicators
5.1 Common LCD Messages and Indicators
- No Display / No Power: Check AC power connection and outlet. Ensure the unit is plugged in.
- "Reverse Polarity" Warning: The clamps are connected backwards. Immediately unplug the charger and correct the connections (RED to +, BLACK to -).
- Battery Not Detected / "0.0V": Check that the clamps have a solid connection to clean battery terminals. The battery may be severely depleted or defective.
- Charging Stops Early or Flashes: Could indicate a faulty battery, poor connection, or an internal safety protection has been triggered (overheat, etc.). Allow the unit to cool and check connections.
- Maintenance Mode Active: A steady display showing voltage and a "Full" or "Maintain" indicator is normal. The charger is keeping the battery topped up.
5.2 Safety Protection Triggers
If a fault is detected, the charger will stop charging and may display an error or flash. Common causes include:
- Short circuit at the clamps or cables.
- Overheated charger (allow to cool in a ventilated area).
- Defective or incompatible battery.
If a protection feature activates, unplug the charger, disconnect the clamps, identify and resolve the issue, then reconnect and restart.
6. Care & Maintenance
- Store the charger in a cool, dry place.
- Periodically inspect cables and clamps for damage, such as cracks or exposed wires. Do not use if damaged.
- Keep the unit clean and free of dust. Wipe with a dry cloth.
- Ensure the ventilation slots on the charger housing are not blocked during operation.
7. Warranty & Support
The Adakiit Smart Battery Charger comes with a 2-year quality assurance and a 12-month refund policy, subject to the manufacturer's terms and conditions.
Manufacturer: Adakiit
Mfr Part Number: USAU-2250-52
UPC: 614751273271
ASIN: B07ZCXDQSP
For support, contact the seller through your point of purchase (e.g., Amazon order page). Have your model number and purchase details ready.