User Guide Powerglide Lift-off Pet Plus Vacuum
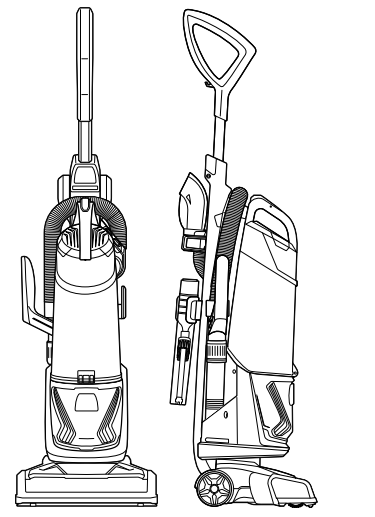
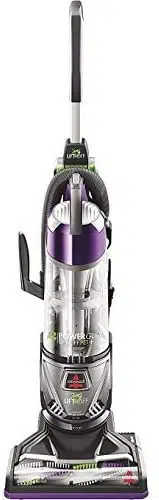
Product View
Getting to Know Your Vacuum

1. Handle
2. Lift-Off Canister Release Button
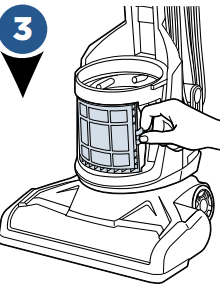
3. Dirt Tank Release Button
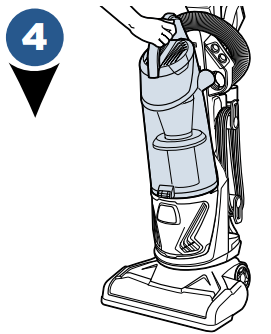
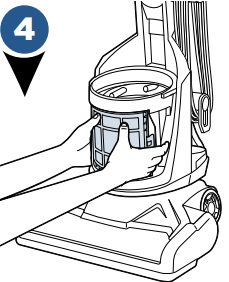
4. Carry Handle
5. Brush Roll Power Switch
6. Power Switch
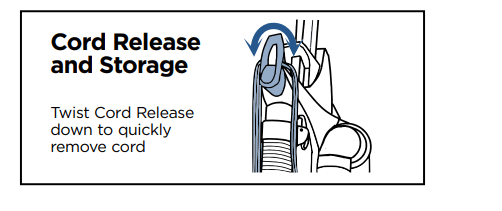
7. Quick Release® Cord Wrap
8. Power Cord
9. Filter Cover (Pre-Motor and Post-Motor Filters are located under Filter Cover)
10. Brush Roll
11. Cord Clip
12. Pet TurboEraser® Tool Holder with Tool
13. Stretch Hose
14. Crevice Tool & Extension Wand Holder with Tools
15. Hose Wand Base
16. Pet Hair Eraser® Tool (does not store on unit; only available select models)
Assembly
Slide handle into vacuum base. Attach with the screw that is taped to the handle.
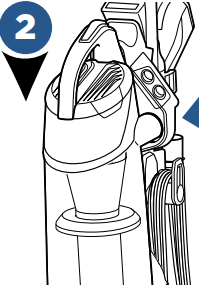
Attach hose by lining the tabs on the cuff with the notches on the back of vacuum. Twist clockwise to lock hose into place.
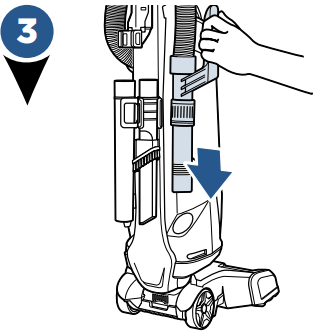
Push handle end into base of vacuum on opposite side.
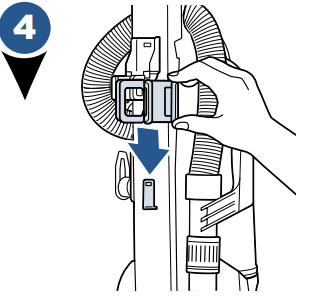
Slide the Crevice Tool/ Extension Wand Holder down onto the middle of the back of base.
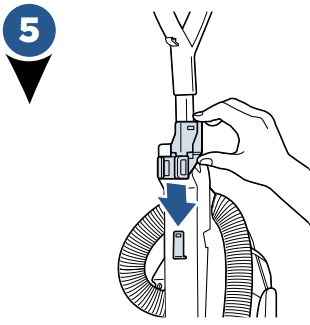
Slide the Pet TurboEraser® tool holder down on the top back of the base.
To use your optional Febreze® filter (included), press the tank release button and pull dirt tank away from vacuum.
Remove the black/ yellow foam filter and replace with the black Febreze® filter. Be sure to place the Febreze® filter last, covering the the mesh filter. Place dirt container back on vacuum.
Operations
PowerBrush Switch
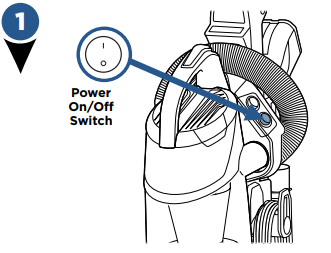
Turn vacuum on by pressing Power Switch on (I - ON and O - OFF).
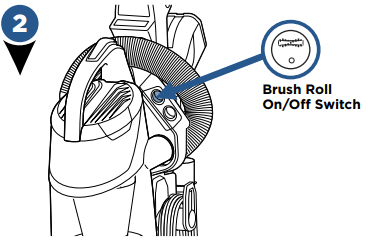
Press the Brush Roll switch to run the PowerBrush for carpet cleaning (brush roll is on when light on switch is illuminated).
NOTE: The brush roll will automatically shut off when vacuum is locked in upright position, recline to reactivate
NOTE: Turn the Brush Roll OFF when vacuuming hard or delicate surfaces that may be caught by the rotating brush. This could include hard wood, tiled floors, small area rugs or frieze carpets that have long delicate fibers or threads
Adjusting the Variable Suction
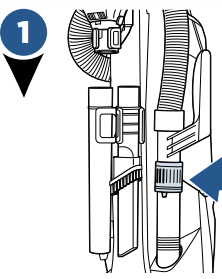
Locate the Variable Suction Control Valve on the Hose Wand Base.
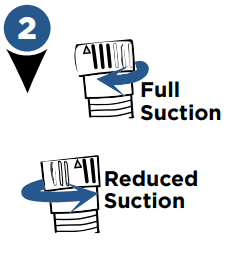
To decrease the amount of suction for cleaning delicate carpets, curtains, or rugs; twist the variable suction valve counterclockwise.
NOTE: The vacuum will come with the Variable Suction Valve closed for full suction power.
Maintenance & Care
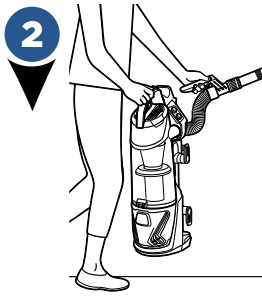
Above Floor Cleaning
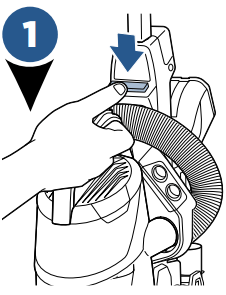
Clean stairs or furniture easily with the removable canister. Push the green button to remove and attach desired tool.
To get the most reach, attach both the extension wand and Combination Dusting/Crevice Tool.
Use the Pet TurboEraser® tool for best results on your stairs.

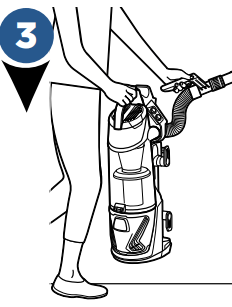
Replace the canister back on vacuum by aligning the front with the base of vacuum, then lean canister back and lock into place.
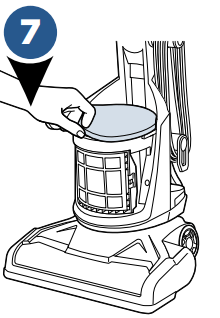
Emptying the Dirt Tank
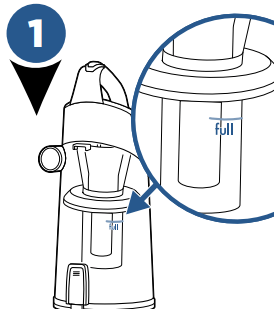
Vacuum tank is full, time to empty
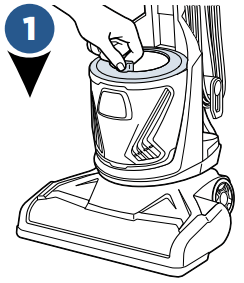
Press tank release button, grab the handle to pull dirt container away from vacuum.
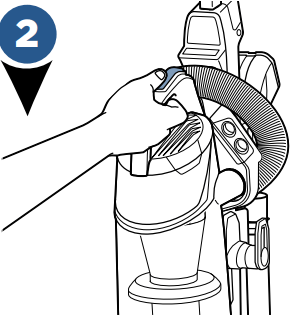
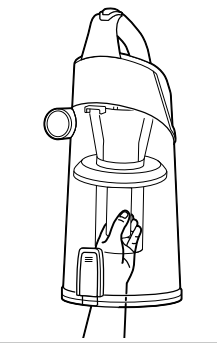
Holding dirt container over a trash bin, press tank empty button.
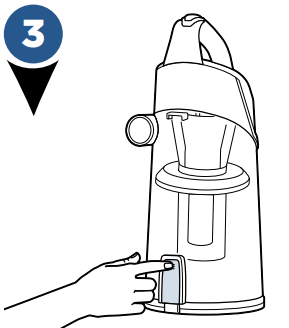
Close bottom of container and place back on the vacuum. Be sure you place the front of the tank first and push back to “click” into place.
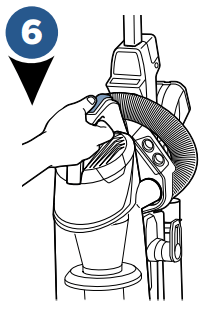
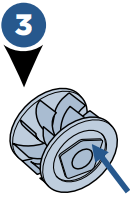
Cleaning Inner Cyclone
- With dirt container off vacuum base, push the empty tank button and twist counter-clockwise to remove the separator and pull down.
- Tap separator against inside of trash bin and rinse with warm water if necessary. Be sure to let it completely dry before placing back in the dirt container.
- Place separator back in, being sure to align each tab on either side of the top of separator with the notches inside the top of the dirt container
Cleaning Filters
With vacuum unplugged, remove the tank and lift up on the tab attached to the filter cover.
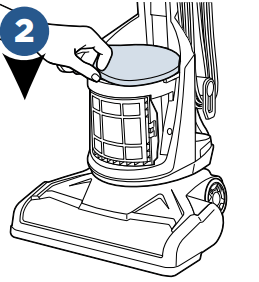
There are 2 filters here; one foam filter on top and a thinner fiber filter; both are washable.
Remove post-motor filter located on the front of the vacuum underneath the filter cover. If it appears dirty, remove the filter and gently tap the filter on the edge of a waste basket.
Replace the post�motor filter by pushing it straight back, clicking each side.
NOTE: The post-motor filter is a pleated filter. This filter is not washable and must be replaced when it becomes dirty.
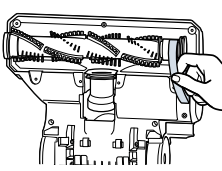
Replace Belt & Brush
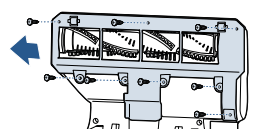
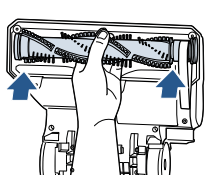
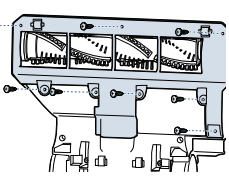
Unplug vacuum, turn over and unscrew 8 Silver Phillips head screws to remove bottom cover

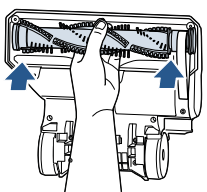
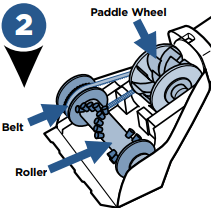
Pull roller straight out and slide belt off brush roll and motor gear.

Inspect brush roll by placing it on its end and spin. The brush roll should spin freely, multiple times by one flick. If it doesn’t, replace brush roll. Inspect belt, replace if it appears damaged.
Place belt back on brush roll.
Pinch belt around brush roll & hook back around the silver motor gear.
Rotate brush roll into place and line up end caps.
Re-attach bottom cover with 8 screws
Maintain the Pet TurboEraser® Tool

Twist gray collar counter-clockwise, until slot appears, and then separate faceplate.
Remove brush roll, belt, and paddle wheel. Inspect for damages and replace if necessary.
To reassemble, align two clips on each end of paddle wheel with belt on and pop back into place. Replace brush roll with belt, making sure all parts are aligned correctly.
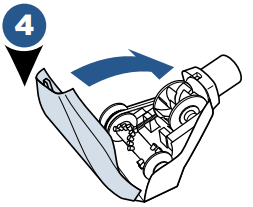
To put faceplate back on, align the tabs in the top of the cover and place it down to “click” into place.
Troubleshooting
| Problem |
Possible causes |
Remedies |
| Vacuum cleaner won’t turn on |
- Power cord not plugged in
- Blown fuse/tripped breaker
|
- Check electrical plug
- Check/replace fuse or reset breaker
|
| No power at rotating floor brush |
- Pod is not securely seated
- Brush switch turned to "OFF"
- Vacuum is in upright position
|
- Remove pod and replace, making sure that it "clicks" into place
- Make sure brush switch is in "ON" position
- Recline vacuum to operate brush
|
| Vacuum cleaner won’t pick up dirt |
- Hose not attached to suction opening
- Crack or hole in hose
- Broken or worn drive belt
- Rotating floor brush bristles worn
- Rotating floor brush jammed
- Clog in vacuum
- Dirt container ful
- Dirt container or secondary cyclone not installed properly
- Filters are dirty
|
- Grasp quick reach handle and firmly push hose wand onto the suction opening
- Check hose and replace if needed
- Replace drive belt, see page 9
- Replace brush
- Remove brush and clean debris from brush ends
- Check for debris build-up or clogs in the inner tank, hose and foot/lower hose
- Empty dirt container
- Position correctly and lock in place
- Check and clean pre-motor and post-motor filters, see page 8
|
| Visible dirt escaping from cleaner |
- Dirt container full
- Filters or secondary cyclone missing or installed incorrectly
- Dirt container installed incorrectly
|
- Empty dirt container
- Check secondary cyclone, pre-motor and post-motor filters for correct installation
- Pull out and re-insert dirt container correctly
|