

Contents I Nevo App URC 8810
Using the NEVO app - Add devices 3
Step 1 Follow the wizard 3
Step 2a Add your device by selecting it from a list 4
Step 2b Add your device with the device model number 5
Step 2c Add your device with a direct setup code 5
Step 3 Test your device 6
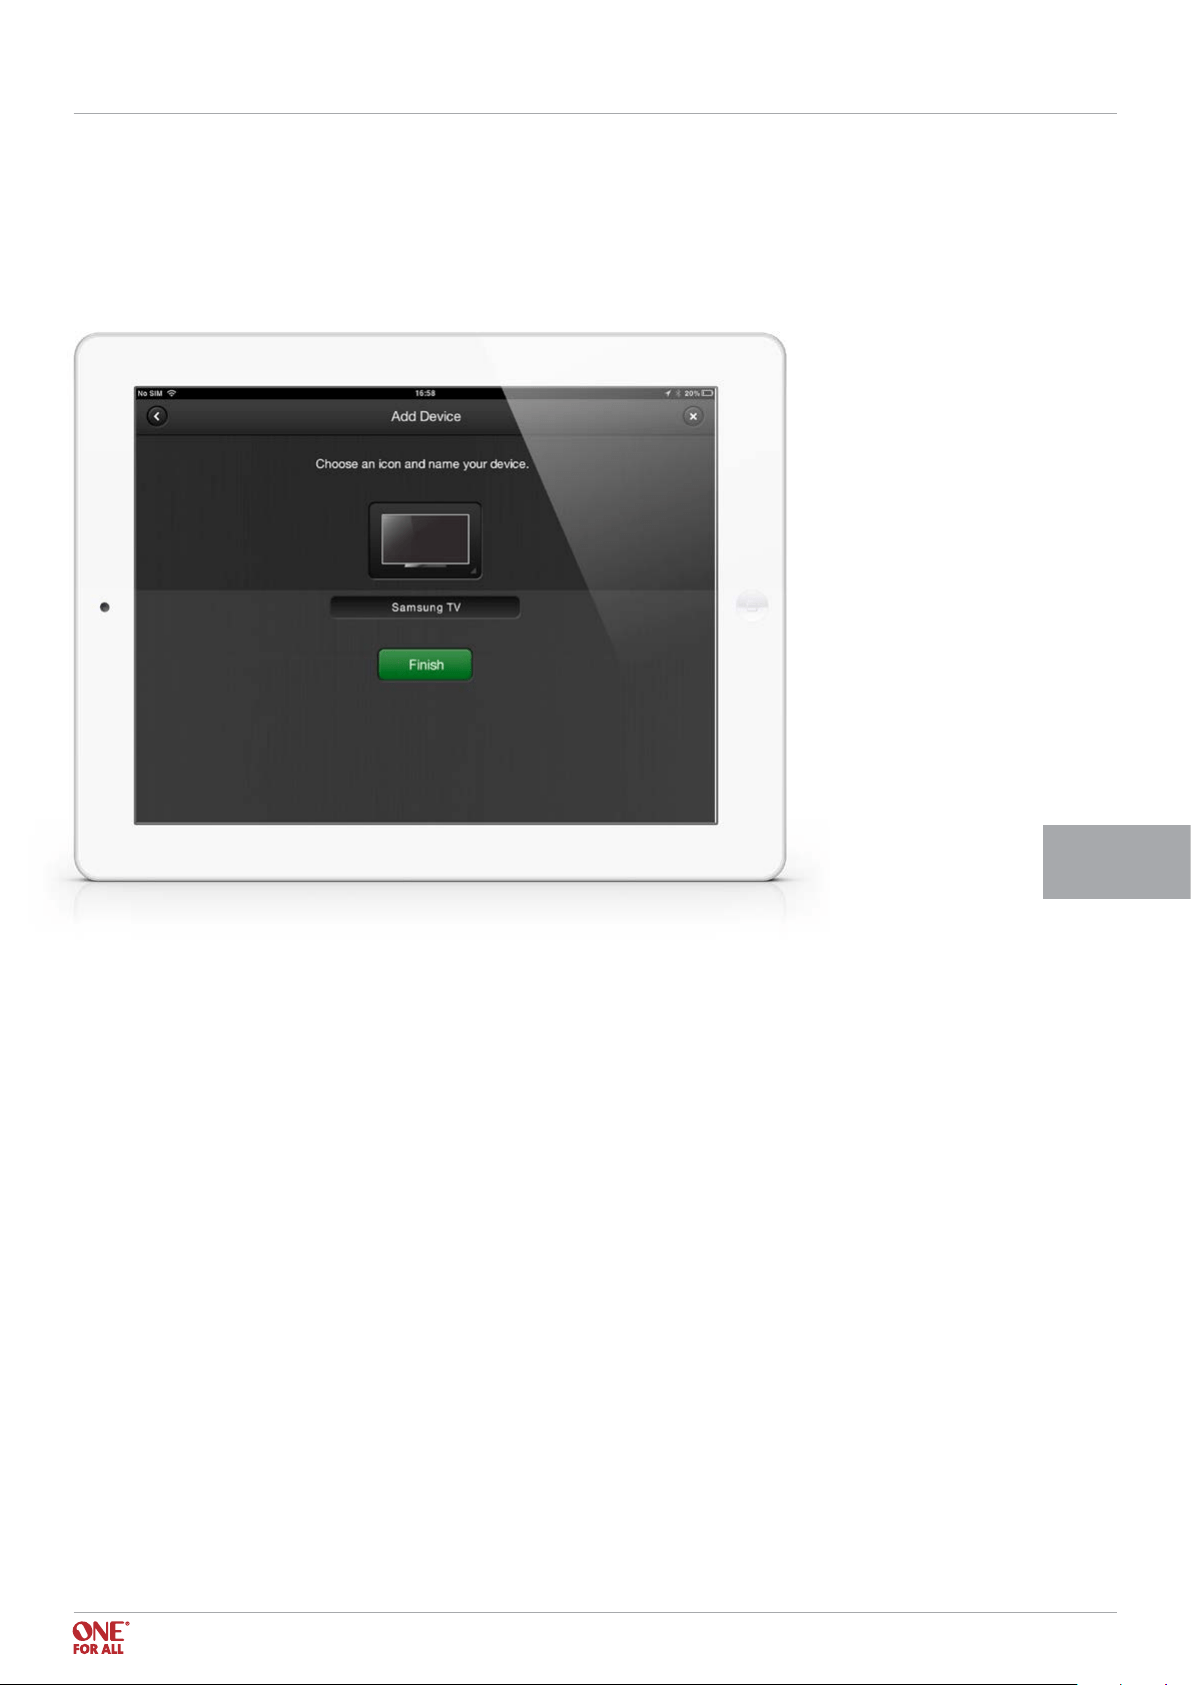
Step 4 Rename your device 7
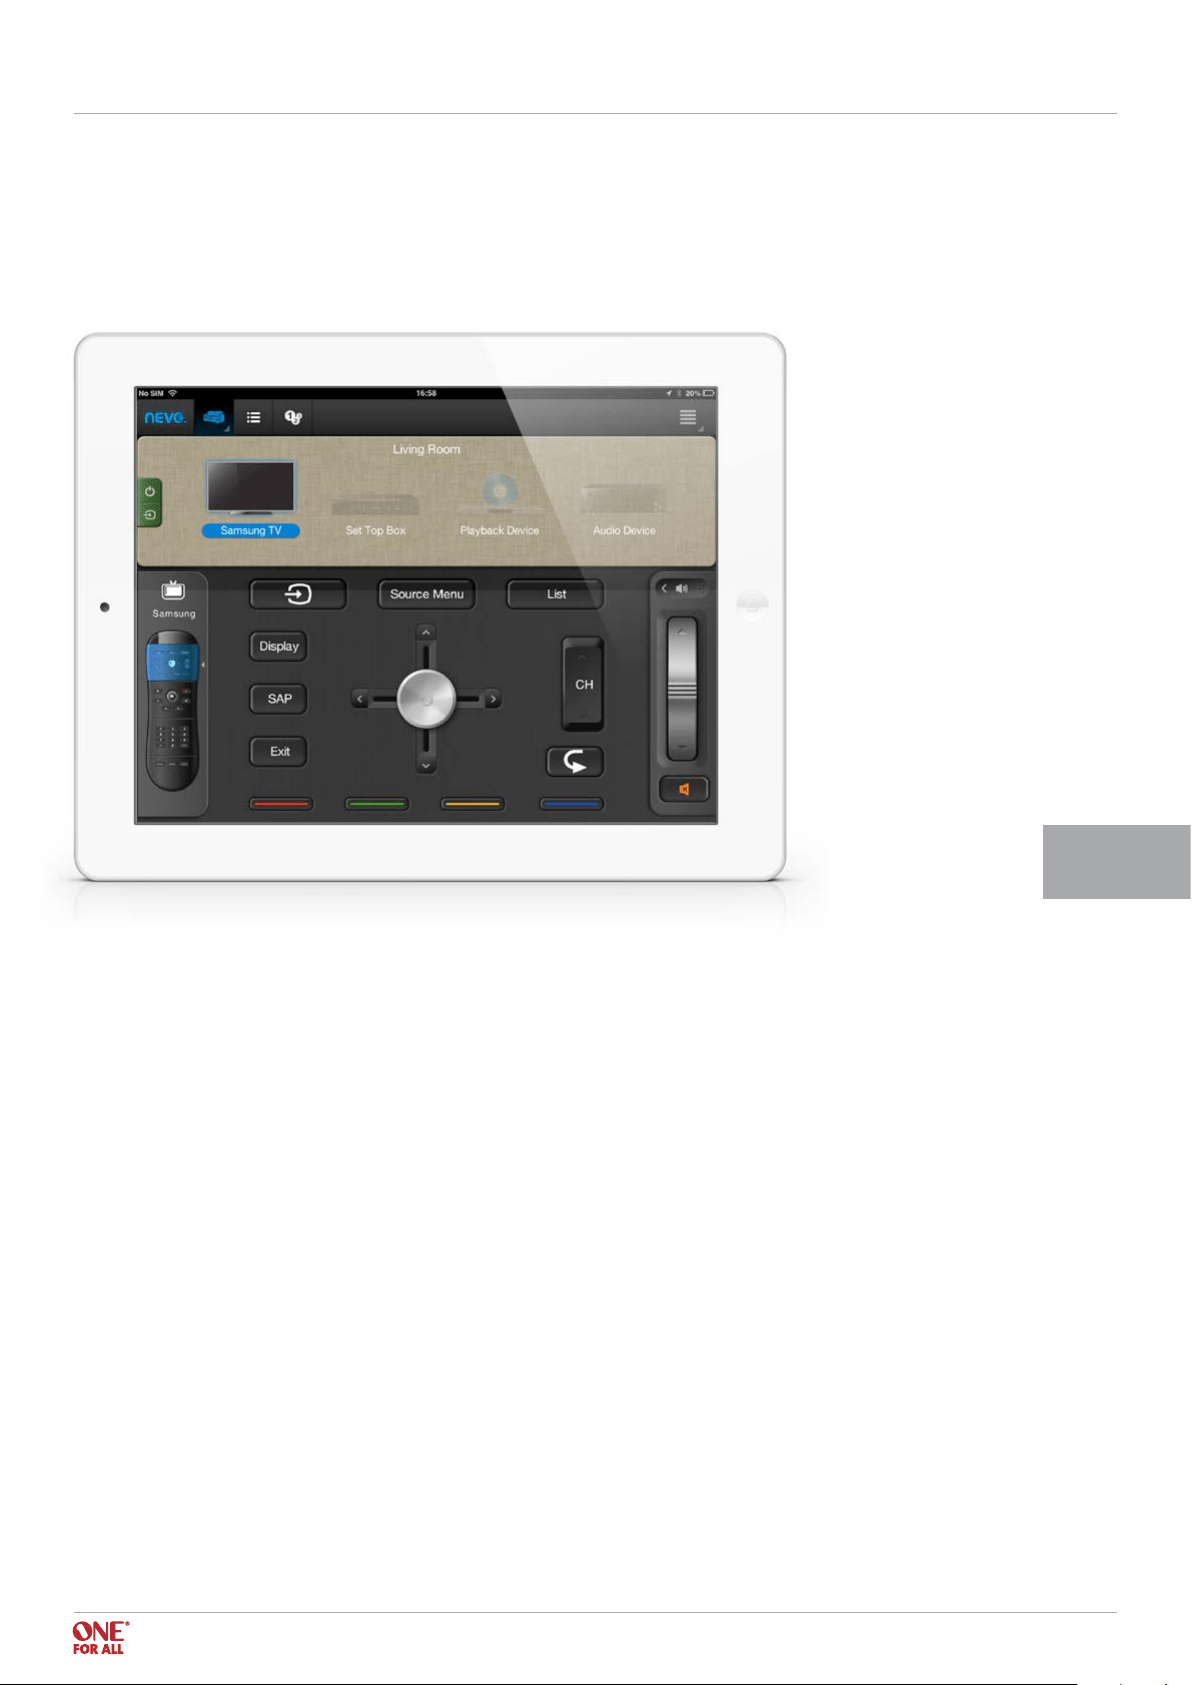
Step 5 Setting up more devices 8
TV Guide Setup 9
Step 1 Select the TV Guide Icon 10
Step 2 Select channel packages 10
Step 3 Select and test the tuning device 11
Step 4 Choose your channel 12
Step 5 Read program details 12
Setting up Shortcuts (Activities) 13
Step 1 Record shortcuts 14
Step 2 Select the icon and name 14
Step 3 Select “Optimize IR” option 16
Volume Lock 17
Power and Input Selection 18
Editing Keys 19
04
< Back to content
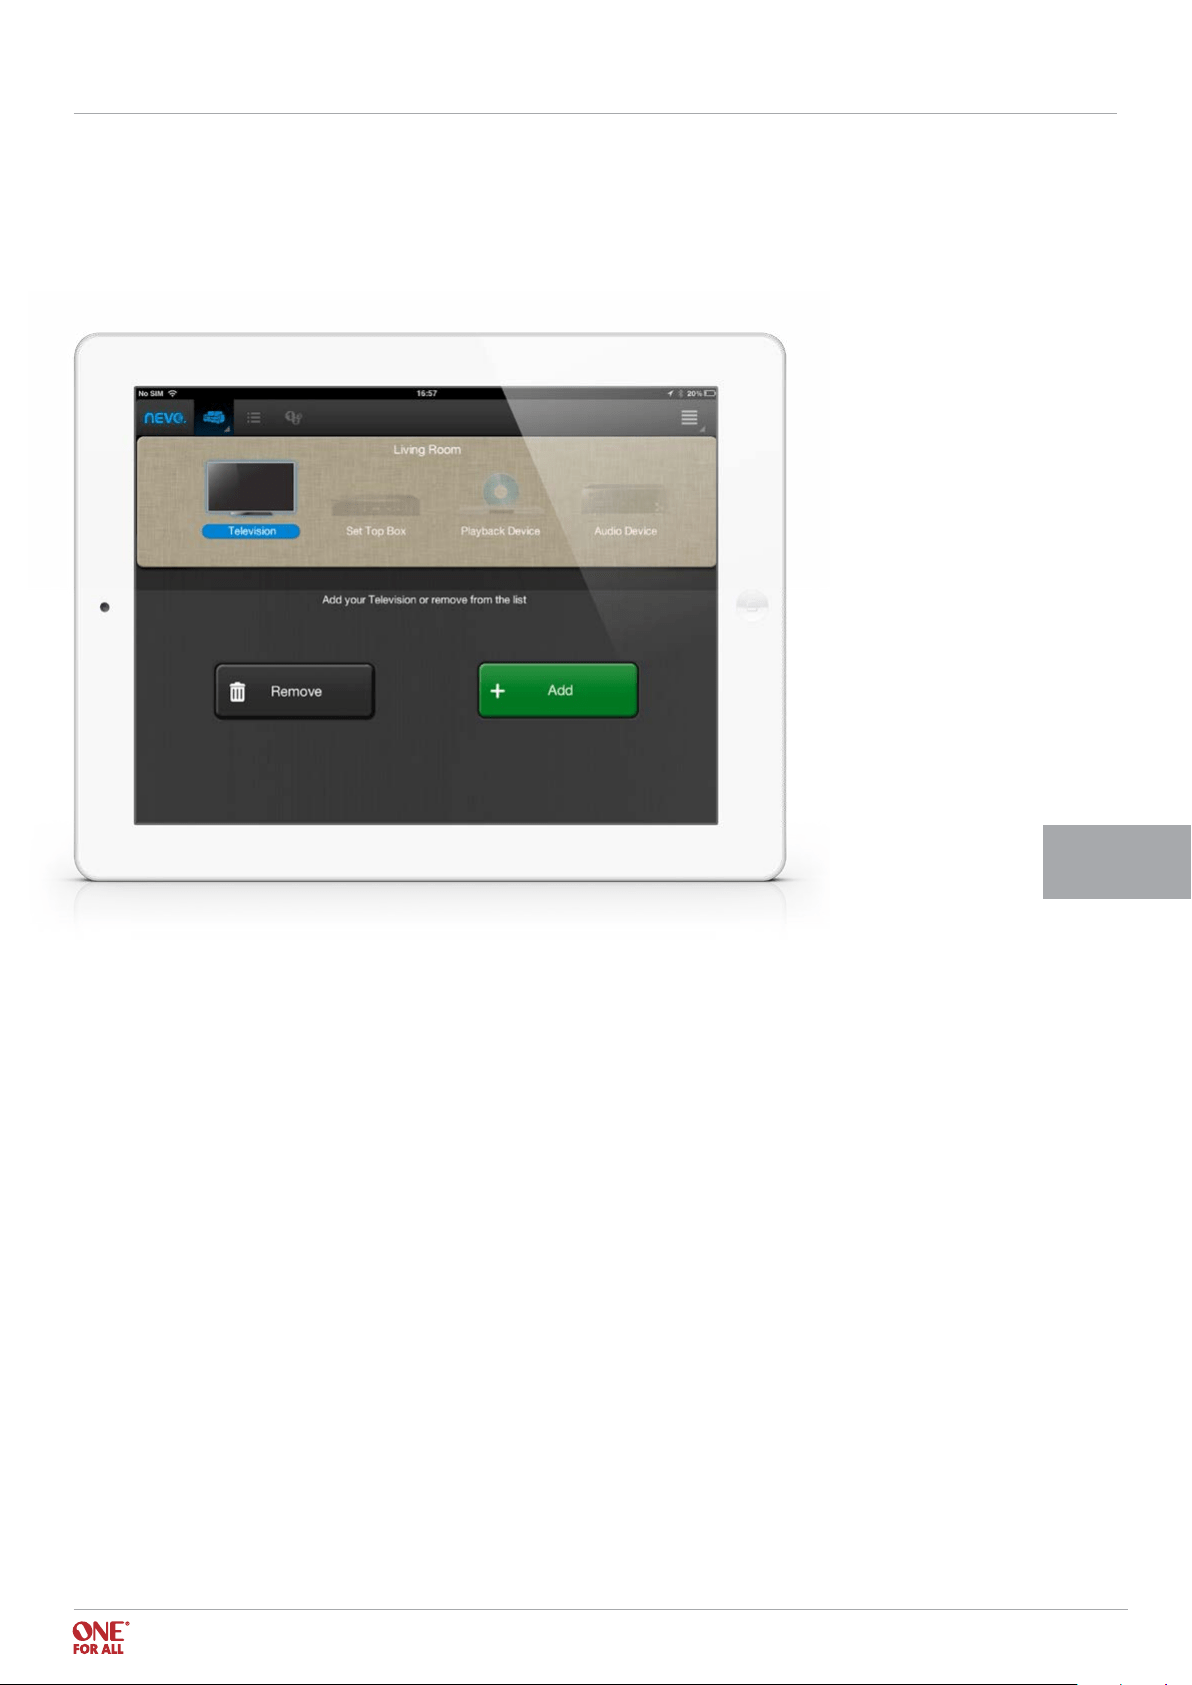
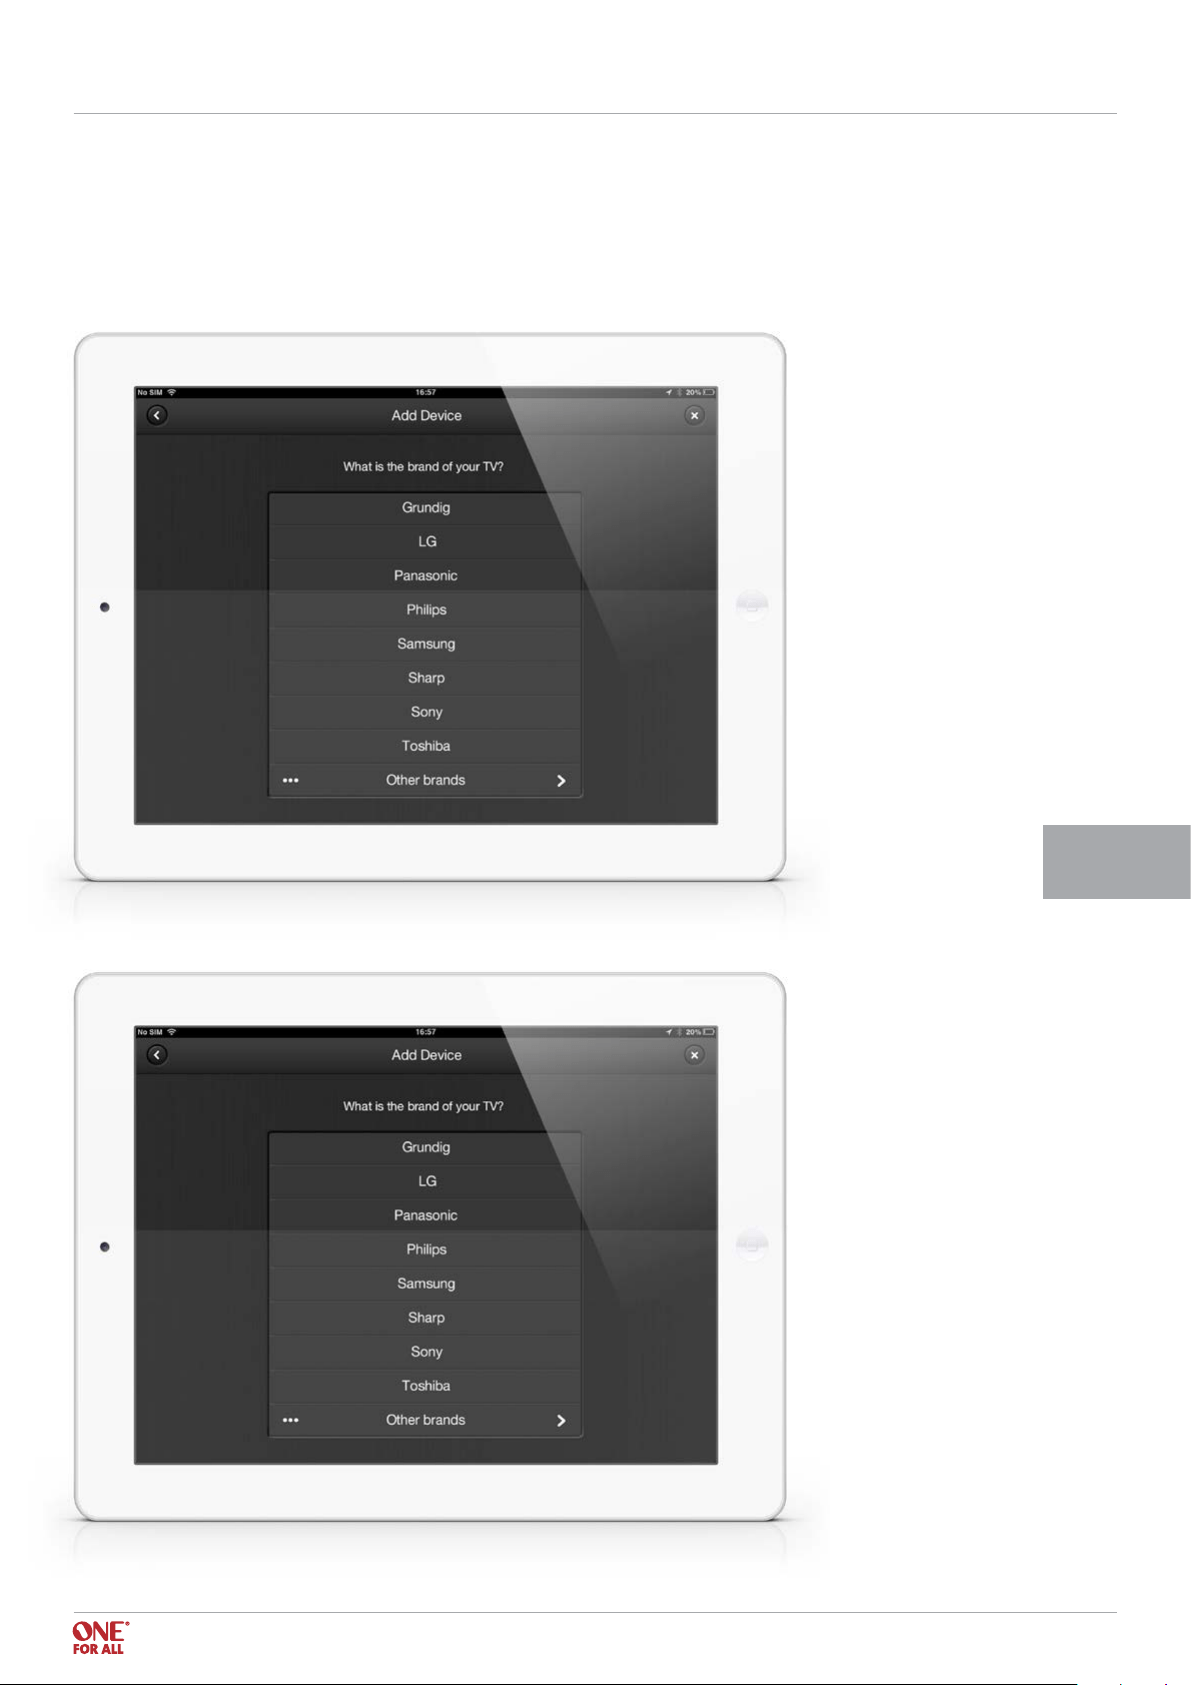
Step 2a - Add your device by selecting it from a list
When you select Add, the wizard for adding a device will begin. Firstly, a list of the top brands
for the device in question will appear.
If you select Other Brands, a full list of that Device Type will appear:
Using the Nevo App I Step 2a URC 8810

07
< Back to content
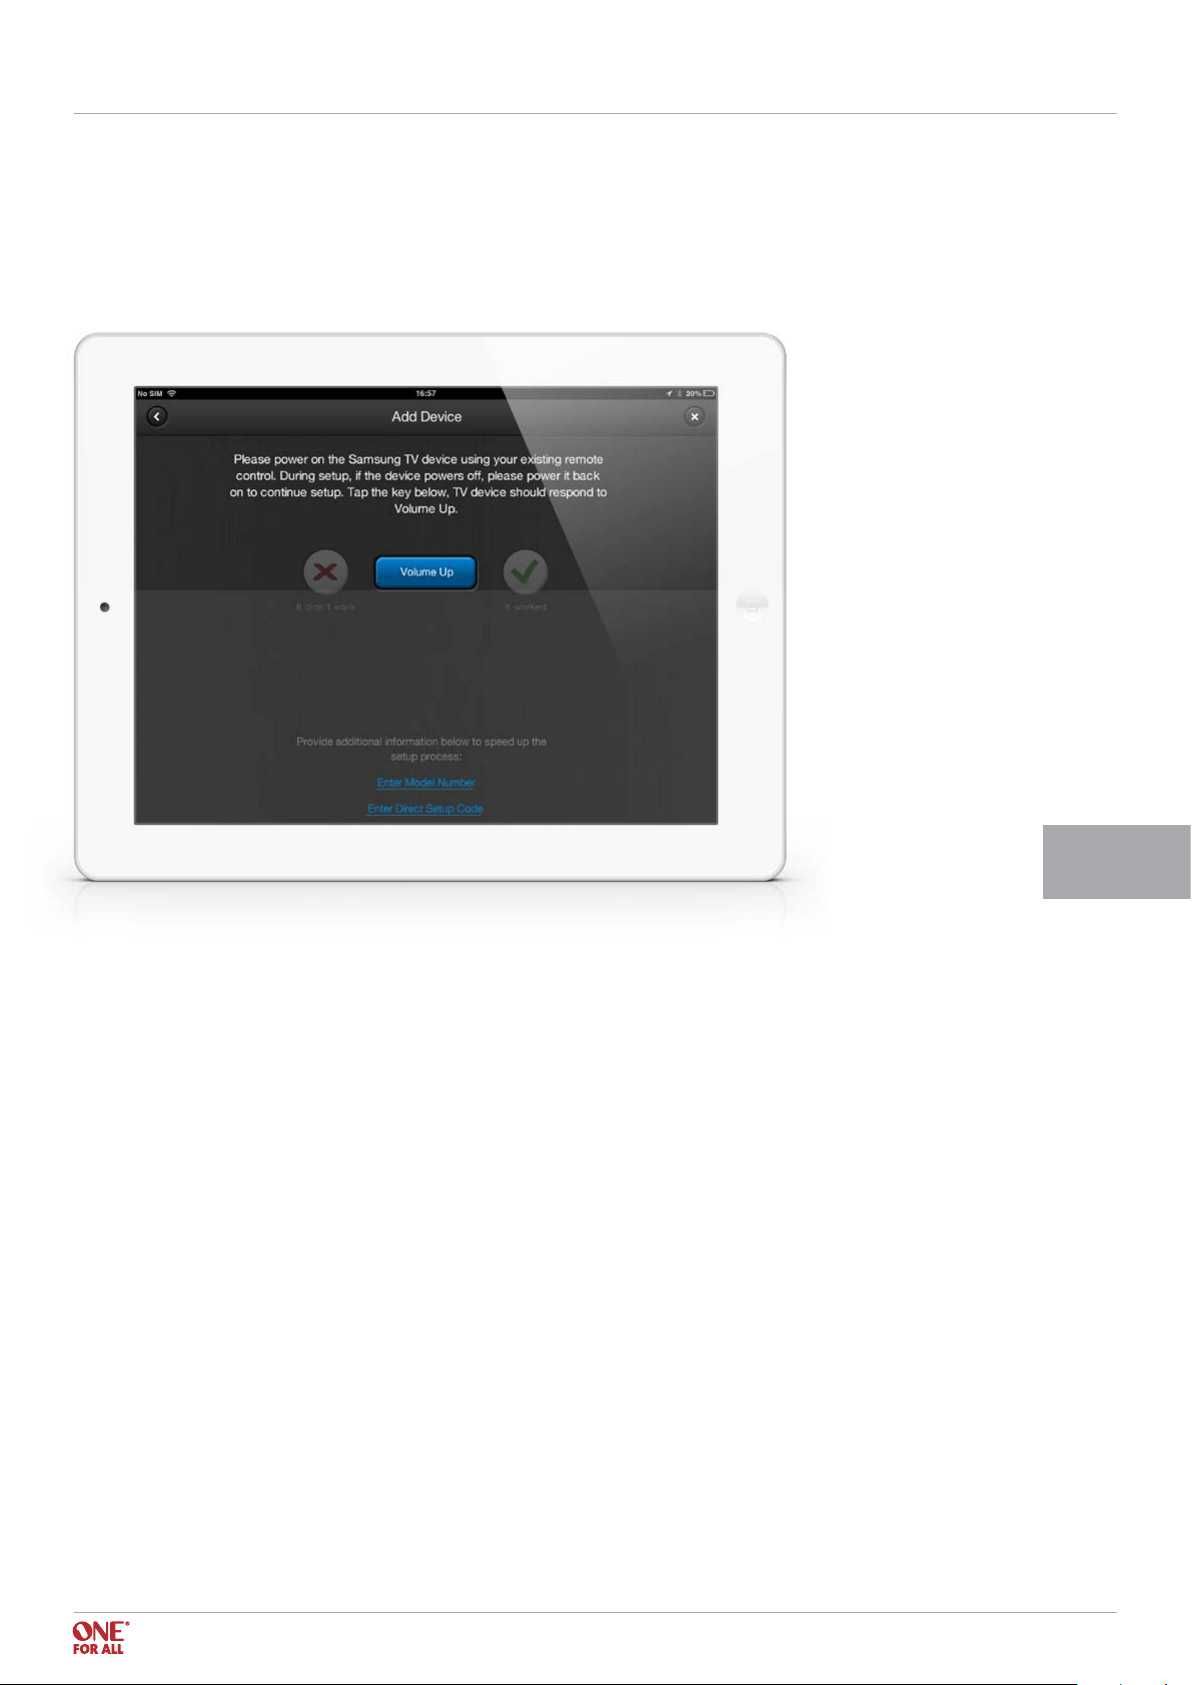
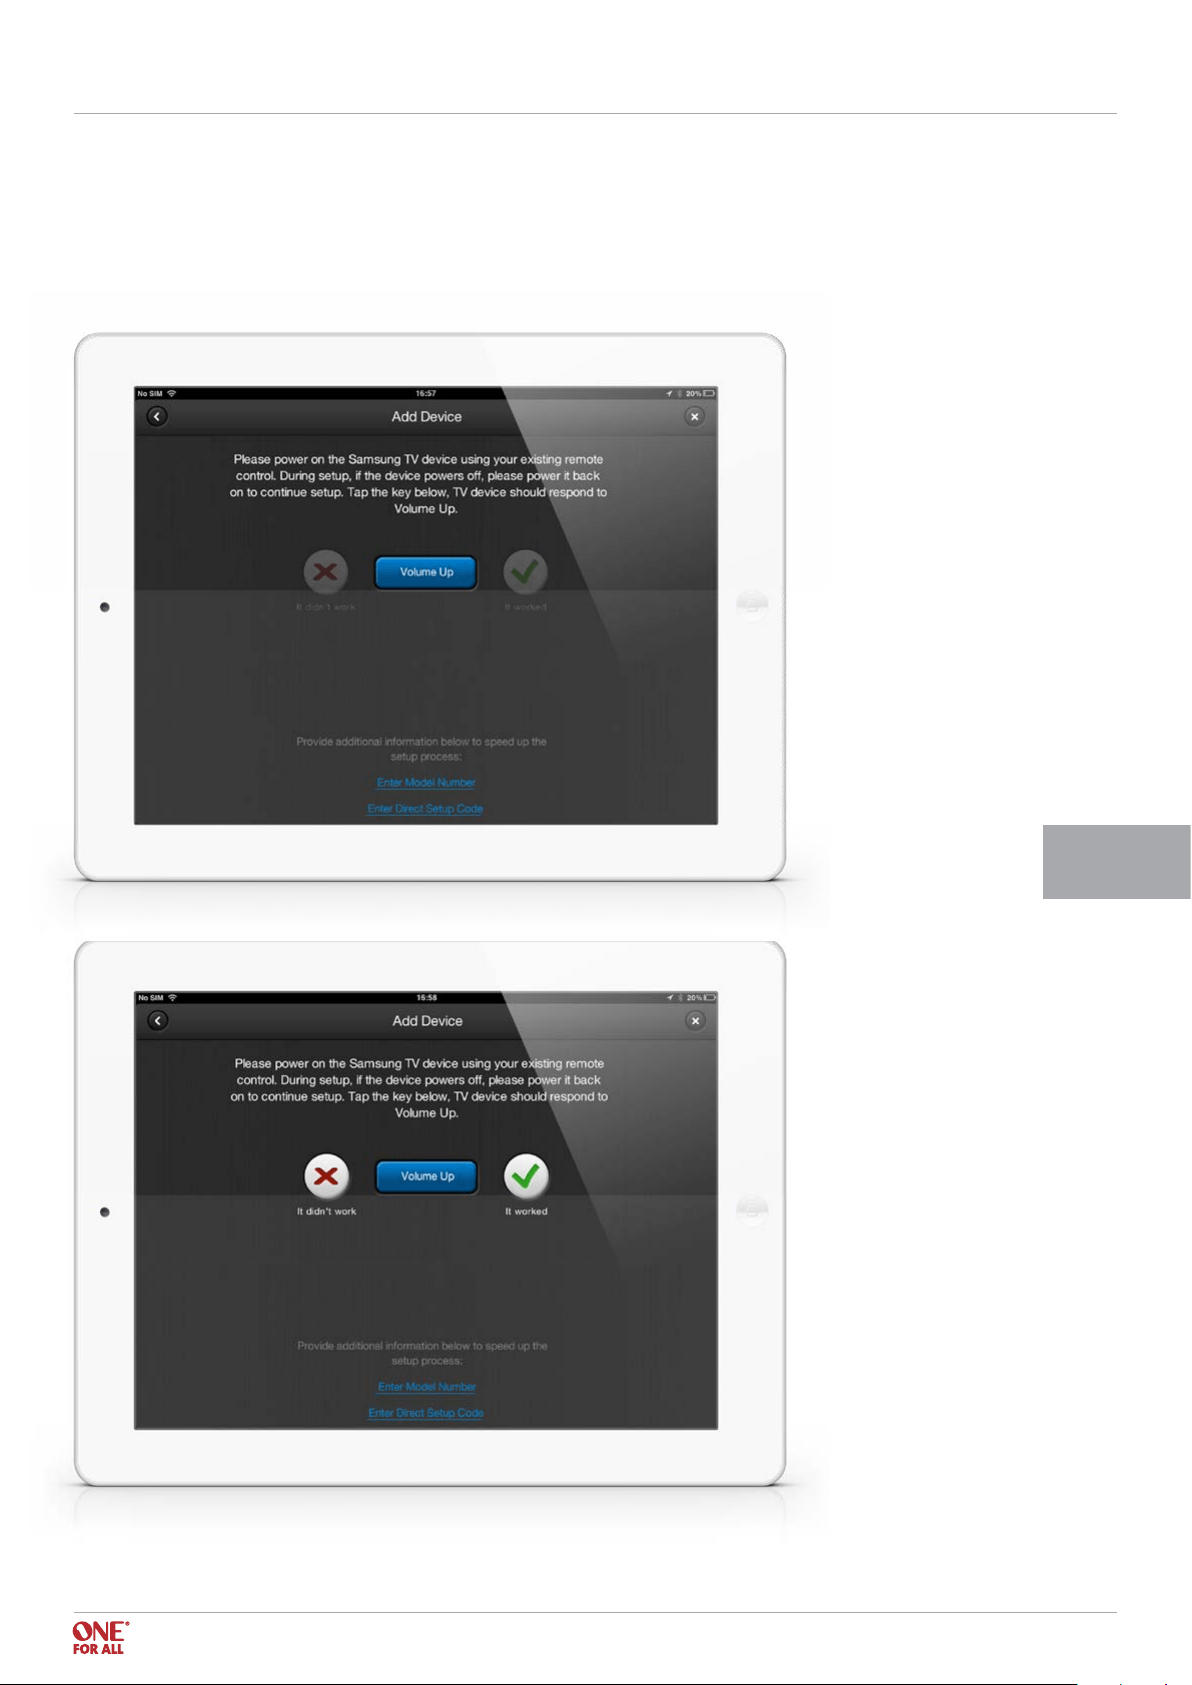
You will be able to test functions on the device. Once a function has been conrmed as working, the next function
required to determine the code will be tested, until a correct code has been found. To nd a code it could take
testing only one or two functions, or four or ve if there are many alternatives, so keep repeating the process.
Using the Nevo App I Step 3 URC 8810

< Back to content
10
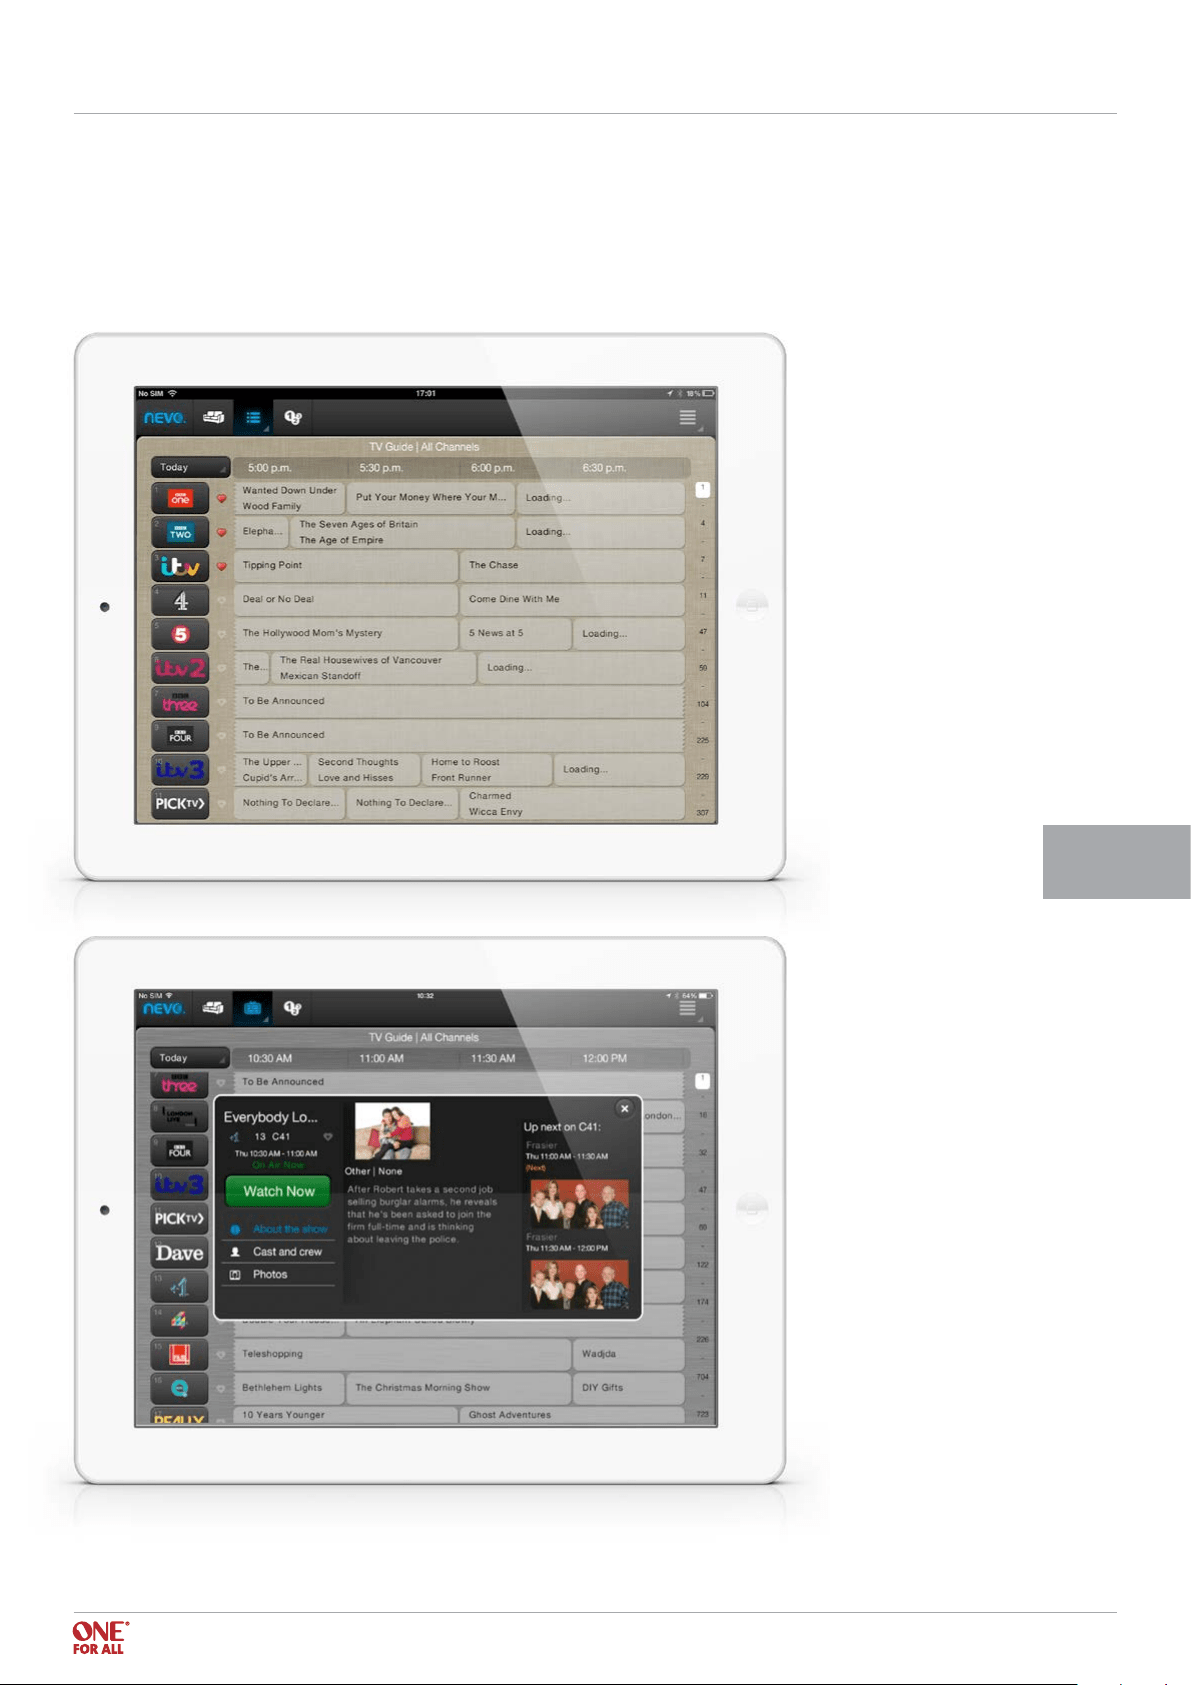
As soon as a device capable of tuning channels (TV or STB) has been set up, the option to set up the TV Guide will
appear. The guide can display up to two weeks of info in advance. Channels can be designated as Favorites by
clicking the heart next to the channel logo.
Step 1 - Select the TV Guide Icon
When you select this icon, the guide setup screen will pop-up.
Here, you can select your country, language and postal code. You can also select your service provider.
TV Guide Setup I Step 1 URC 8810
< Back to content
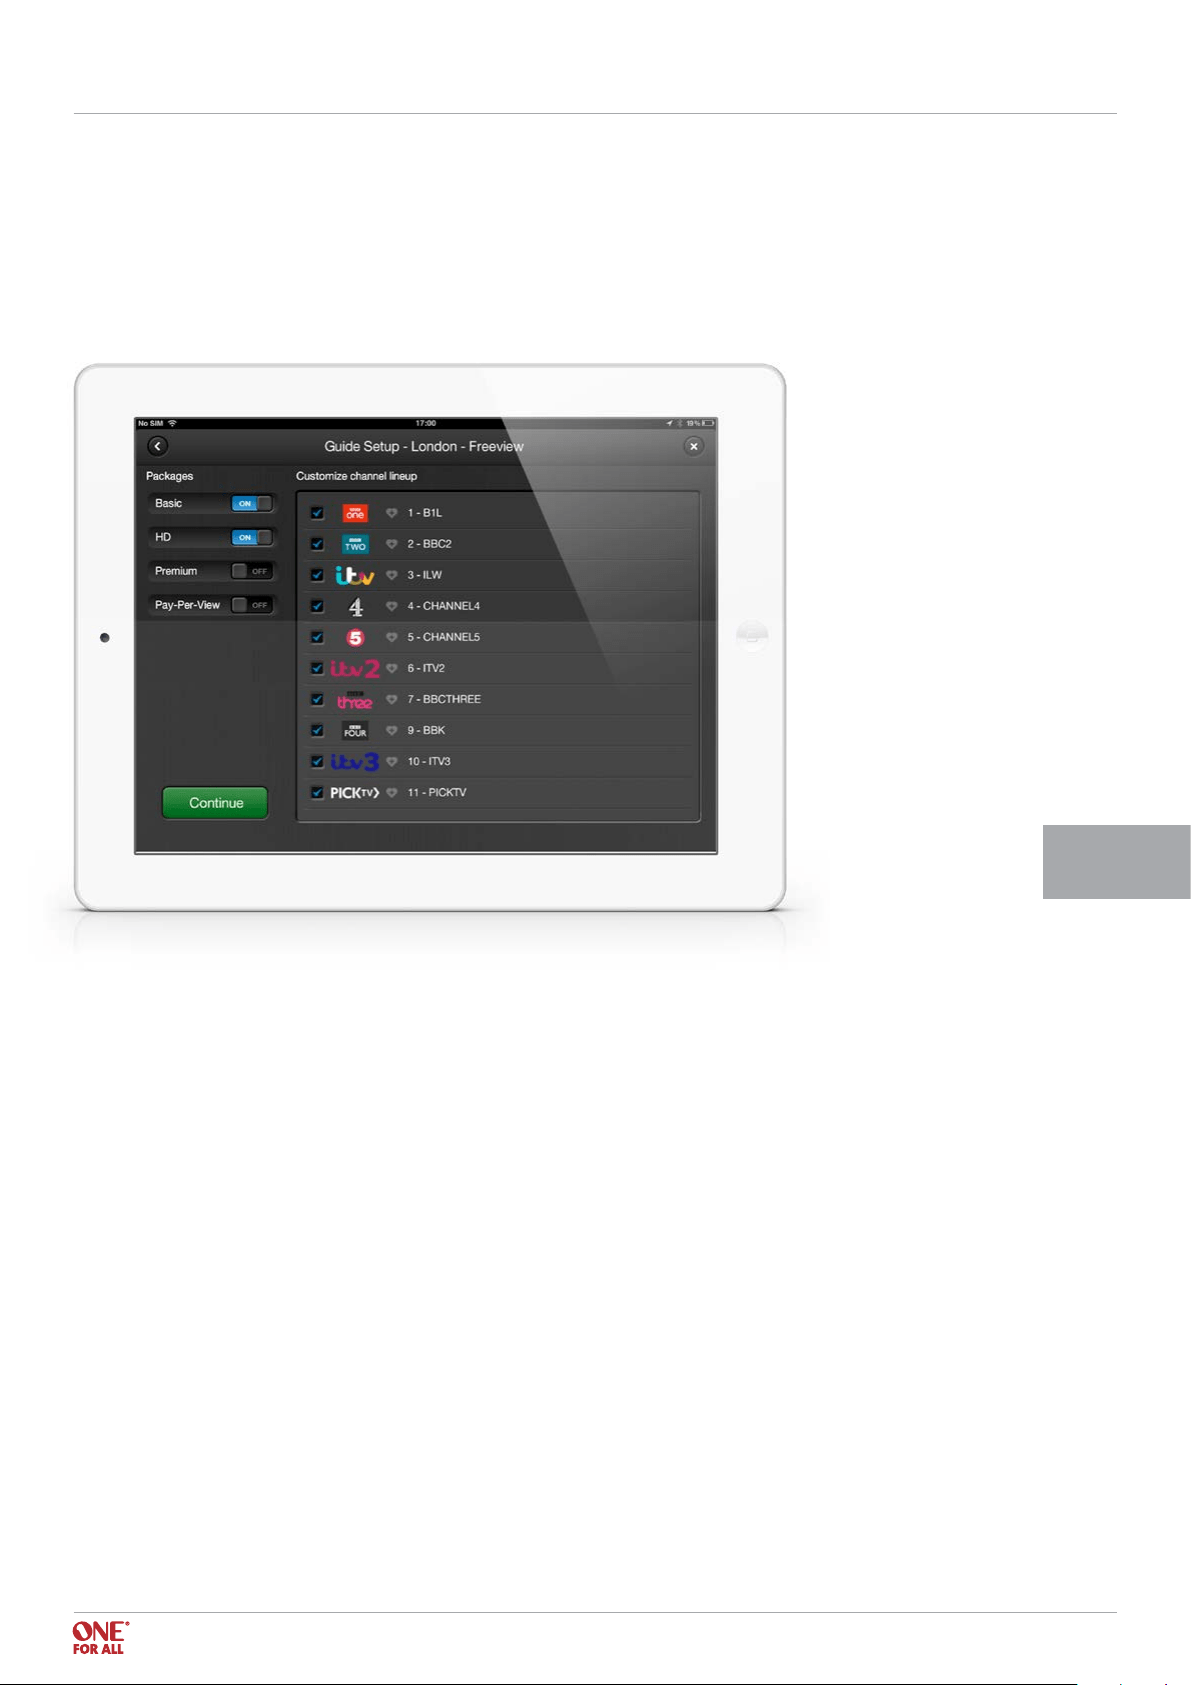
Step 2 - Select channel packages
The following screen will ask you to select channels from a list of channels associated with that provider.
It is also possible to select favorite channels at this point by clicking the heart next to the channel
(this can also be done later).
TV Guide Setup I Step 2 URC 8810
11
< Back to content
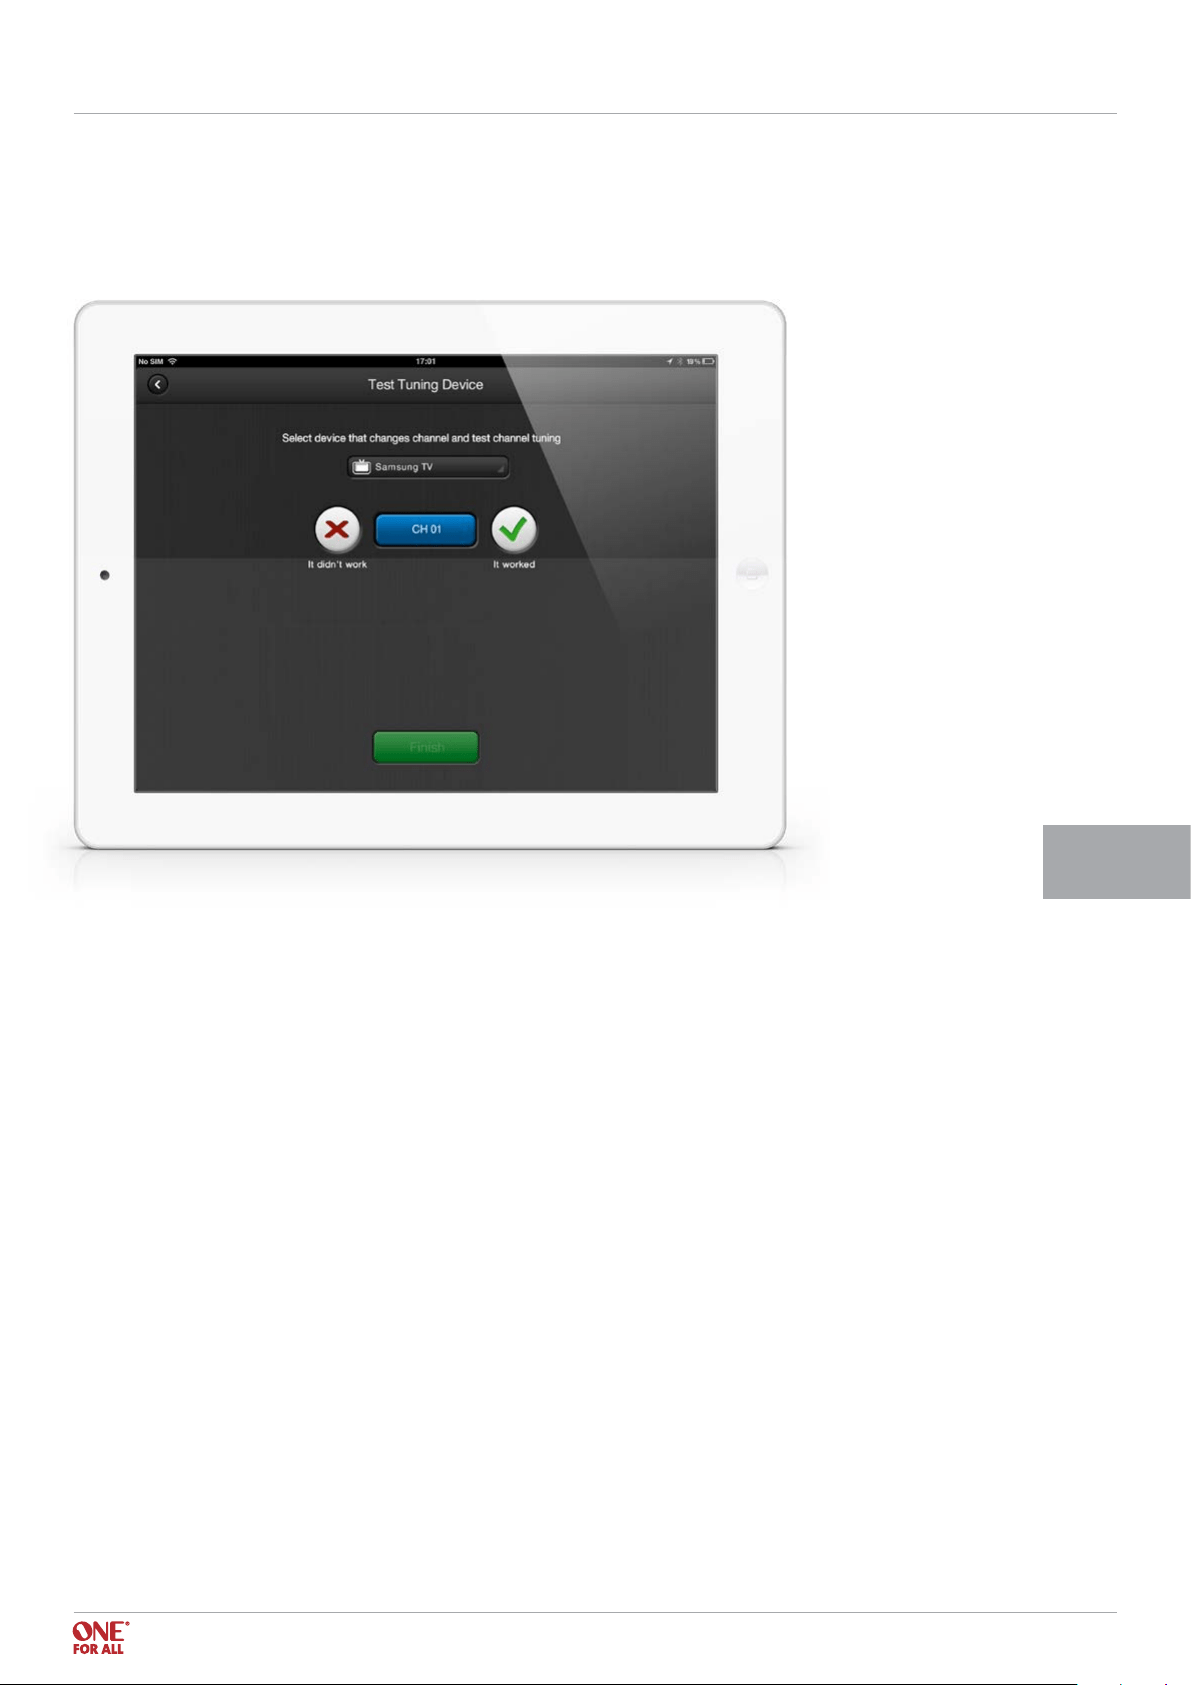
Step 3 - Select and test the tuning device
Here, you can select the device you use for watching TV and test the app with this device.
Step 4 - Choose your channel
After you conrm that it worked, the guide is set up.
You can choose which channel you would like to watch, simply by clicking the channel.
12
TV Guide Setup I Step 3 - 4 URC 8810
< Back to content
13
Step 5 - Read program details
If you click on the program itself, info will be displayed about the content, including photos, description etc.
From here, you can also choose which channel you would like to watch, simple by clicking the Watch Now button.
TV Guide Setup I Step 5 URC 8810

< Back to content
14
Step 1 - Record shortcuts
When you have set up the devices, the option to program Shortcuts opens up.
There are four suggested shortcuts, but more can be programmed and the names and icons can be changed.
With shortcuts, you are able to program multiple clicks in one click of a button and manage multiple devices in the
same on click of a button. E.g. Watch TV: you can program all the buttons you would normally push to watch TV:
TV ON – SET TOP BOX ON – AUDIO DEVICE ON
Setting up Shortcuts (Activities) I Step 1 URC 8810
< Back to content
15
Setting up Shortcuts (Activities) I Step 1 URC 8810
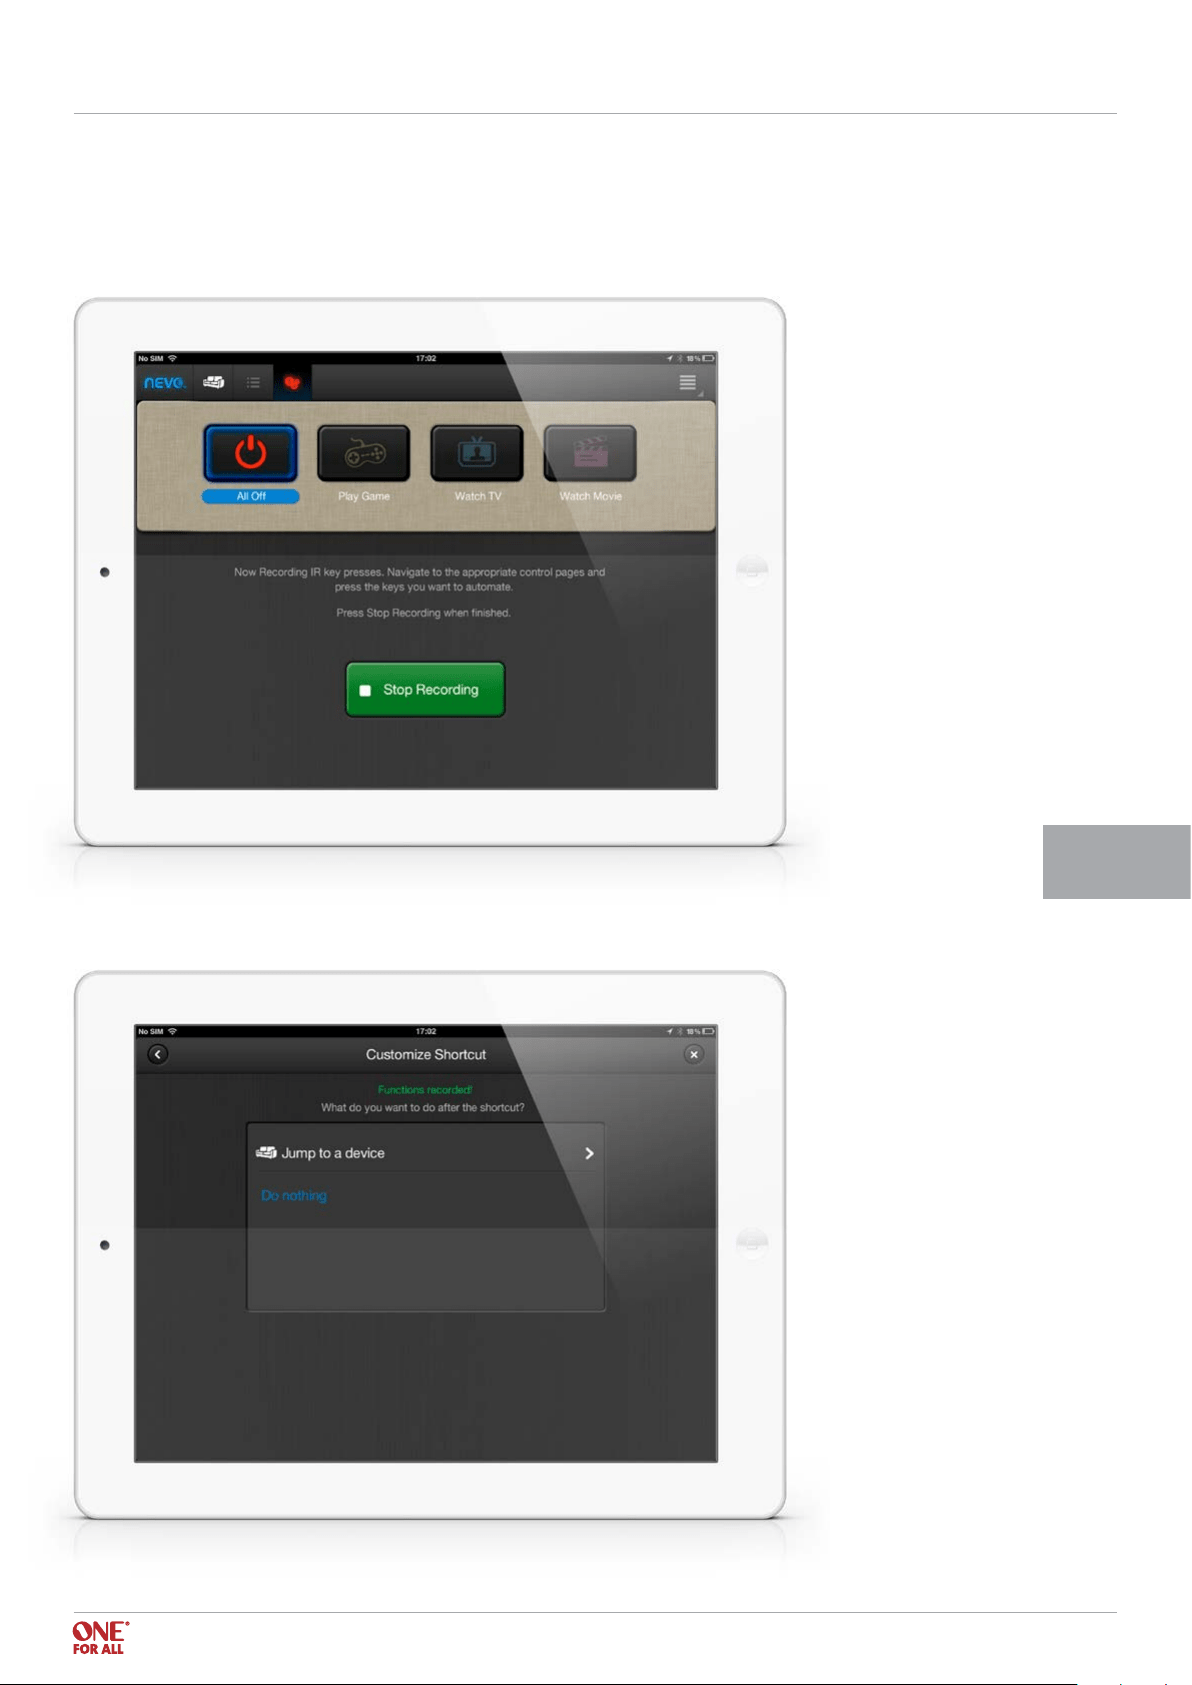
When you select Record Now, the recording begins. The recording records each key that you selects. During the
recording, the Shortcuts icon is red and all devices are available for record.
Once you have nished recording the shortcut, you can choose to jump to
a device after the shortcut, or to do nothing.
< Back to content
16
Setting up Shortcuts (Activities) I Step 2 - 3 URC 8810
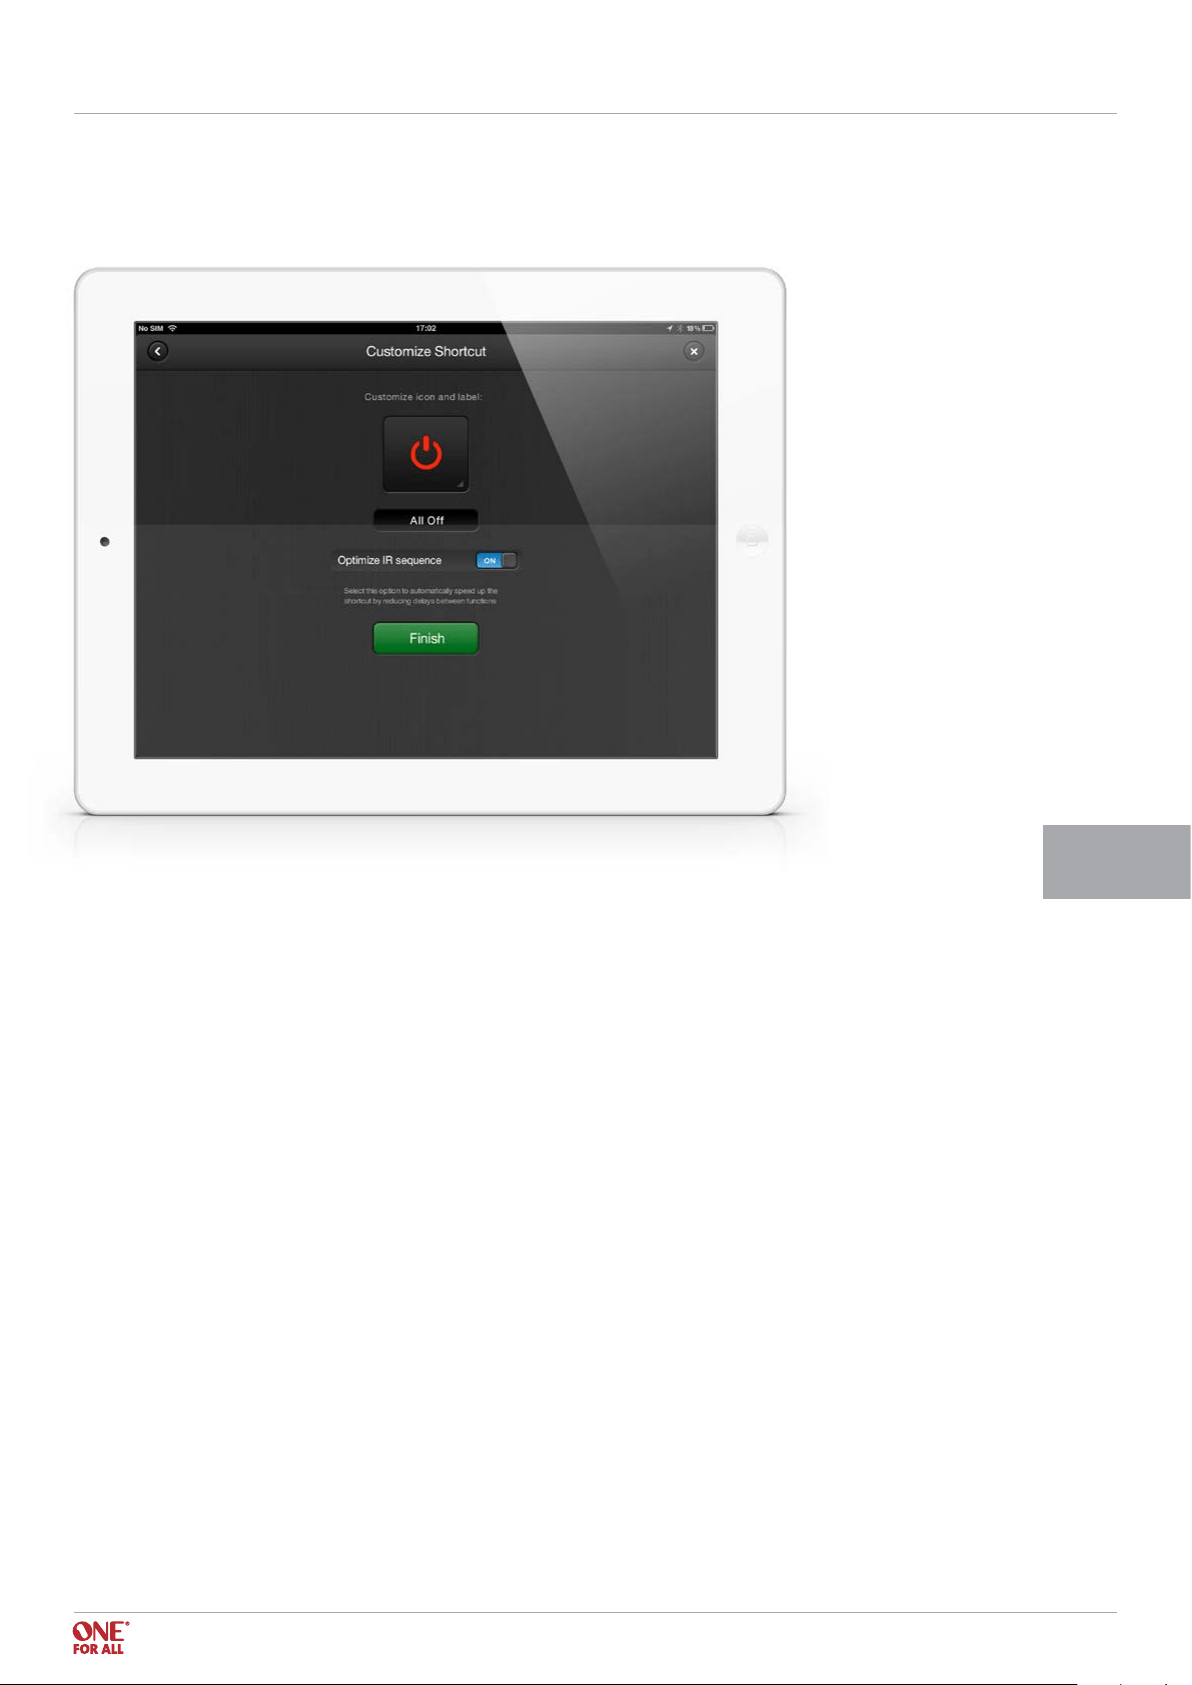
Step 2 - Select the icon and name
Step 3 - Select “Optimize IR” option
When you select this option, you don’t have to hurry your recording; you can take as long as
you like, and, once the recording has stopped, the app will take away the gaps between your clicks.
If a real time shortcut is required, for example to wait while a TV turns on, you should disable this option.
< Back to content
18
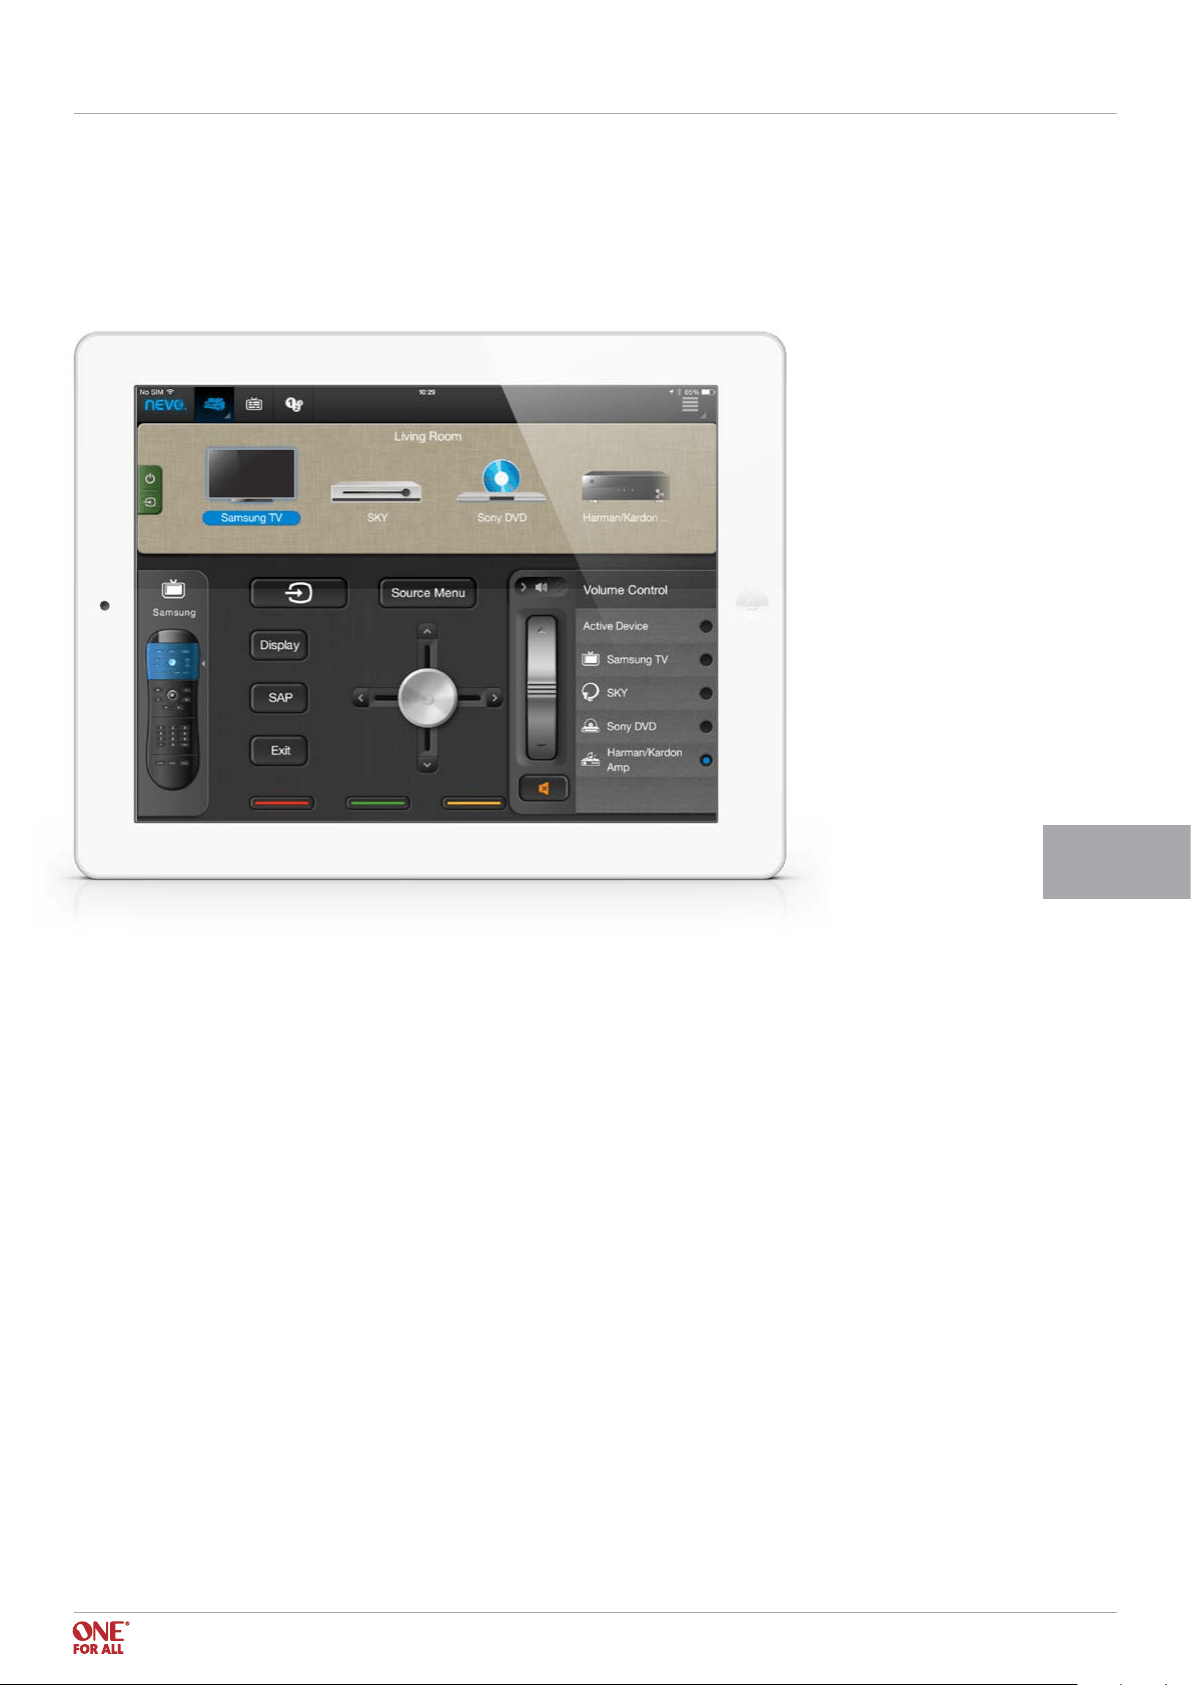
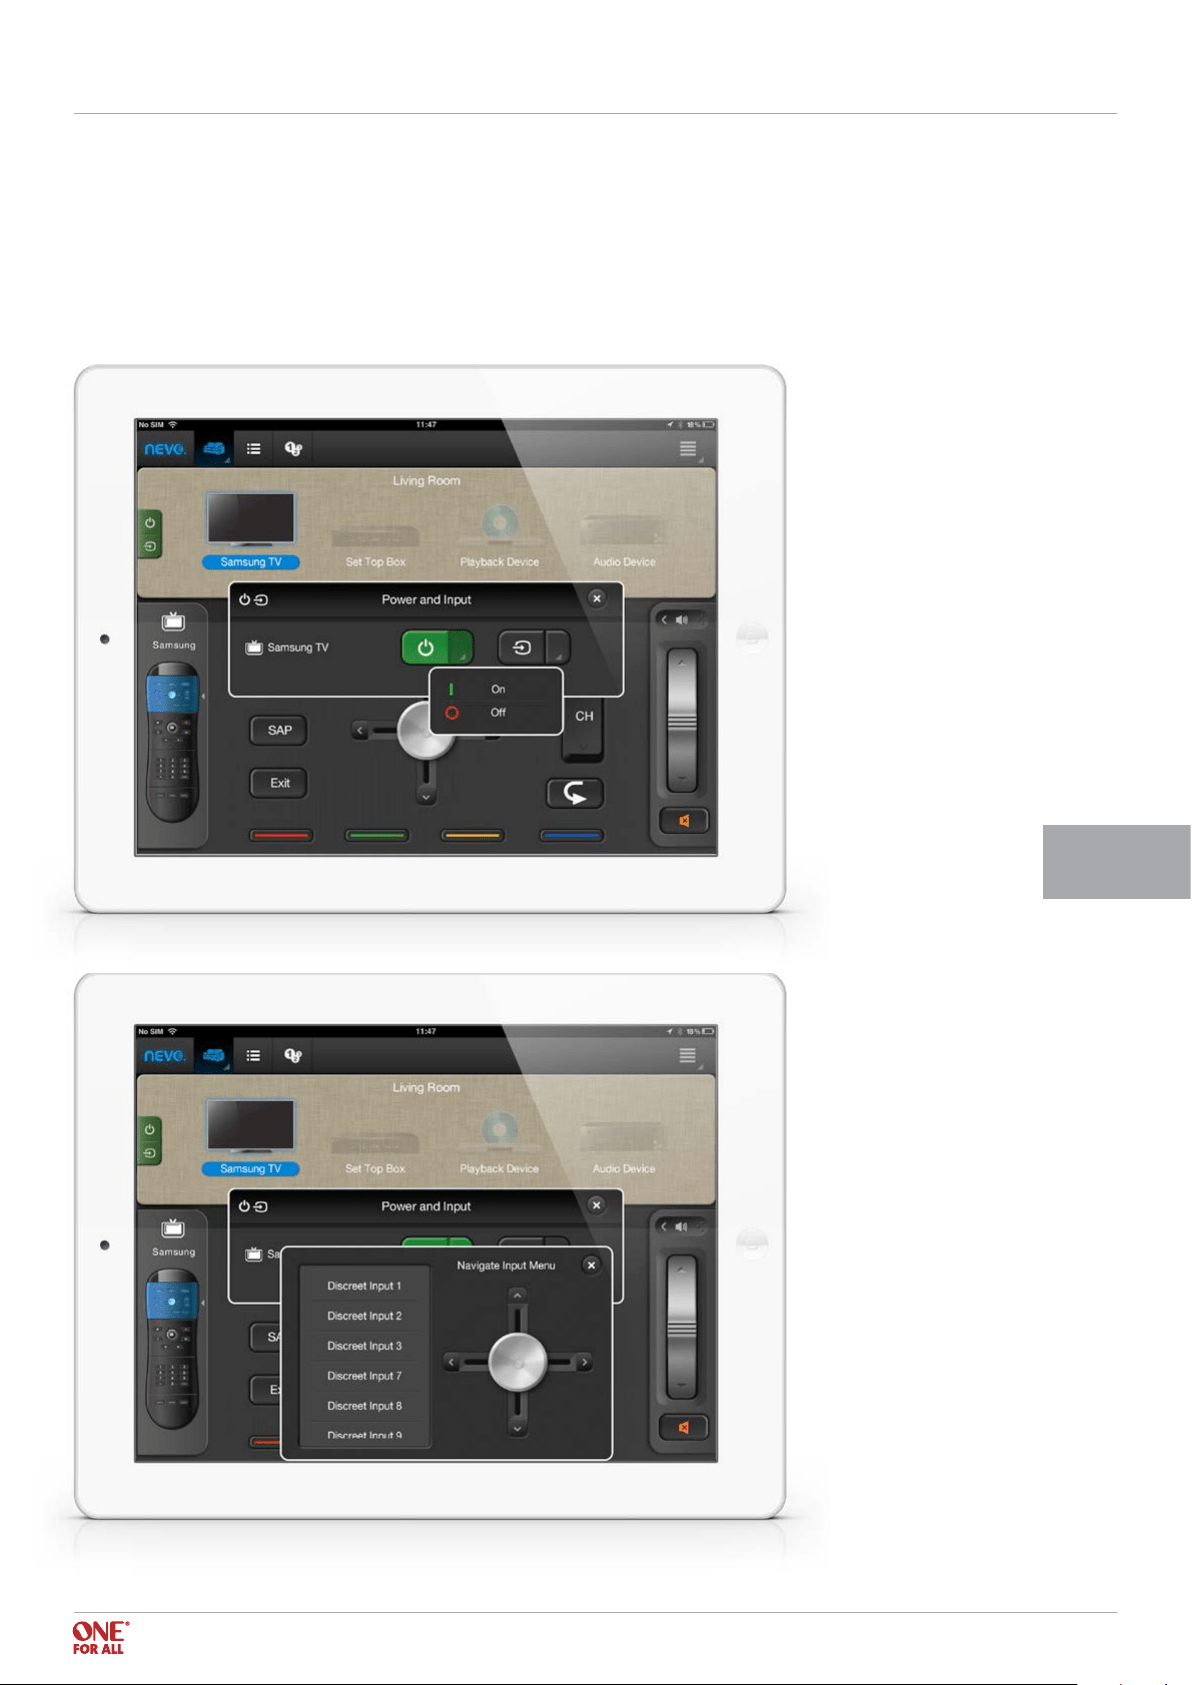
On the left of the screen in User Mode, there is one button for Power and Input selection.
When pressed this will display a pop up window showing all devices and their Power and Input functions.
By clicking the drop down box next to the Power or Input icon, discreet power or input functions will display if
they are available for the current device.
Power and Input Selection URC 8810
< Back to content
20
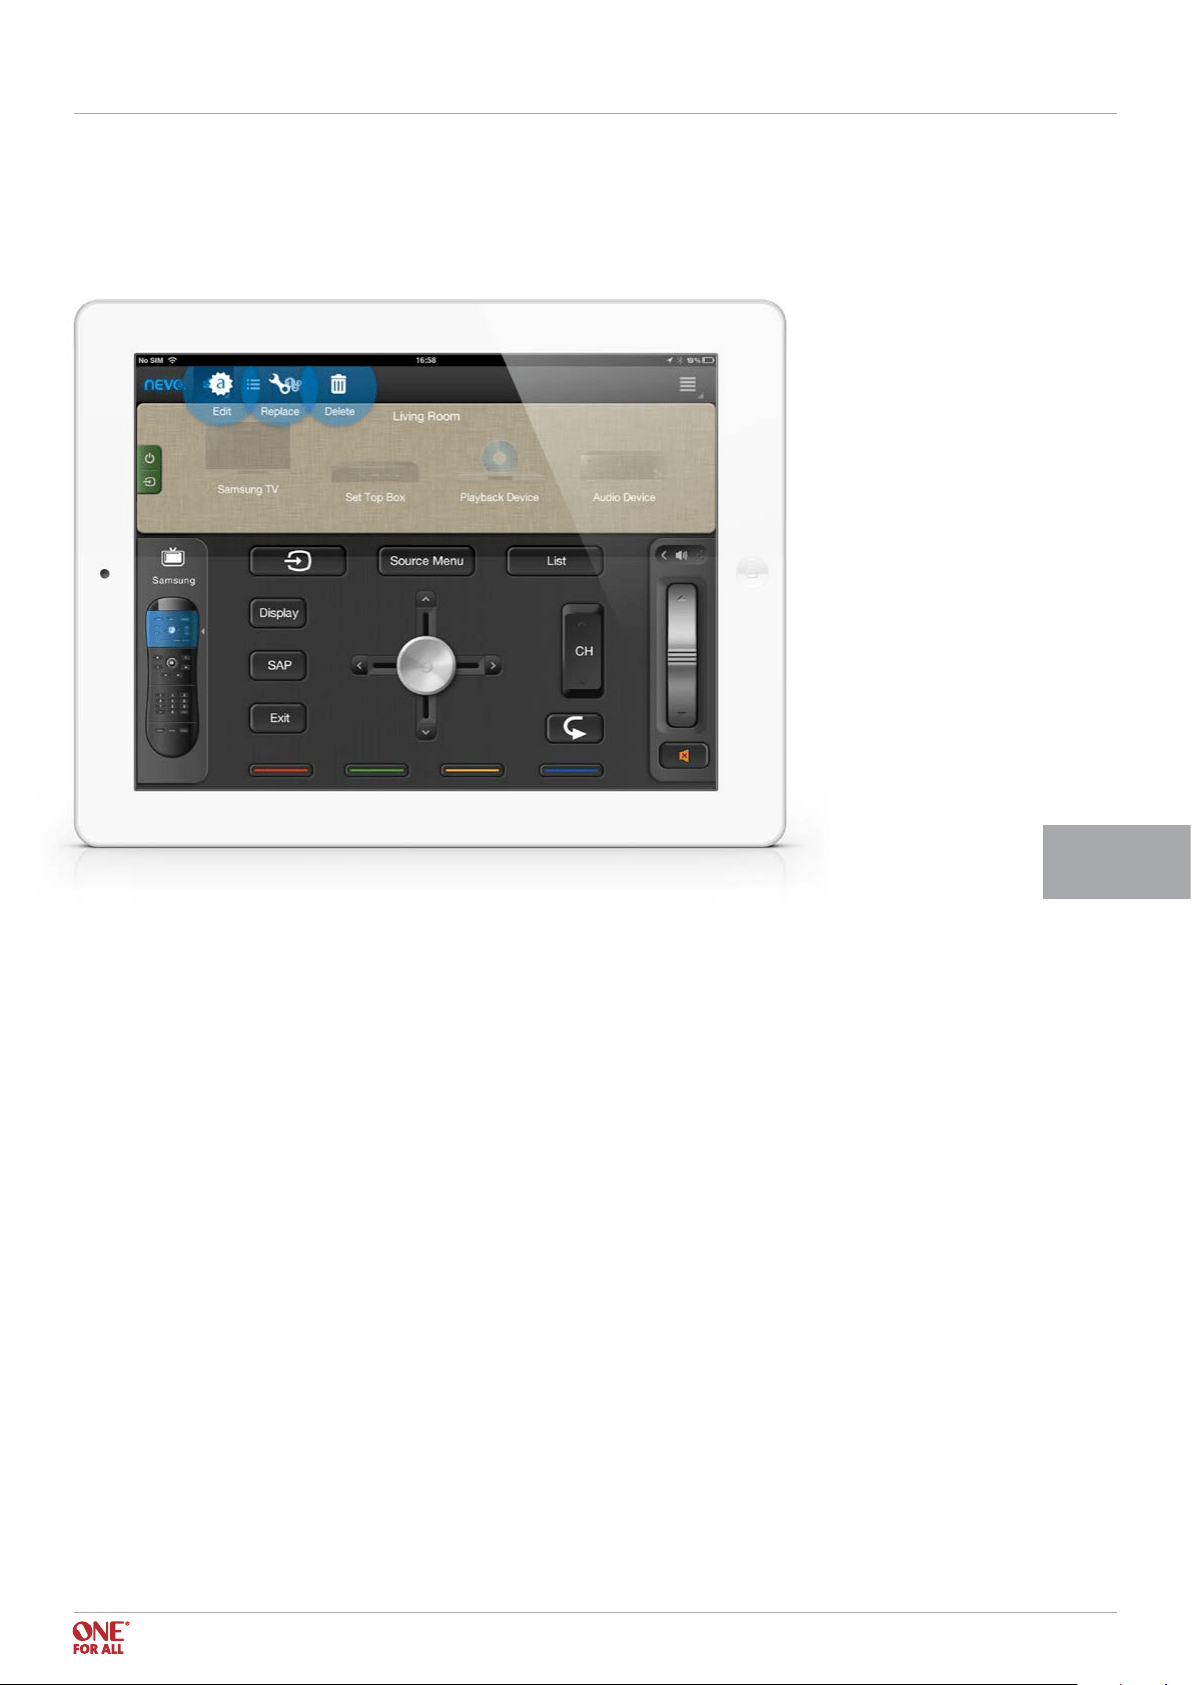
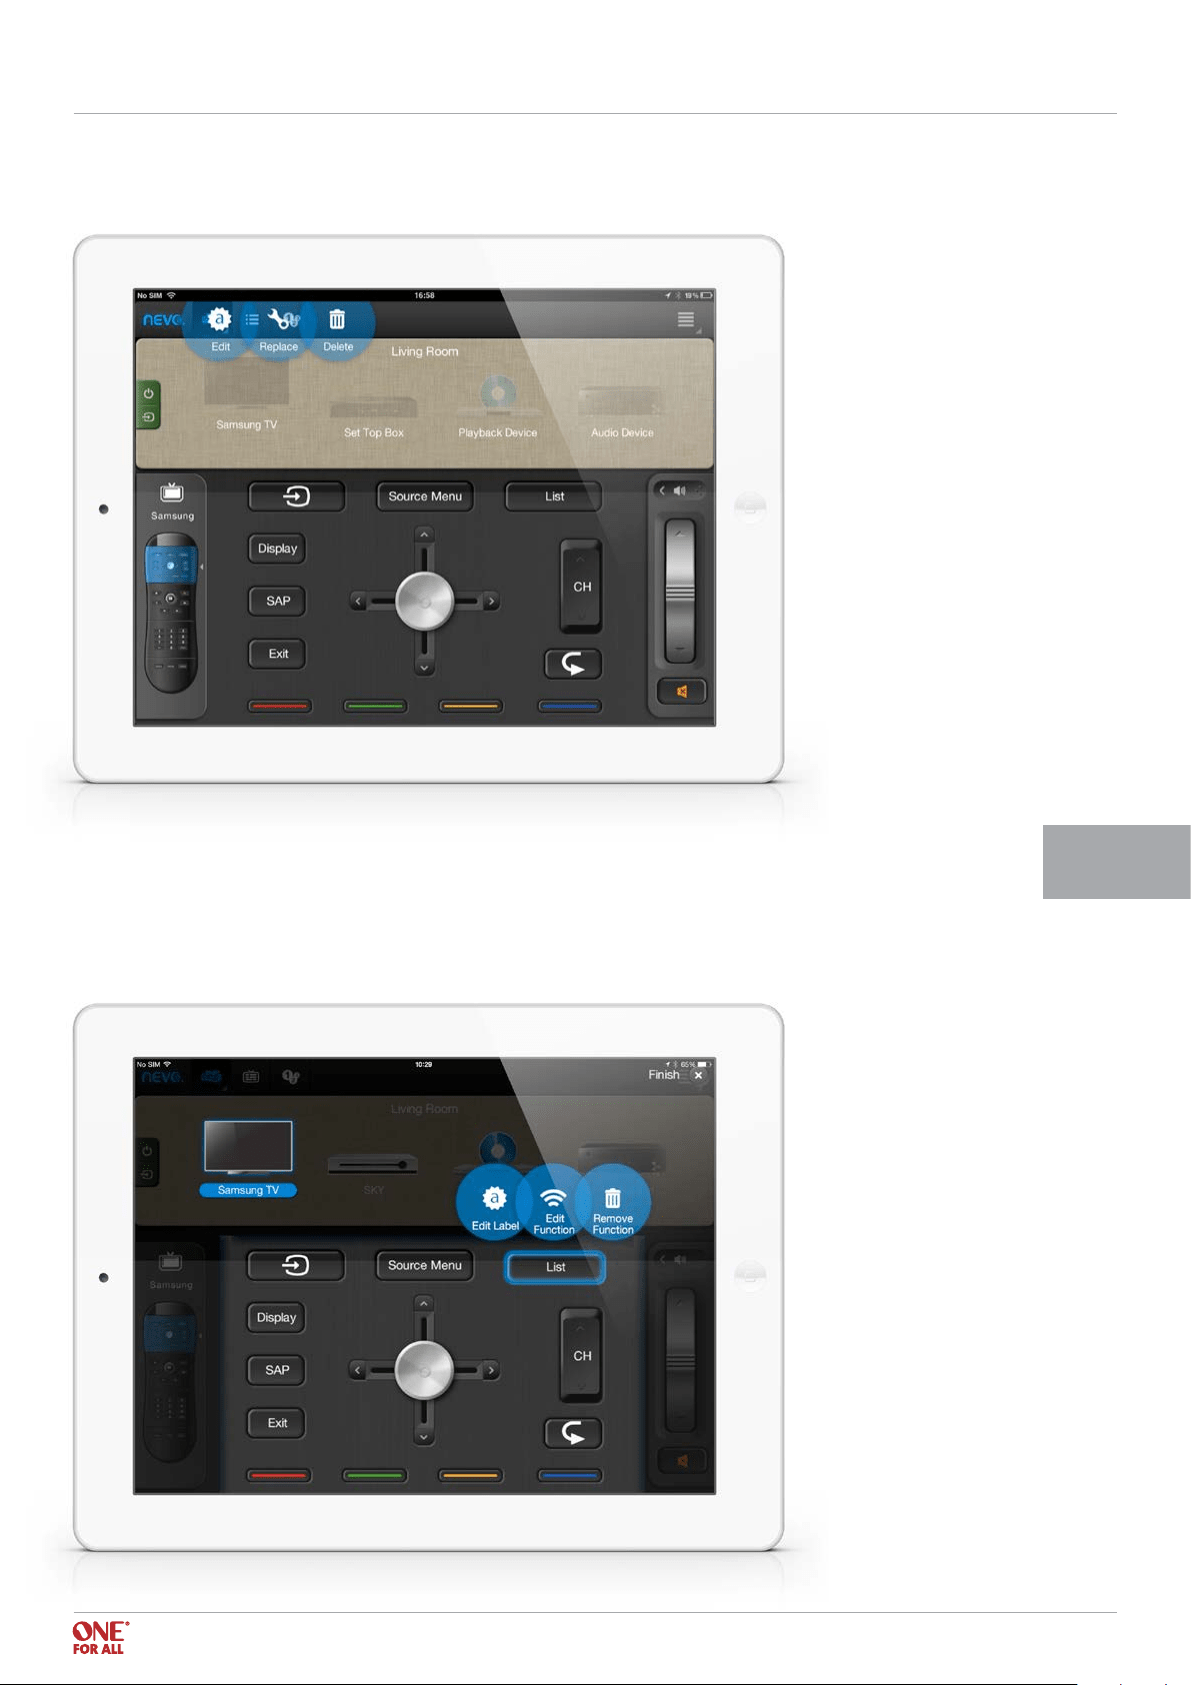
Note that it is possible to edit the label of keys, using an icon or text. It is also possible to edit
the function by selecting from a drop down list of functions available for the current ID.
Note that not all functions within an ID are currently available, only those that are pre
dened in the key table in the chip. This should include all general functions;
however some unusual functions may be excluded.
Editing Keys URC 8810
< Back to content
21
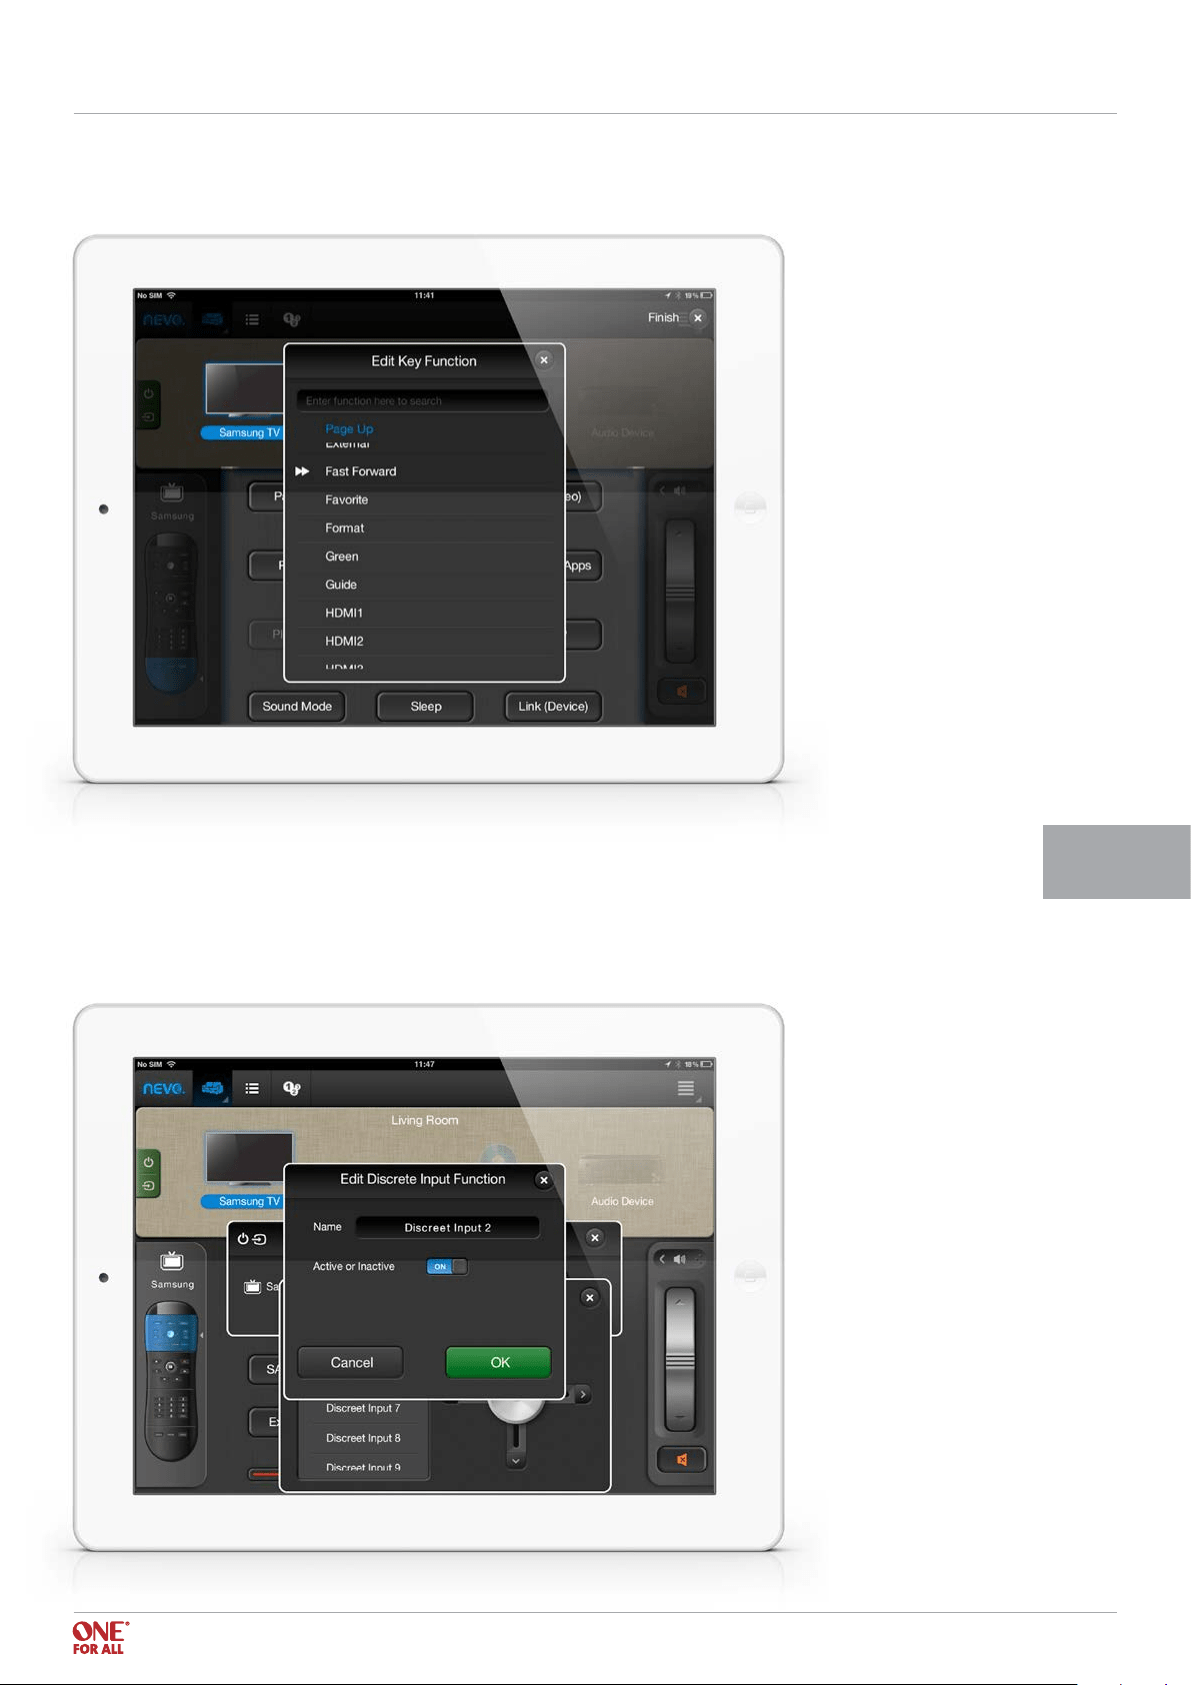
It is also possible to edit the names of the discreet inputs. This can be especially useful as you can
change the inputs to the name of the devices they have attached to the input, for example instead of
HDMI 1 it could be labeled Blu-ray play. This is also accomplished by holding down the name of the
discreet input. Also, irrelevant inputs (which either do not exist on the current device or have nothing
attached) can be made inactive and will be pushed to the bottom of the list.
Editing Keys URC 8810