Loading ...
Loading ...
Loading ...
13
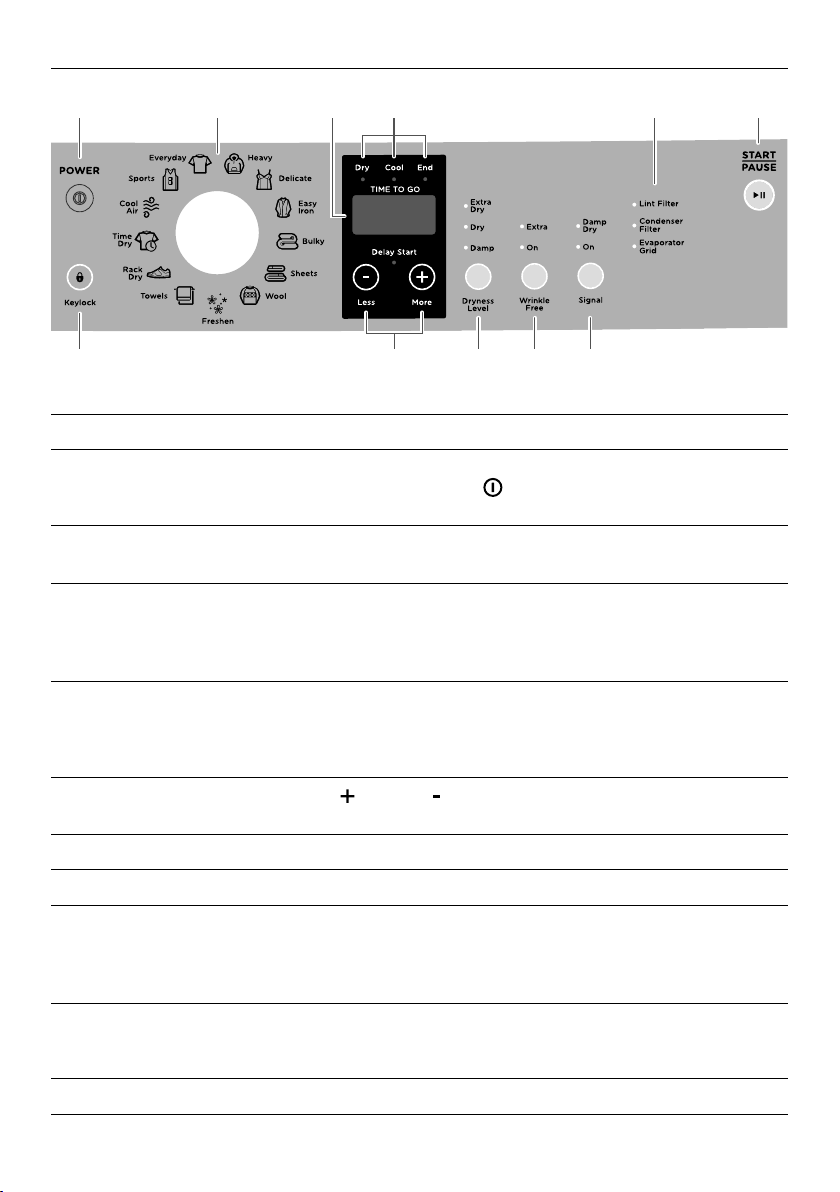
CONTROL PANEL
2
1
9
!1
76
4
1
POWER Press to turn the dryer on/off.
2
Keylock Touch and hold for 3 seconds to disable all buttons on the
displaypanel, except ‘POWER’ button. This prevents accidental
buttonpresses.
3
SmartTouch™
control dial
Rotate to select your desired drying cycle.
z
The icon illuminates to indicate the selected drying cycle.
4
Digital display
screen
Shows the following:
z
How long the drying cycle has to go.
z
Delayed start time of the drying cycle.
z
Notifications if an error is detected or a warning is necessary.
5
Progress lights The progress lights indicate what part of the cycle the dryer is
currently on (‘Dry’, ‘Cool’ or ‘End’). All three lights are on at the
beginning of the cycle. The light for the current part of the cycle
flashes, and each one goes out when that part of the cycle is complete.
6
Delay Start
Touch ‘More’
or ‘Less’ to increase or decrease the delay start
time for drying cycles.
7
Dryness Level Allows you to select the level of dryness for your load.
8
Wrinkle Free Allows you to select a wrinkle free option for your cycle.
9
Signal This button has two functions:
z
Signal On: Alerts you that the dryer has finished.
z
Signal Damp Dry: Alerts you to remove items once your load
reaches the damp/dry stage.
!0
Lint filter
Condenser filter
Evaporator grid
The lights will flash when the machine is switched on as a reminder
toclean the lint filter, the condenser filter or the evaporator grid.
See ‘Caring for your dryer’ for details.
!1
START/PAUSE Touch to start or pause the selected drying cycle.
3
!0
8
5
Loading ...
Loading ...
Loading ...