Loading ...
Loading ...
Loading ...
setting up _09
01 SETTING UP
Spacer
Spacer
Spacer
Spacer
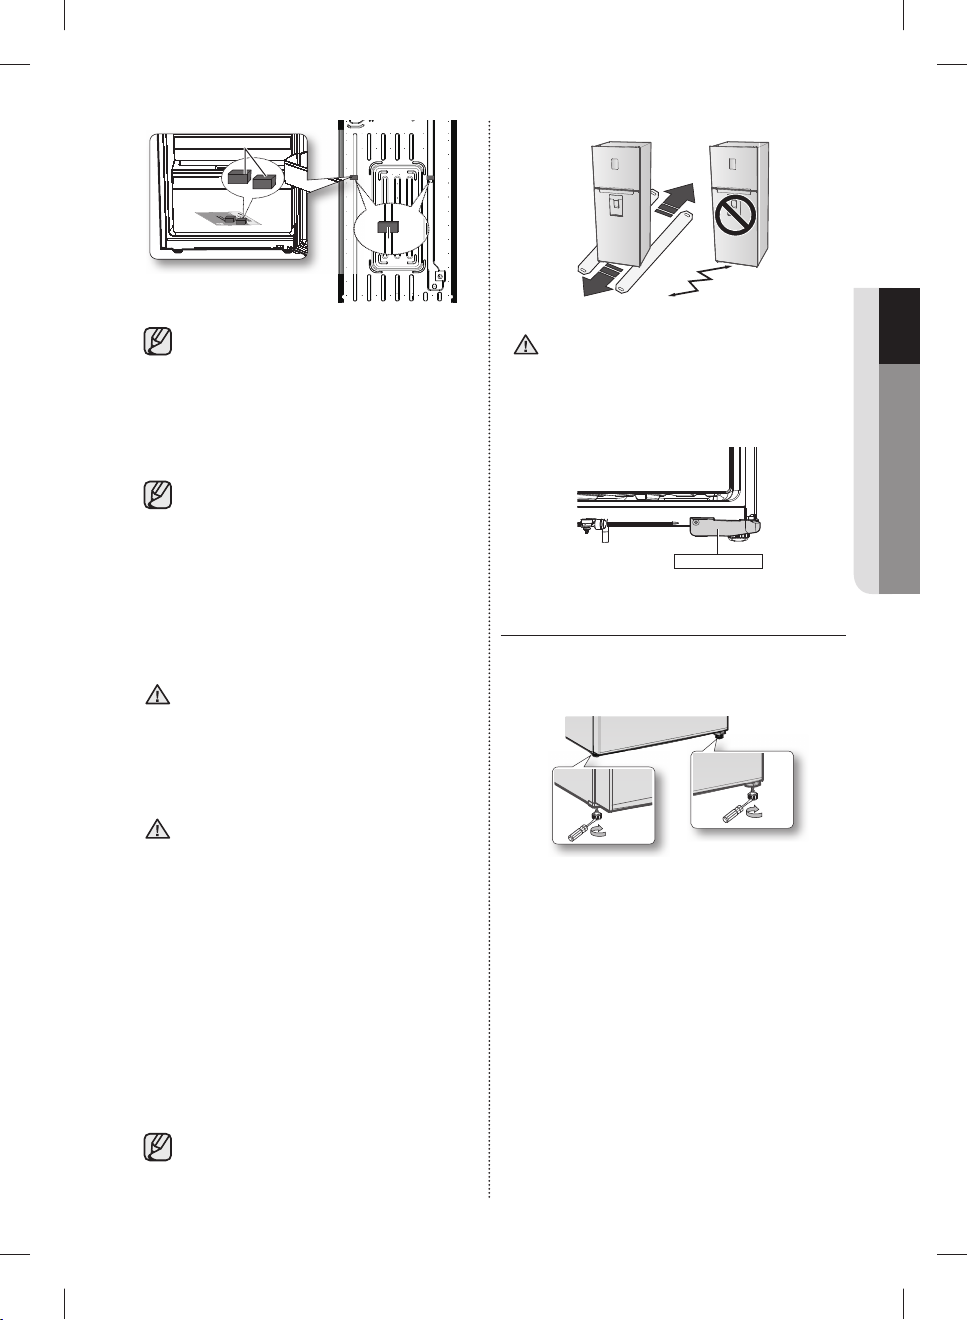
Remove paper on spacer and then attach
two spacers (Gray block) on the back
side of refrigerator for better performance.
Make sure two spacers fi x like below
image when you install the refrigerator. It
is improving the refrigerator performance.
(Optional)
Allow suffi cient space to the right, left,
back and top for air circulation.
This will help reduce power consumption
and keep your energy bills lower.
Do not install the refrigerator where the
temperature will go below 10 °C.
Please ensure that appliance can be
moved freely in the event of maintenance
& service.
When installing, servicing, or cleaning
behind the refrigerator, be sure to pull the
unit straight out and push back in straight
after fi nishing. Also, make sure your fl oor
supports the full-load refrigerator.
Otherwise, it may cause fl oor damage.
Please tie up the extra length of the power
cord at the back of the refrigerator so as
not to be touched on the fl oor preventing
the power cord from being crushed by the
rollers upon relocation.
FLOORING
For proper installation, this refrigerator must be
placed on a level surface of hard material that
has the same height as the rest of the fl ooring.
This surface should be strong enough to support
a fully loaded refrigerator (or approximately 100
kg). To protect the fl oor fi nish, cut a large section
of the cardboard carton and place it under the
refrigerator where you are working.
Pulling or pushing the refrigerator may
damage the fl oor.
Moving the refrigerator after installation
may damage the fl oor.
CAUTION
CAUTION
Be careful : do not damage the cover leg
while moving the refrigerator. The cover
leg protects the wire and hose . If it is
damaged, the refrigerator may also be
damaged. (Optional)
Cover Leg
Cover Leg
LEVELLING THE REFRIGERATOR
If the front of the appliance is slightly higher than
the rear, the door can be opened and closed more
easily.
< Case2 >
< Case2 >
< Case1 >
< Case1 >
Case 1) The appliance tilts down to the left.
Turn the left adjusting leg in the direction of the •
arrow until the appliance is level.
Case 2) The appliance tilts down to the right.
Turn the right adjusting leg in the direction of •
the arrow until the appliance is level.
CAUTION
DA68-02832A(EN)-0.4.indd 09DA68-02832A(EN)-0.4.indd 09 2013.1.30 2:16:14 PM2013.1.30 2:16:14 PM
Loading ...
Loading ...
Loading ...