Loading ...
Loading ...
Loading ...
150
Setting Menu
Accessories
Appendix
Before Use
Index
Basic Guide
Advanced Guide
Camera Basics
Auto Mode /
Hybrid Auto Mode
Other Shooting Modes
P Mode
Tv, Av, M, and C Mode
Playback Mode
Wi-Fi Functions
7
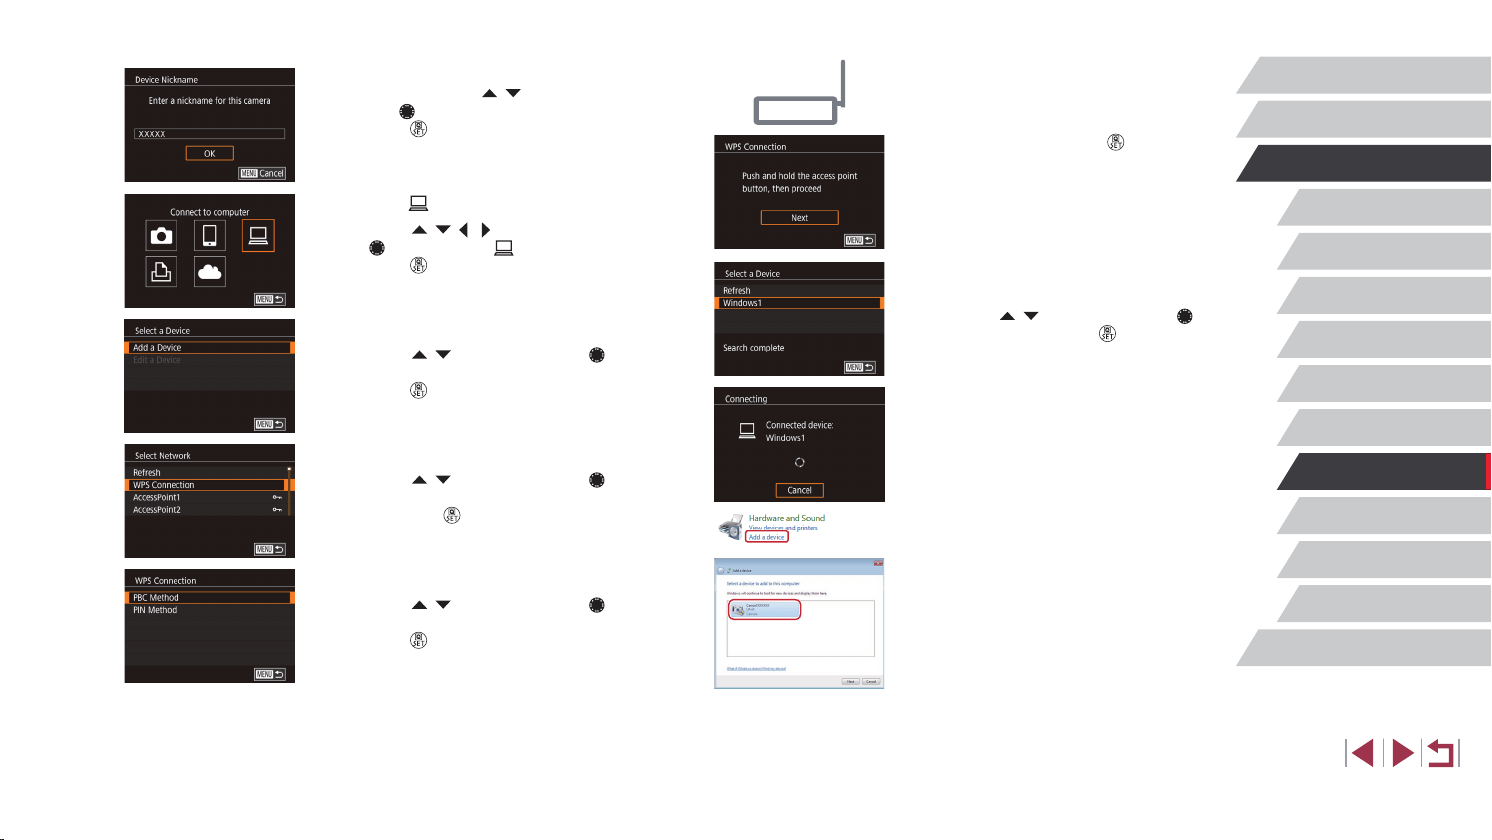
Establish the connection.
z On the access point, hold down the WPS
connection button for a few seconds.
z On the camera, press the [
] button to
go to the next step.
z The camera connects to the access point
and lists devices connected to it on the
[Select a Device] screen.
8
Choose the target device.
z Choose the target device name (either
press the [ ][ ] buttons or turn the [ ]
dial), and then press the [ ] button.
9
Install a driver (rst Windows
connection only).
z When this screen is displayed on the
camera, click the Start menu on the
computer, click [Control Panel], and then
click [Add a device].
z Double-click the connected camera icon.
z
Driver installation will begin.
z After driver installation is complete, and
the camera and computer connection
is enabled, the AutoPlay screen will be
displayed. Nothing will be displayed on
the camera screen.
z If the [Device Nickname] screen is
displayed, press the [ ][ ] buttons or
turn the [ ] dial to choose [OK], and then
press the [ ] button.
3
Choose [ ].
z Press the [ ][ ][ ][ ] buttons or turn
the [ ] dial to choose [ ], and then
press the [ ] button.
4
Choose [Add a Device].
z Press the [ ][ ] buttons or turn the [ ]
dial to choose [Add a Device], and then
press the [ ] button.
5
Choose [WPS Connection].
z Press the [ ][ ] buttons or turn the [ ]
dial to choose [WPS Connection], and
then press the [ ] button.
6
Choose [PBC Method].
z Press the [ ][ ] buttons or turn the [ ]
dial to choose [PBC Method], and then
press the [ ] button.
Loading ...
Loading ...
Loading ...