Loading ...
Loading ...
Loading ...
En-5
AIR CONDITIONER Wall Mounted Type
OPERATING MANUAL
Remote Controller Overview and Operations (continued)
7 Signal transmitter
Aim at the signal receiver of the indoor unit properly.
• Signal transmit indicator on the remote controller display shows
that the signal from the remote controller is being transmitted.
• Operating range is approximately 7 m.
• You will hear a beep if the transmitted signal has been sent properly.
If there is no beep, press the button on the remote controller again.
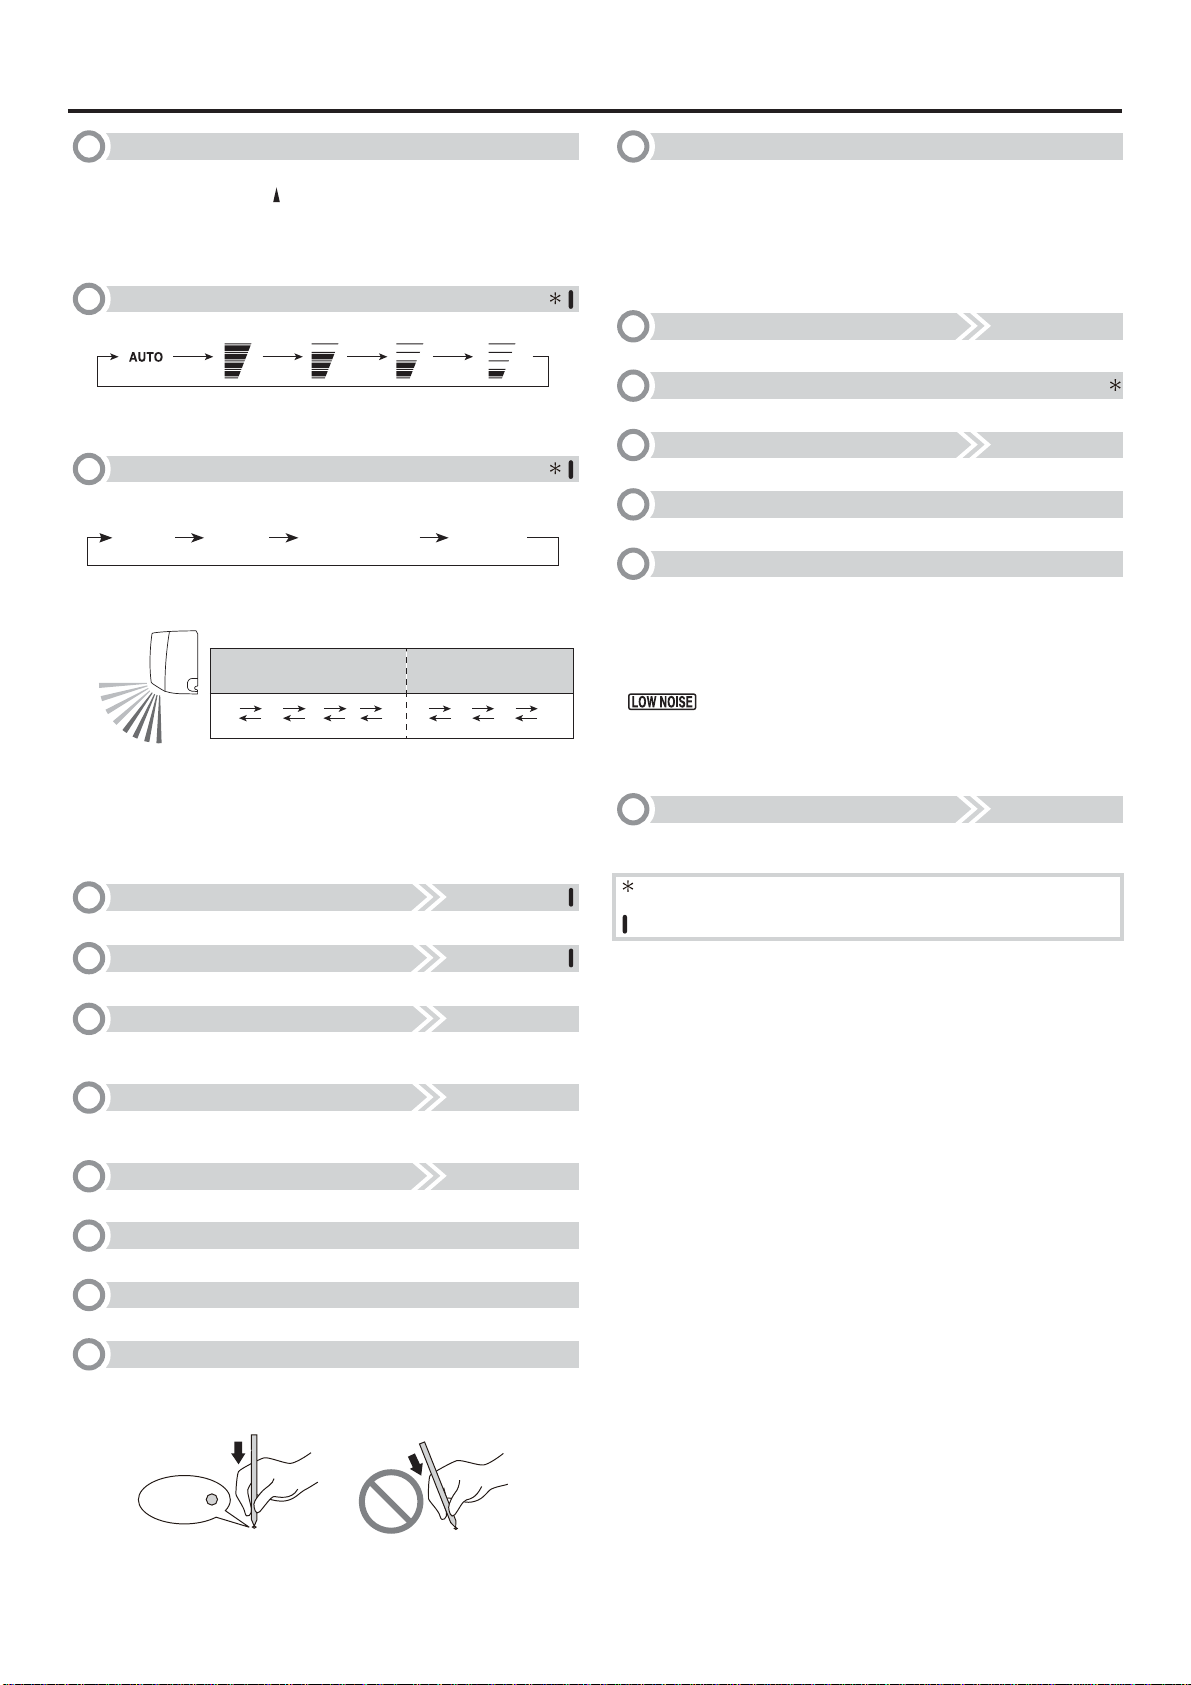
8 FAN button
Controls the fan speed.
(Auto) (High) (Med) (Low) (Quiet)
• When AUTO is selected, the fan speed is automatically adjusted
according to the operation mode.
9 SWING button
Sets the automatic swing operation. Each time the SWING button is
pressed, the operation will change.
Up/down Left/right Up/down/left/right Stop swing
• The Left/right swing operation will follow the direction as shown on
page 3 "Horizontal airÀ ow direction louver"
• The Up/down Swing operation range will differ by mode as follows:
COOL, DRY, or FAN
mode
FAN mode
12
3
4
87
6
5
5
1
2
3
4
5
6
7
8
Notes:
• SWING operation may stop temporarily when the indoor unit fan is
rotating at very low speed or is stopped.
• In FAN mode, the Up/down swing operation range of 1
l
5 or 6
l
8 is decided according to the airÀ ow direction previously set before
starting the swing operation.
See page 3
10 Vertical SET button
Adjusts the vertical airÀ ow direction.
See page 3
11 Horizontal SET button
Adjusts the horizontal airÀ ow direction.
See page 7
12
WEEKLY timer button
Activates the WEEKLY timer for a maximum of 4 on or off programs
per day, each day of the week.
See page 6
13
SLEEP timer button
Activates the SLEEP timer that helps you to fall asleep comfortably
with gradual temperature control.
See page 6
14
ON/OFF timer button
Activates the ON/OFF timer.
15
NEXT button
Used for adjusting the timer setting.
16
BACK button
Used for adjusting the timer setting.
17 RESET button
When you press the RESET button, press it gently by using the tip of
a ballpoint pen or other small object in correct direction as shown in
this ¿ gure.
RESET
18
TEST RUN button
Only used for the initial test in the unit installation.
Do not press this button under normal use because it will cause
incorrect operation.
• During the test run, the OPERATION indicator and the TIMER
indicator blink simultaneously.
• To quit the test run that is started unintentionally, you need to turn
off the air conditioner by pressing the START/STOP button.
See page 2
19 CLOCK ADJUST button
Used for adjusting the clock.
20 SEND button
Used for sending the timer/clock setting.
See page 6
21 TIMER SETTING button
Used to enter the timer setting mode.
22 SELECT button
Used for adjusting the clock or timer.
23
OUTDOOR UNIT LOW NOISE button
Starts or stops OUTDOOR UNIT LOW NOISE operation that lowers
noise generated from the outdoor unit by cutting down the rotation
number of the compressor, and suppressing the fan speed.
Once the operation is set, the setting is preserved until you press this
button again to stop the operation, even if the indoor unit operation is
stopped.
on the remote controller display shows that the unit is in
OUTDOOR UNIT LOW NOISE mode.
Notes:
• This operation cannot be performed simultaneously with FAN, DRY
and POWERFUL operation modes.
See page 8
24
SENSOR button (ENERGY SAVING PROGRAM)
Activates or deactivates the energy saving program.
* The Energy Saving program is ON at the time of purchase.
: The setting must be done while the setting screen is displayed for
each function.
: The button is controllable only when the air conditioner is on.
9320455088_OM_EN.indd 5 3/23/2017 1:55:04 PM
Loading ...
Loading ...
Loading ...