Loading ...
Loading ...
Loading ...
Consumer SupportTroubleshooting TipsOperating Instructions
Safety Instructions
Installation Instructions
Care and cleaning of the refrigerator.
Cleaning the Outside
The dispenser drip area
(on some models)
,
beneath the grille, should be wiped dry. Water
left in this area may leave deposits. Remove
the deposits by adding undiluted vinegar to
the well. Soak until the deposits disappear
or become loose enough to rinse away.
The dispenser cradle
(on some models).
Before cleaning, lock the dispenser by
pressing and holding the
LOCK CONTROL
pad for 3 seconds. Clean with warm
water and baking soda solution – about
a tablespoon (15 ml) of baking soda to
a quart (1 liter) of water. Rinse thoroughly
and wipe dry.
The door handles and trim.
Clean with
a cloth dampened with soapy water.
Dry with a soft cloth.
Keep the outside clean.
Wipe with a clean
cloth lightly dampened with kitchen
appliance wax or mild liquid dish detergent.
Dry and polish with a clean, soft cloth.
Do not wipe the refrigerator with a soiled dish
cloth or wet towel. These may leave a residue
that can erode the paint. Do not use scouring
pads, powdered cleaners, bleach or cleaners
containing bleach because these products can
scratch and weaken the paint finish.
Cleaning the Inside
To help prevent odors,
leave an open box
of baking soda in the fresh food and freezer
compartments.
Unplug the refrigerator before cleaning.
If this
is not practical, wring excess moisture out
of sponge or cloth when cleaning around
switches, lights or controls.
Use warm water and baking soda solution –
about a tablespoon (15 ml) of baking soda
to a quart (1 liter) of water. This both
cleans and neutralizes odors. Rinse and
wipe dry.
Use of any cleaning solution other than that
which is recommended, especially those that
contain petroleum distillates, can crack or
damage the interior of the refrigerator.
Avoid cleaning cold glass shelves with hot water
because the extreme temperature difference
may cause them to break. Handle glass shelves
carefully. Bumping tempered glass can cause
it to shatter.
Do not wash any plastic refrigerator parts in the
dishwasher.
Dispenser drip area.
ge.com
Lift the bin, then pull it
forward until the bin stops.
Lift and pull forward again
to remove the bin.
Models without a shelf
above the ice bin
To remove:
Models with a shelf
above the ice bin
To remove:
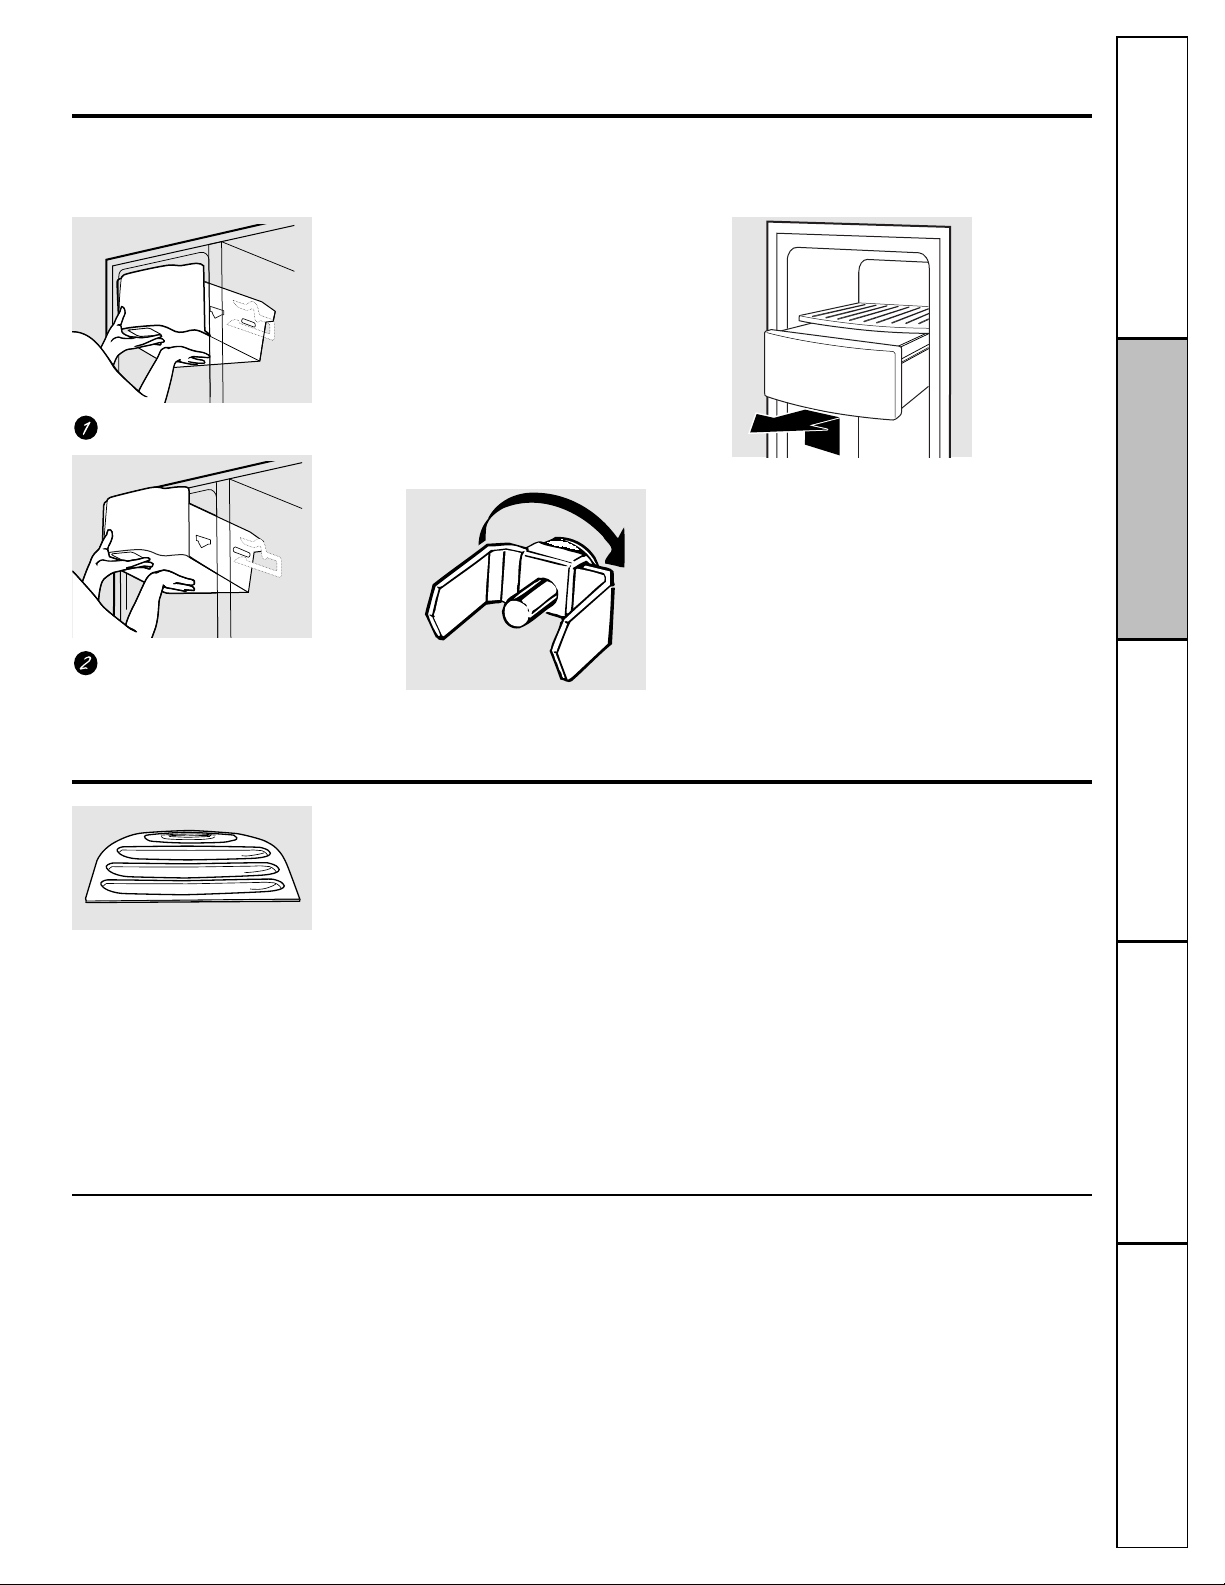
Removing and Replacing the Ice
Storage Bin on Dispenser Models
There are two types of ice storage bins on
dispenser models.
One has a shelf above
the bin, the other does not.
Always set the icemaker power switch
to the
OFF
position before removing
the ice bin.
When replacing either type of ice bin:
Always be sure to press it firmly into place.
If it does not go all the way back, remove it
and rotate the drive mechanism 1/4 turn.
Then push the bin back again.
Pull the bin straight out, then lift past
the stop position.
Rotate
Drive
Mechanism
13
Loading ...
Loading ...
Loading ...