Loading ...
Loading ...
Loading ...
29
• Ashieldedcablemustbeusedwhenconnectinga
peripheral to the serial ports.
Appendix A:
Collimating the Optics
Collimating is the process of adjusting the mirrors so they are
aligned with one another. Your telescope’s optics were aligned
at the factory, and should not need much adjustment unless
the telescope was handled roughly in transit. Accurate mirror
alignment is important to ensure the peak performance of your
telescope, so it should be checked regularly. Collimating is a
relatively easy process and can be done in daylight or darkness.
To check collimation, remove the eyepiece and look down the
focuser drawtube. You should see the secondary mirror cen-
tered in the drawtube, as well as the reflection of the primary
mirror centered in the secondary mirror, and the reflection of
the secondary mirror (and your eye) centered in the reflection
of the primary mirror, as in Figure 27a. If anything is off-center,
proceed with the following collimating procedure.
The Collimation Cap
Your StarBlast 6/6i comes with a “quick collimation cap”
(Figure 28). This is a simple cap that fits on the focuser draw-
tube like a dust cap, but has a tiny hole in the center and a
reflective inner surface. The collimation cap helps center your
eye over the focuser drawtube so that aligning the optical com-
ponents is easier to achieve. The reflective surface provides a
distinct visual reference that is helpful in centering the mirror
reflections. Figures 27b through 27e assume that you have
the collimation cap in place.
The Primary Mirror Center Mark
You’ll notice that the primary mirror of the StarBlast 6/6i has a
tiny ring (sticker) marking its center. This “center mark” allows
you to achieve a very precise collimation; you don’t have to
guess where the exact center of the mirror is.
NOTE: The center ring sticker need not ever be removed from
the primary mirror. Because it lies directly in the shadow of
the secondary mirror, its presence in no way adversely affects
the optical performance of the telescope or the image quality.
That might seem counterintuitive, but it’s true!
Preparing the Telescope for Collimating
Once you get the hang of collimating, you will be able to do it
quickly even in the dark. For now, it is best to collimate in day-
light, preferably in a brightly lit room and aimed at a white wall.
It is recommended that the telescope tube be oriented hori-
zontally. This will prevent any parts from the secondary mirror
from falling down onto the primary mirror and causing damage
if something comes loose while you are making adjustments.
Place a sheet of white paper inside the optical tube directly
opposite the focuser. The paper will provide a bright “back-
ground” when viewing into the focuser.
Aligning the Secondary Mirror
To adjust the secondary mirror collimation, you will need a
Phillips screwdriver and a 2mm hex key, or Allen wrench.
You will need to check, and adjust if necessary, four aspects of
the secondary mirror’s alignment:
1. The secondary mirror’s axial position
2. The secondary mirror’s radial position
3. The secondary mirror’s rotational position
4. The secondary mirror’s tilt
The first three will probably only need to be checked and (pos-
sibly) adjusted once. Thereafter, it is usually only the second-
ary mirror’s tilt that will need to be adjusted occasionally.
Adjusting the Secondary Mirror’s Axial Position
With the collimating cap in place, look through the hole in the
cap at the secondary (diagonal) mirror. Ignore the reflections
for the time being. The secondary mirror itself should be cen-
tered in the focuser drawtube. If it is off-center along the axis of
Figure 30. To center the secondary mirror radially in the
focuser drawtube, make adjustments to the two knurled
spider vane thumbnuts that are perpendicular to the focuser.
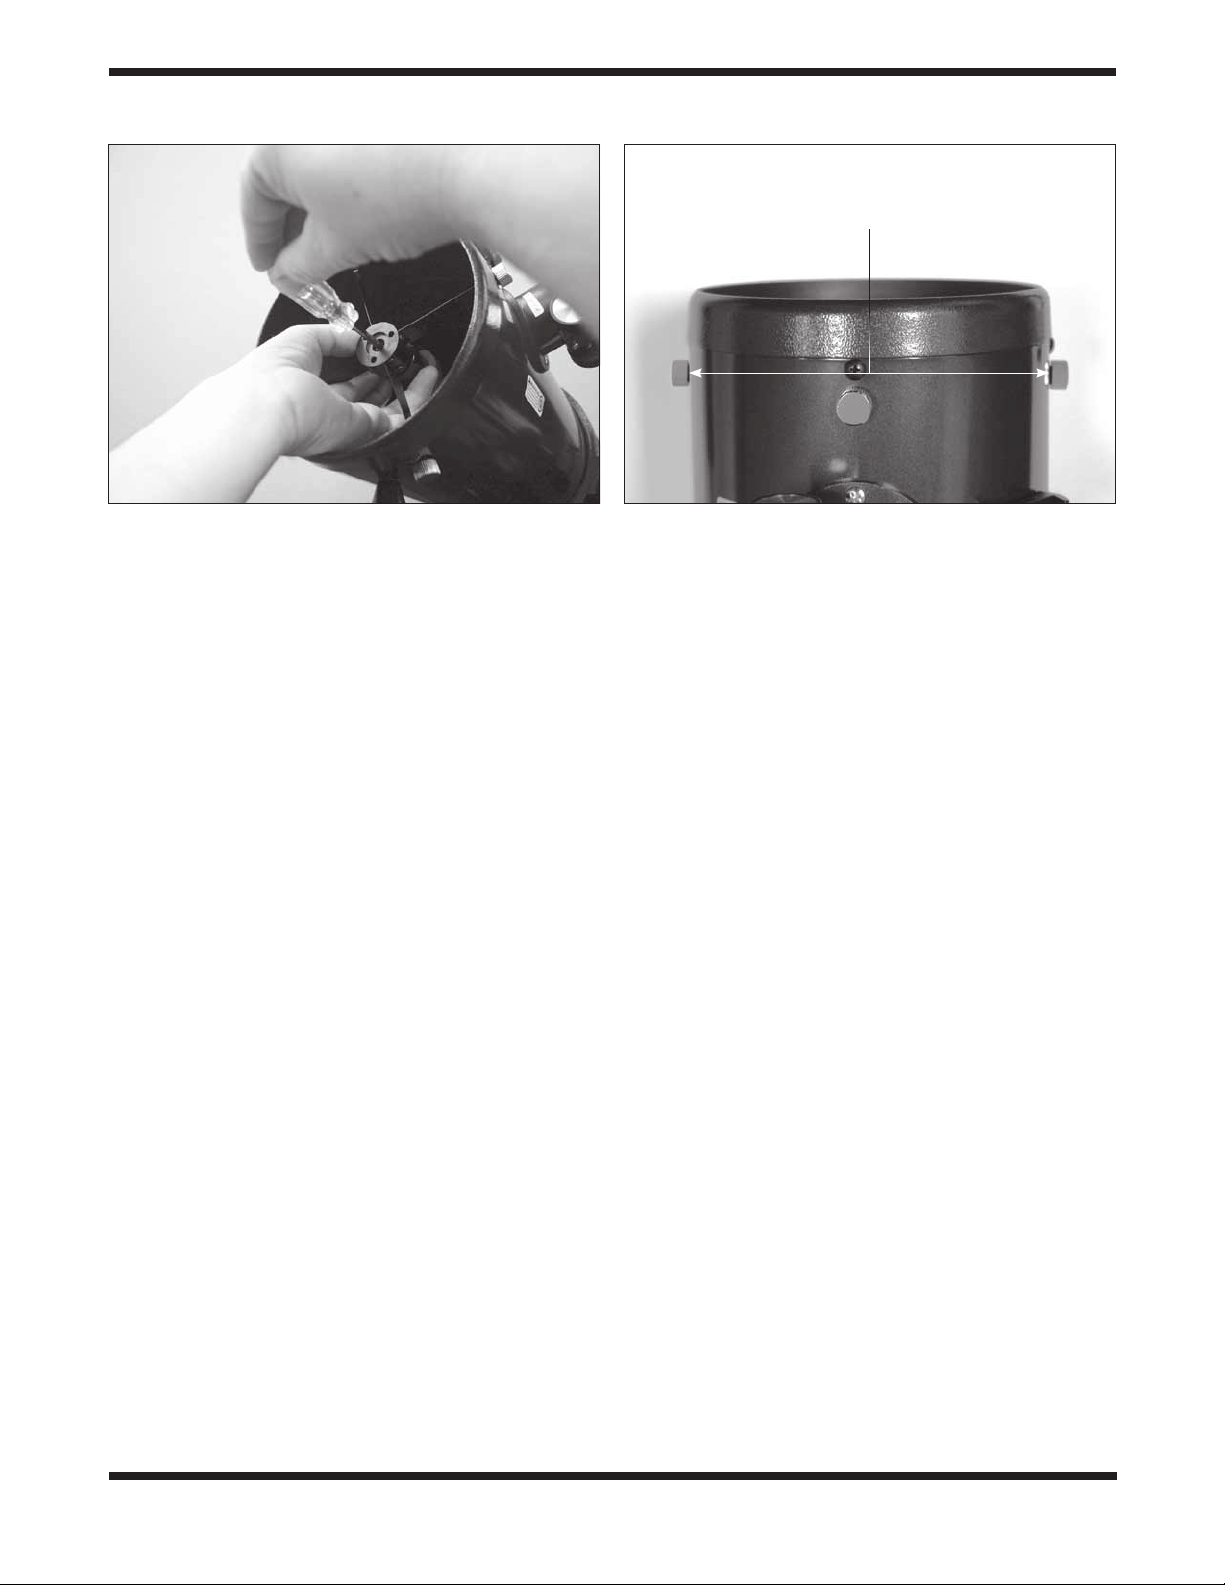
Figure 29. To center the secondary mirror under the
focuser, hold the secondary mirror holder in place with your
fingers while adjusting the center screw with a Phillips head
screwdriver. Do not touch the mirror’s surface.
Spider vane
thumb nuts
Loading ...
Loading ...
Loading ...