What you will need:
• iOS or Android Device
• Internet Router and Service
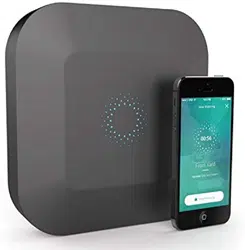
Blossom Controller
Blossom Bracket
Four Wall Screws
Ethernet Cord
Blossom Bridge
1
2
3
4
5
Wire Labels
6
1
2
3
4
5
What’s in the box?
Installation Sheet
1
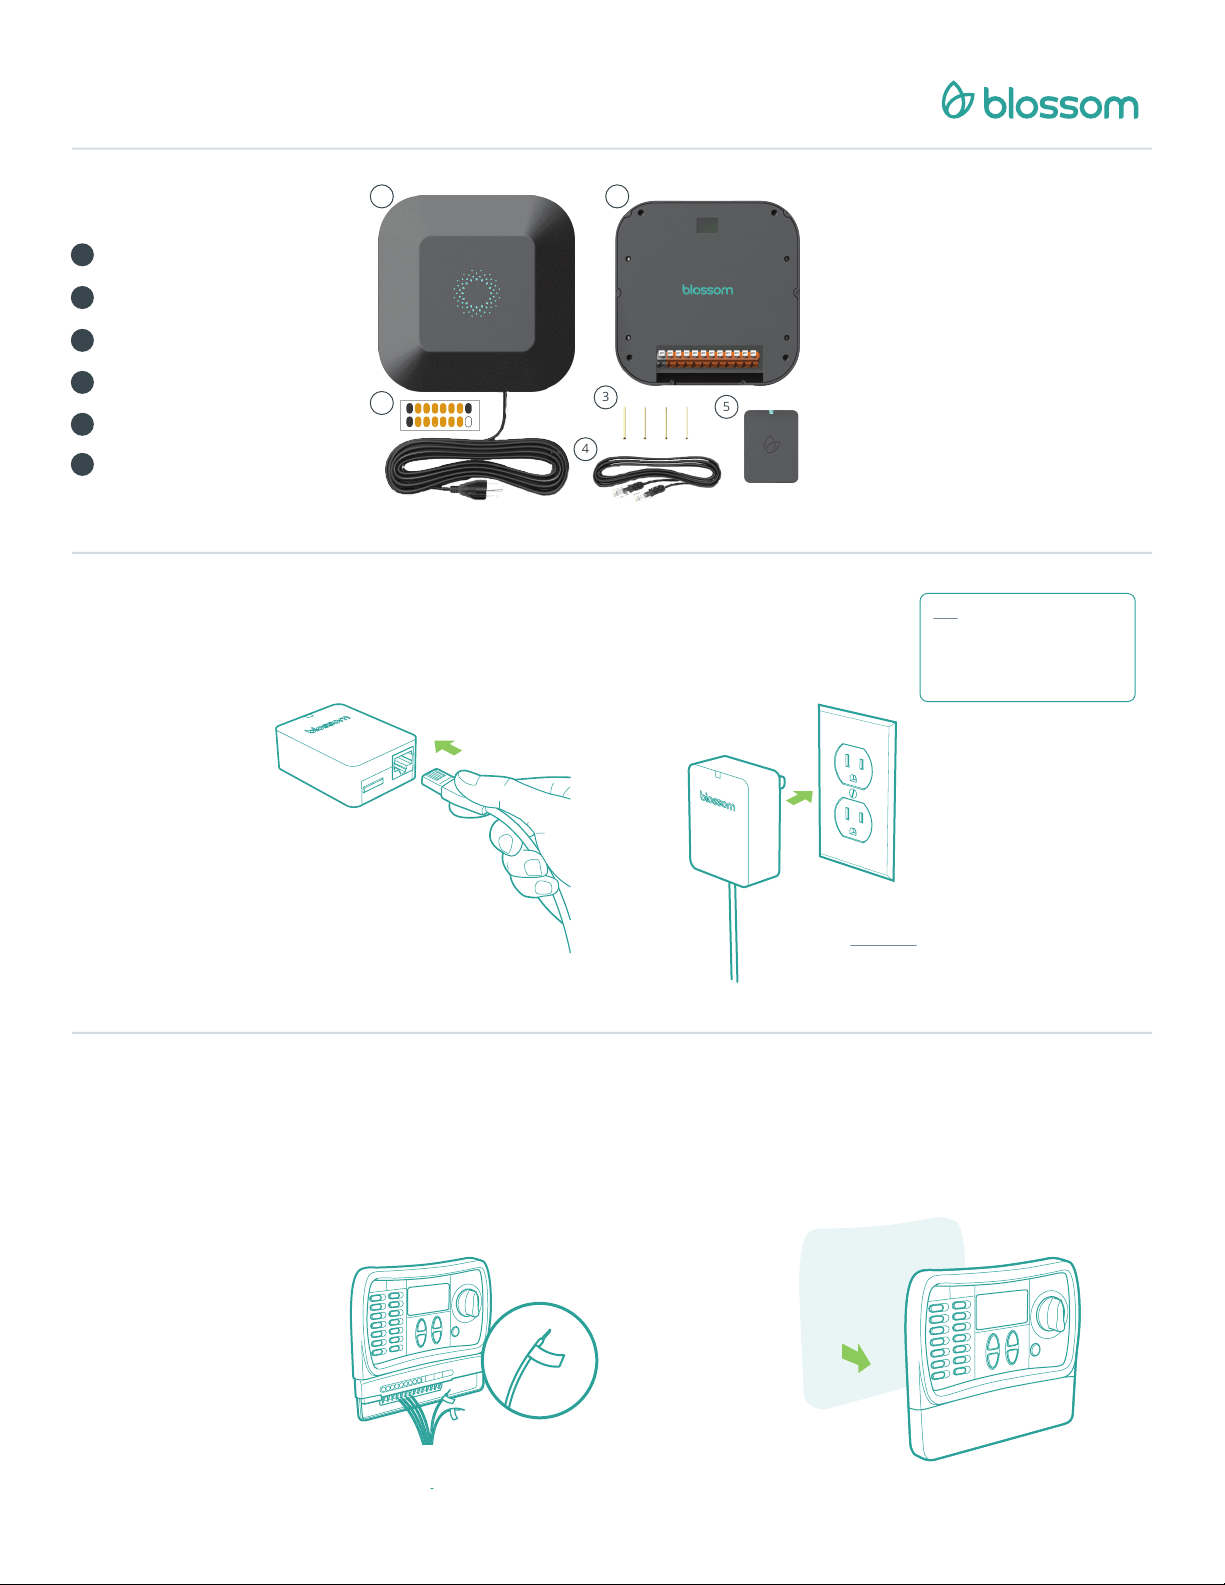
Connect
the Ethernet cable
Plug in
the Blossom Bridge
Power up by plugging the Blossom
Bridge directly into an electrical outlet
near your internet router.
Connect one end of the provided
Ethernet cable into the Blossom Bridge.
Connect the other end of the Ethernet cable into
an open port on your router.
Keep track of your common wire. We provide you
a black label for it. If you have a pump relay wire,
use the gray label for it.
If you want to keep
your zones in the
same valve numbers
you can use the
orange stickers.
Dismount your old watering controller from the
wall.
Note: Make sure the Bridge is
plugged in directly into a power
socket. Avoid any power
protection strip. You should see a
green light once you connect it.
2
Label the wires
of your old controller
Remove
your old controller
TM
C
COMMON
C
COMMON
1 2 3
4
5 6
6 5 4
3
2 1
7 8 9
10
11 12
12 11 10
9
8 7
P
PUMP
6
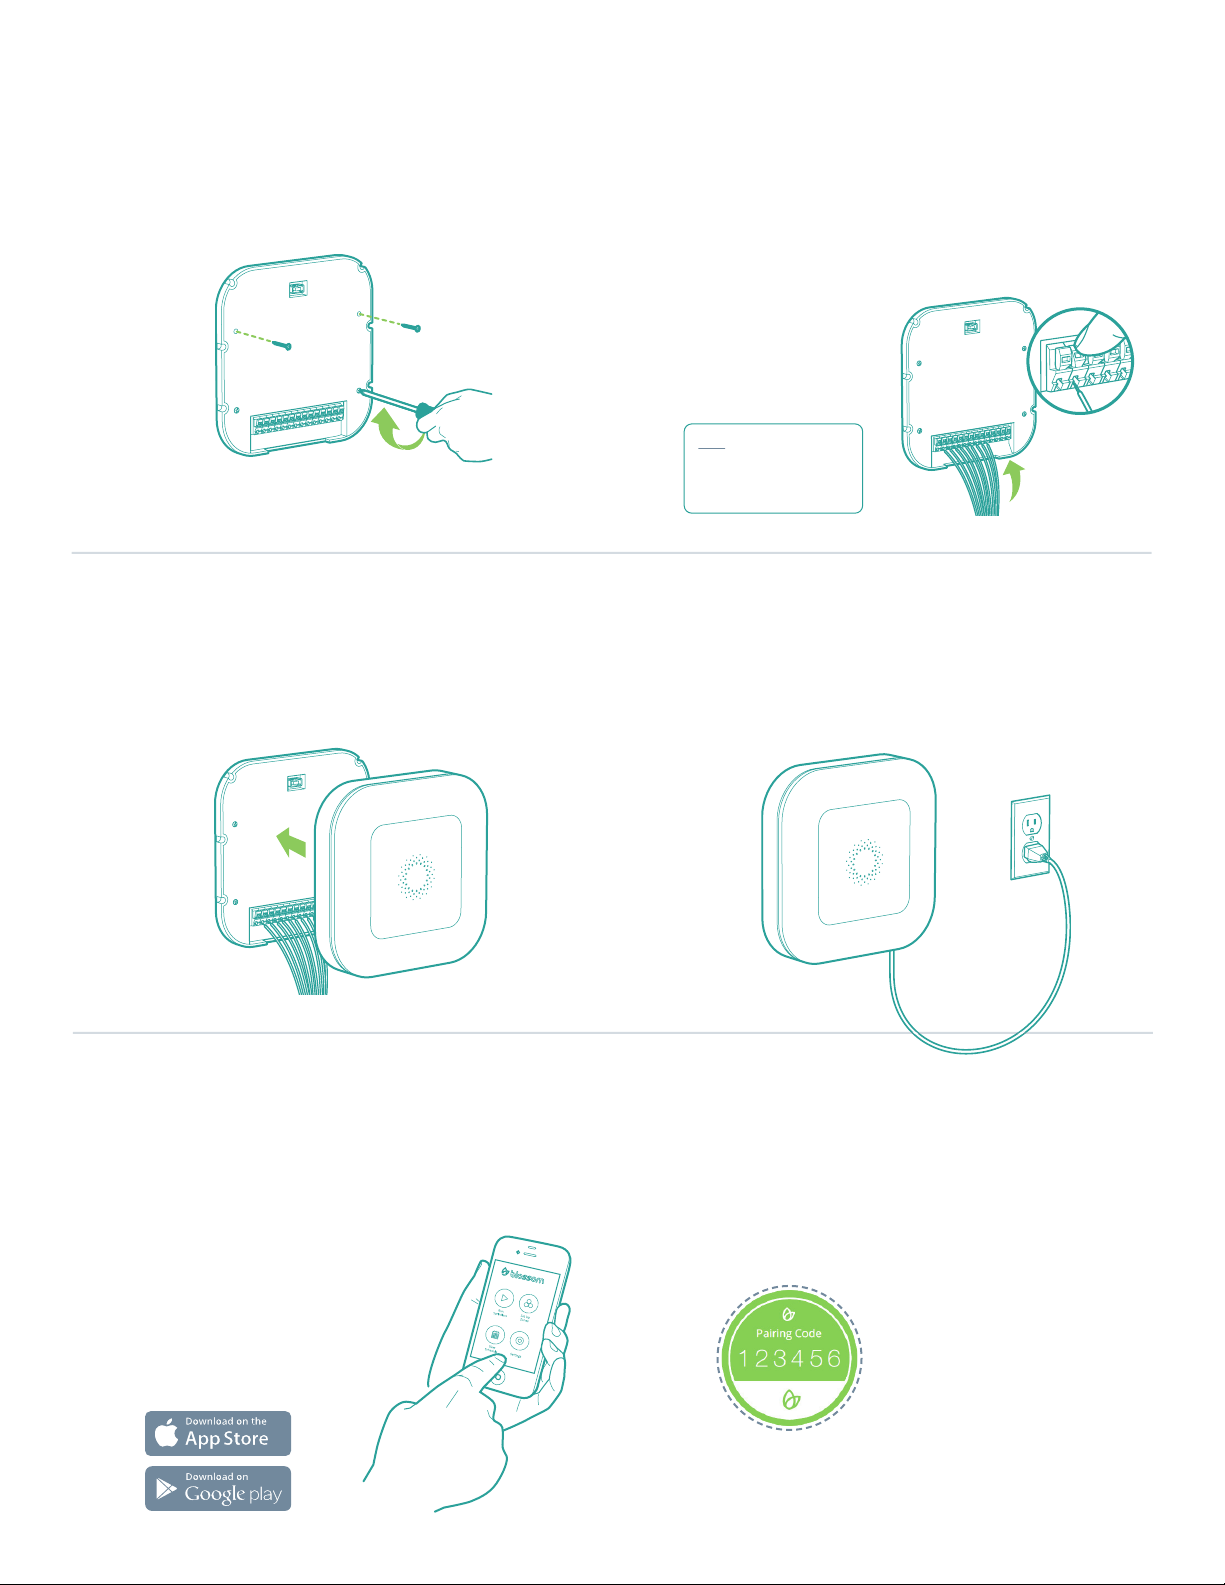
Mount the Blossom Bracket directly on the wall
with the four provided screws.
Locate the opening in the base of the Blossom
Bracket. Connect the labeled wires to their corre-
sponding colored ports. Connect the common wire
(black sticker) to the a black connector port.
If you have a
pump relay, use
the far right gray
port.
3
Install
the Blossom Bracket
Connect
the wires
Secure the Blossom Controller to the Blossom
Bracket on the wall.
Plug the Blossom Controller’s power cord into an
available electrical outlet.
4
Snap the Blossom Controller
on to the Blossom Bracket
Plug in
the Blossom Controller
Download the Blossom app on the Apple App Store,
Google Play Store or visit myblossom.com.
The app will guide you through
creating your account, syncing
your device and connecting
your Blossom to the Internet.
You will require a pairing code, which you can find
in page number 25 of your Quick Start Guide.
It looks like this one:
5
Get
the Blossom App
Pair
your Blossom Controller
Note: Discard your existing
weather sensors. You won’t
need them. Blossom uses
real-time weather data.