Loading ...
Loading ...
Loading ...
installing the range
INSTALLING THE ANTI-TIP DEVICE
WARNING
WARNING To reduce the risk of tipping, you must secure the
appliance by properly installing the Anti-Tip device packed with the appliance.
• Refer to the installation instructions supplied with the bracket.
• If the anti-tip device is not installed properly, an adult or child stepping on or sitting
on the range door could tip the range and suer serious injuries caused by spilled hot
liquids or by the range itself.
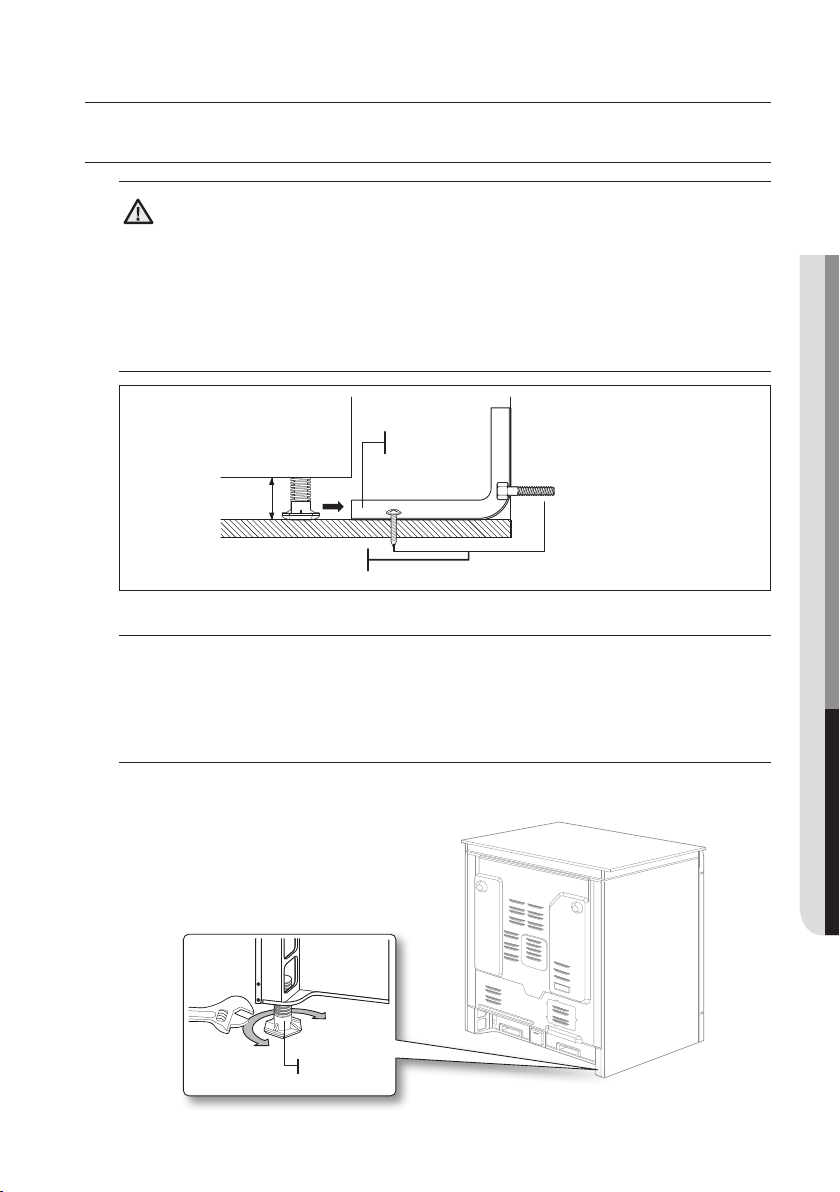
Anti-Tip
bracket
Screw must enter
wood or concrete
*approximately
21/32" (16.5 mm)
*NOTE: To install
the Anti-Tip bracket,
release the leveling leg.
A minimum clearance
of 21/32" (16.5 mm) is
required between the
range bottom and the
kitchen floor.
1. Install the bracket using the template
The Anti-Tip bracket is packaged with a template. The instructions include
information necessary to complete the installation. Read and follow the instructions
on the sheet (template) for range installation.
2. Level the range
Level the range by adjusting the leveling legs with a wrench.
Lower range
Raise range
Leveling leg
English - 17
03 INSTALLING THE RANGE
Loading ...
Loading ...
Loading ...