The permanent options are set by holding pressed the relative button for at least 3 seconds.
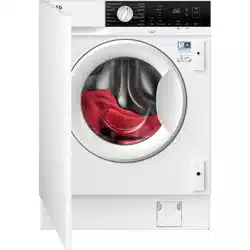
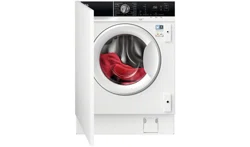
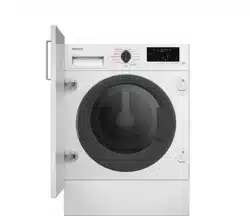
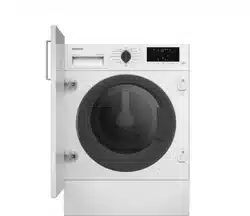
Programme dial
Display
Time Dry touch button
Auto Dry touch button
Start/Pause touch button
Delay Start touch button
Time Save touch button and permanent Child Lock option
Prewash touch button and permanent Extra Rinse option
Spin touch button
Temp. touch button
Mode touch button:
Mode - Wash
Mode - Dry
On/Off push button
Display
DIAL AND BUTTONS
Introduction
The options/functions are not available with all washing programmes. Check the compatibility between options/functions and washing programmes in the "Programme Chart". An option/function can exclude another one, in this case the appliance doesn't allow you to set incompatible options/ functions.
On/Off
Press this button for a few seconds to activate or deactivate the appliance. Two different tunes sound while switching the appliance on or off.
As the Stand-by function automatically deactivates the appliance after several minutes to reduce the energy consumption, you may need to activate the appliance again.
For more details, refer to Stand-by paragraph in Daily Use chapter.
Mode
Thanks to this button, a cycle can perform:
Only washing: Mode - Wash indicator is on (default mode).
Washing and drying: Mode - Wash and Mode - Dry indicators are on.
Only drying: Mode - Dry indicator is on.
Temp.
When you select a washing programme, the appliance automatically proposes a default temperature.
Tap on this button to change the water temperature.
The indicator of the set temperature comes on.
The indicator Cold corresponds to cold water
Spin
When you set a programme, the appliance automatically sets the maximum spin speed allowed, except for programme Denim. With this option you can decrease the default spin speed. Touch repeatedly this button to:
Decrease the spin speed. The display shows only the spin speeds available for the set programme.
Additional spin options No Spin . Set this option to deactivate all spin phases. The appliance performs the only draining phase of the selected washing programme. Set this option for very delicate fabrics. The rinses phase uses more water for some washing programmes
Activate the Rinse Hold option. The final spin is not performed. The water of the last rinse is not drained out to prevent the fabrics from creasing. The washing programme ends with water in the drum.
The indicator is on display. The door stays locked and the drum turns regularly to reduce creasing. You must drain the water to unlock the door.
If you touch the Start/Pause button, the appliance performs the spinning phase and drains the water.
The appliance empties the water out automatically after 18 hours approximately
Prewash
With this option you can add a prewash phase to a washing programme. The corresponding indicator above the touch button illuminates.
Use this option to add a pre-wash phase at 30 °C before the washing phase.
This option is recommended for heavily soiled laundry, especially if containing sand, dust, mud and other solid particles.
The options can increase the programme duration.
Permanent Extra Rinse
With this option you can permanently have an extra rinse when you set a new programme.
To activate/deactivate this option, hold the Prewash button pressed for 3 seconds until the indicator comes on/ goes off on the display.
When it is activated, the appliance will default to this option after you switch it off or change/reset the programme.
This option increases the programme duration.
Time Save
With this option you can reduce the programme duration depending on the load size and the degree of soiling.
When you set a washing programme, the display shows the default duration and dashes.
Touch Time Save button to reduce the programme duration according to your needs. The display shows the new programme duration and a number of dashes will decrease accordingly:
suitable for a full load of normally soiled garments.
a quick cycle for a full load of lightly soiled garments.
very quick cycle for a smaller lightly soiled load (max. half load recommended).
the shortest cycle to freshen up a small amount of laundry.
The Time Save is available only with the programmes in the table.
Time Save with steam programmes
When setting a steam programme, this button allows to chose three steam levels and the programme duration is reduced accordingly:
: maximum.
: medium.
: minimum.
Child Lock
With this option you can prevent children from playing with the control panel.
To activate/deactivate this option, hold the Time Save button pressed until the indicator comes on/goes off on the display.
When it is activated, the appliance will default to this option after you switch it off or change/reset the programme. If you press any button, the indicator blinks to indicate that the buttons are disabled.
Time Dry
Touch this button to set the time that suits the fabrics you have to dry (refer to "Timed drying" table). The display shows the set value.
Each time you touch this button the time value increases by 5 minutes.
You cannot set all time values for different types of fabrics.
Auto Dry
Touch this button to set one the automatic dryness levels proposed by the appliance.
On the display the relevant dryness indicator goes on:
Iron dry: laundry to be ironed.
Cupboard dry: laundry to be put in store.
Extra dry: laundry to be fully dried.
You can not set all automatic levels for each type of fabrics.
Delay Start
With this option you can delay the start of a programme to a more convenient time.
Touch the button repeatedly to set the required delay. The time increases in steps of 1 hour up to 20 hours.
The corresponding indicator above the touch button illuminates.
The display shows the selected delay time. After touching the Start/Pause button, the appliance begins the countdown and the door is locked.
Start/Pause
Touch the Start/Pause button to start, pause the appliance or interrupt a running programme.
SETTINGS
Acoustic signals
This appliance has different acoustic signals, that operate when:
You activate the appliance (special short tune).
You deactivate the appliance (special short tune).
You touch the buttons (click sound).
You make an invalid selection (3 short sounds).
The programme is completed (sequence of sounds for about 2 minutes).
The appliance has a malfunction (sequence of short sounds for about 5 minutes).
To activate/deactivate the acoustic signals when the programme is completed, touch the Mode and the Temp. buttons simultaneously for about 2 seconds. The display shows On or Off.
If you deactivate the acoustic signals, they continue to operate when the appliance has a malfunction.
BEFORE FIRST USE
Make sure that the electrical power is available and the water tap is open.
Pour 2 litres of water into the detergent compartment marked by . This action activates the drain system.
Pour a small quantity of detergent into the compartment marked by .
Set and start a programme for cotton at the highest temperature without any laundry in the drum. This removes all possible dirt from the drum and the tub.
DAILY USE - WASHING ONLY
WARNING! Refer to Safety chapters.
Activating the appliance
Connect the mains plug to the mains socket.
Open the water tap.
Press the On/Off button for a few seconds to activate the appliance.
A short tune sounds.
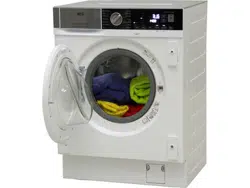
Loading the laundry
Open the appliance door.
Empty the pockets and unfold the items before you put them in the appliance.
Put the laundry in the drum, one item at a time. Do not put too much laundry in the drum.
Close the door firmly.
CAUTION! Make sure that no laundry gets caught between the seal and the door to avoid risk of water leakage and damage to the laundry.
Washing heavily oiled, greasy stains could cause damage to rubber parts of the washing machine.
Filling the detergent and additives
Always follow the instructions that you find on the packaging of the detergent products, but we recommend that you do not exceed the maximum indicated level ( ). This quantity will however guarantee the best washing results.
After a washing cycle, if necessary, remove any detergent residue from the detergent dispenser.
Check the position of the detergent flap
Pull out the detergent dispenser until it stops.
2. Press the lever down to remove the dispenser.
3. To use powder detergent, turn the flap up.
4. To use liquid detergent, turn the flap down.
With the flap in the position DOWN:
Do not use gelatinous or thick liquid detergents.
Do not exceed to liquid detergent dose indicated on the flap.
Do not set the prewash phase.
Do not set the delay start function.
5. Measure out the detergent and the fabric conditioner.
6. Carefully close the detergent dispenser.
Make sure that the flap does not cause a blockage when you close the drawer.
Setting a programme
Turn the programme dial to select the desired washing programme. The indicator of Mode - Wash button illuminates. The indicator of the Start/Pause button flashes. The display shows an indicative programme duration and the maximum load.
To change the temperature and/or the spin speed, touch the related buttons.
If desired, set one or more options by touching the related buttons. The related indicators illuminate on the display and the given information changes accordingly.
If a selection is not possible an acoustic signal sounds and the display shows
Starting a programme
Touch the Start/Pause button to start the programme. It is not possible to start the programme when the indicator of the button is off and doesn't flash (e.g. the door is open).
The related indicator stops flashing and stays on.
The programme starts, the door is locked. The display shows the indicator .
The drain pump can operate shortly before the appliance fills water.
Starting a programme with the delay start
Touch the Delay Start button repeatedly until the display shows the desired delay time. The related indicator comes on.
Touch the Start/Pause button. The appliance door locks and starts the countdown of the delay start. The display shows the indicator .
When the countdown is completed, the programme starts automatically.
Cancelling the delay start after the countdown has started
To cancel the delay start:
Touch the Start/Pause button to pause the appliance. The related indicator flashes.
Touch the Delay Start button repeatedly until the display shows .
Touch the Start/Pause button again to start the programme immediately.
Changing the delay start after the countdown has started
To change the delay start:
Touch the Start/Pause button to pause the appliance. The related indicator flashes.
Touch the Delay Start button repeatedly until the display shows the desired delay time.
Touch the Start/Pause button again to start the new countdown.
The ProSense System load detection
The programme duration in the display is referred to a medium/high load.
After touching the Start/Pause button, the ProSense System starts the laundry load detection:
The appliance detects the load in the first 30 seconds. During this phase the Time Save bars placed below the time digits play a simple animation, the drum rotates shortly.
The programme duration will be adjusted accordingly and could increase or decrease. After further 30 seconds, the water filling starts.
At the end of the load detection, in case of drum overload, the indicator is flashing in the display: In this case, for 30 seconds, it is possible to pause the appliance and remove the exceeding garments.
Once removed the exceeding garments, touch the Start/Pause button to start the programme again. The ProSense phase can be repeated up to three times (see point 1).
Important! If the laundry amount will not be reduced, the washing programme starts anyway, despite the overload. In this case, it will be not possible to guarantee the best washing results.
About 20 minutes after the programme start, the programme duration could be adjusted again depending on the capacity of water absorption of the fabrics.
The ProSense detection is carried out with complete washing programmes only and if the programme duration has not been reduced by means of the Time Save button.
Interrupting a programme and changing the options
When the programme is running, you can change only some options:
Touch the Start/Pause button. The related indicator flashes.
Change the options. The given information in the display changes accordingly.
Touch the button Start/Pause again. The washing programme continues.
Cancelling a running programme
Press the button On/Off to cancel the programme and to deactivate the appliance.
Press the button On/Off again to activate the appliance.
If the ProSense System has completed and the water filling has already started, the new programme starts without repeating the ProSense System. The water and the detergent are not drained out in order to avoid waste. The display shows the maximum duration of the programme, updating it about 20 minutes after the starting of the new programme.
There is also an alternative way of cancelling:
Rotate the selector knob to the "Reset" position .
Wait for 1 second. The display shows .
Now, you can set a new washing programme.
Opening the door - Adding garments
If the temperature and level of the water in the drum are too high and/or the drum is still rotating you should not open the door.
While a programme or the delay start operates, the appliance door is locked.
The display shows the indicator .
Touch the Start/Pause button. In the display the related door lock indicator goes off.
Open the appliance door. If necessary, add or remove the items. Close the door and touch the Start/ Pause button.
End of the programme
When the programme has finished, the appliance stops automatically. The acoustic signals operate (if they are active). The display shows
The indicator of the Start/Pause button goes off.
The door unlocks and the indicator goes off.
Press button On/Off to deactivate the appliance. After five minutes from the end of the programme, the energy saving function automatically deactivates the appliance. When you activate the appliance again, the display shows the end of the previous programme. Turn the programme dial to set a new cycle.
Remove the laundry from the appliance.
Make sure that the drum is empty.
Keep the door and the detergent dispenser slightly ajar to prevent mildew and odours.
Close the water tap.
Draining water out after end of cycle
If you have chosen a programme or an option that does not empty out the water of the last rinse, the programme is completed, but:
The time area shows and the display shows the door locked .
The indicator of the Start/Pause button starts flashing.
The drum still turns at regular intervals to prevent creases in the laundry.
The door stays locked.
You must drain the water to open the door:
If necessary, touch the Spin button to decrease the spin speed proposed by the appliance.
Press the Start/Pause button: the appliance drains the water and spins. The option indicator Rinse Hold disappears. If you have selected No Spin , the appliance will only drain the water.
When the programme is completed and the door locked indicator goes off, you can open the door.
Press the On/Off button for a few seconds to deactivate the appliance
Stand-by function
The Stand-by function automatically deactivates the appliance to reduce the energy consumption when:
You do not use the appliance for 5 minutes when no programme is running. Press the button On/Off to activate the appliance again.
5 minutes after the end of the washing programme. Press the On/Off button to activate the appliance again. The display shows the end of the last programme. Turn the programme dial to set a new cycle.
If the dial is rotated to the "Reset" position , the appliance automatically turns off in 30 seconds.
If you set a programme or an option that ends with water in the drum, the Stand-by function doesn't deactivate the appliance to remind you to drain the water.
DAILY USE - WASHING & DRYING
Preparation to drying
Press the On/Off button for some seconds to activate the appliance.
Load the laundry one item at a time.
Turn the programme dial to the programme suitable for the items to dry. The appliance defaults to the washing only mode and the indicator of the Mode - Wash button is on.
Tap on the Mode button twice to perform drying only. The indicator of Mode - Dry button illuminates and the indicator of Mode - Wash button goes off.
When drying a big amount of laundry, to have good drying performances, make sure that the laundry itself is not rolled up and that is uniformly distributed in the drum.
Drying - Automatic levels
1. Tap on the Auto Dry button repeatedly until the display shows the required dryness level. The indicators in the display illuminate accordingly:
a. Iron dry: for cotton items;
b. Cupboard dry: for cotton and synthetic items;
c. Extra dry: for cotton items. The display shows the drying programme duration.
2. Touch the Start/Pause button to start the programme.
In the display the door locked indicator comes on.
The display also shows the remaining programme time.
Timed Drying
Tap on the Time Dry button repeatedly to set the desired time value (see the "Timed drying" table the "Programmes" chapter). The drying level indicator goes off and the indicator comes on. Each time you tap on this button the time value increases by 5 minutes. The display shows the set new time value.
Touch the Start/Pause to start the programme. In the display the door locked indicator comes on.
The display also shows the remaining programme time
At the end of the drying programme
The appliance stops automatically.
The acoustic signals operate (if they are active).
In the display comes on.
The indicator of the Start/Pause button goes off. The door locked indicator goes off and the door unlocks.
Press the On/Off button for some seconds to deactivate the appliance.
After some minutes from the end of the programme, the energy saving function deactivates the appliance automatically.
Remove the laundry from the appliance.
Make sure that the drum is empty.
After drying phase, clean the drum, the seal and the inside of the door with a wet cloth.
HINTS AND TIPS
The laundry load
Divide the laundry into: white, coloured, synthetics, delicates and wool.
Follow the washing instructions on the laundry care labels.
Do not wash white and coloured items together.
Some coloured items can discolour with the first wash. We recommend that you wash them separately for the first couple of times.
Button up pillowcases, close zippers, hooks and poppers. Tie up belts.
Turn multilayered fabrics, wool and items with printed illustrations inside out.
Pre-treat tough stains.
Wash heavy soil stains with a special detergent.
Be careful with curtains. Remove the hooks and put the curtains in a washing bag or pillowcase.
Do not wash laundry without hems or with cuts.
Use a washing bag to wash small and/or delicate items (e.g. underwired bras, belts, tights, etc. ).
A very small load can cause balance problems with the spin phase leading to excessive vibration. If this occurs:
interrupt the programme and open the door (refer to "Daily Use" chapter);
manually redistribute the load so that the items are spaced evenly around the tub;
press the Start/Pause button. The spin phase continues.
Avoid washing garments full of long animal hair or poor quality garments releasing lots of fluff that could block the drain circuit and therefore requiring the Service assistance.
Empty pockets and unfold the items.
Stubborn stains
For some stains, water and detergent is not sufficient.
We recommend that you pre-treat these stains before you put the items in the appliance.
Special stain removers are available. Use the special stain remover that is applicable to the type of stain and fabric.
Detergents and other treatments
Only use detergents and other treatments specially made for washing machines:
powder detergents for all types of fabric, excluding delicate. Prefer powder detergents containing bleach for whites and laundry sanitization
liquid detergents, preferably for low temperature wash programmes (60 °C max) for all types of fabric, or special ones for woollens only.
Do not mix different types of detergents.
To help the environment, do not use more than the recommended quantity of detergent.
Follow the instructions that you find on packaging of the detergents or other treatments without exceeding the indicated maximum level ( ).
Use the recommended detergents for the type and colour of the fabric, the programme temperature and the level of soil.
Ecological hints
Set a programme without the prewash phase to wash laundry with normal soil.
Always start a washing programme with the maximum load of laundry allowed.
If you pre-treat the stains or use a stain remover, set a programme with a low temperature.
To use the correct quantity of detergent, check the water hardness of your domestic system. Refer to "Water hardness".
Water hardness
If the water hardness in your area is high or moderate, we recommend that you use a water softener for washing machines. In areas where the water hardness is soft it is not necessary to use a water softener.
To find out the water hardness in your area, contact your local water authority.
Use the correct quantity of water softener. Follow the instructions that you find on the packaging of the product.
Prepare the drying cycle
Open the water tap.
Check if the drain hose is connected properly. Refer to installation chapter for more information.
For the maximum laundry load of the drying programmes, refer to the drying programmes table.
Items not suitable for drying
Do not set a drying programme for this laundry:
Synthetic curtains.
Pieces of clothing with metal inserts.
Nylon stockings.
Quilts.
Bed covers.
Duvets.
Anoraks.
Sleeping bags.
Fabrics with residue of hair sprays, nail solvents or similar.
Garments with foam-rubber or materials similar to foam-rubber
CARE AND CLEANING
External cleaning
Clean the appliance with mild soap and warm water only. Fully dry all the surfaces.
CAUTION! Do not use alcohol, solvents or chemical products.
CAUTION! Do not clean the metal surfaces with chlorine-based detergent.
Descaling
If the water hardness in your area is high or moderate, we recommend that you use a water descaling product for washing machines.
Regularly examine the drum to check for limescale.
Regular detergents already contain water softening agents, but we recommend to run a cycle with an empty drum and a descaling product occasionally.
Always follow the instructions that you find on the packaging of the product.
Maintenance wash
The repeated and prolonged use of low temperature programmes can cause detergent deposits, fluff residues, bacterial growth inside the drum and the tub. This could generate bad odours and mildew. To eliminate these deposits and clean the inner part of the appliance, run a maintenance wash regularly (at least once a month).
Refer to Cleaning the drum chapter.
Door seal with double lip trap
This appliance is designed with a self cleaning draining system, allowing light fluff fibers that fall off the clothes to be drained out with the water, in such a way that there is no need by the customer to access this area for regular maintenance and cleaning.
Regularly examine the seal and remove all objects from the inner part. Coins, buttons, other small items forgotten in the pockets of your clothes are deposited during the washing cycle in the special double lip trap in the porthole seal, where they can be conveniently recovered at the end of the cycle.
Cleaning the drum
Regularly examine the drum to prevent unwanted deposits.
Rust deposits in the drum may occur due to rusting foreign body in the washing or tap water containing iron
Clean the drum with special products for stainless steel.
Always follow the instructions that you find on the packaging of the product. Do not clean the drum with acidic descaling products, scouring products containing chlorine or iron or steel wool.
For a thorough clean:
Remove all laundry from the drum.
Run the Machine Clean programme. For more details, refer to washing programme table.
Add a small quantity of powder detergent into the empty drum, in order to rinse out any left residues.
Cleaning the detergent dispenser
To prevent possible deposits of dried detergent or clotted fabric softener and/or formation of mould in the detergent dispenser drawer, once in a while carry out the following cleaning procedure:
1. Open the drawer. Press the catch downwards as indicated in the picture and pull it out.
2. Remove the top part of the additive compartment to aid cleaning and flush it out under running warm water, to remove any traces of accumulated detergent. After cleaning, put the top part back into position.
3. Make sure that all detergent residue is removed from the upper and lower part of the recess. Use a small brush to clean the recess.
4. Insert the detergent drawer into the guide rails and close it. Run the rinsing programme without any clothes in the drum.
Cleaning the drain pump
WARNING! Disconnect the mains plug from the mains socket.
Regularly check the drain pump filter and make sure that it is clean.
Clean the drain pump if:
The appliance does not drain the water.
The drum does not turn.
The appliance makes an unusual noise because of the blockage of the drain pump.
The display shows the alarm code .
WARNING!
Do not remove the filter while the appliance operates.
Do not clean the pump if the water in the appliance is hot. Wait until the water cools down
Proceed as follows to clean the pump:
1. Open the pump cover.
2. Place a suitable bowl below the drain pump access to collect the water that flows out. Always keep a rag nearby to dry up any water spillages when removing the filter.
3. Turn the filter 180 degrees in anti-clockwise direction to open it, without removing. Let the water flow out.
4. When the bowl is full of water, turn the filter back and empty the container.
5. Repeat the steps 4 and 5 until the water stops to flow out.
6. Turn the filter anti-clockwise to remove it
7. If it is necessary, remove fluff and objects from the filter recess. Make sure that the impeller of the pump can rotate. If it does not rotate, contact the Authorised Service Centre.
8. Clean the filter under the water tap.
9. Put the filter back into the special guides by turning it clockwise. Make sure that you tighten the filter correctly to prevent leakages.
10. Close the pump cover.
When you drain the water with the emergency drain procedure, you must activate the drain system again:
Put 2 litres of water in the main wash compartment of the detergent dispenser.
Start the programme to drain the water.
Cleaning the inlet hose and the valve filter
Emergency drain
If the appliance cannot drain the water, carry out the same procedure, described in 'Cleaning the drain pump' paragraph. If necessary, clean the pump.
When you drain the water with the emergency drain procedure, you must activate the drain system again:
Put 2 litres of water in the main wash compartment of the detergent dispenser.
Start the programme to drain the water.
Frost precautions
If the appliance is installed in an area where the temperature can reach values around 0° C or drop below, remove the remaining water from the inlet hose and the drain pump.
Disconnect the mains plug from the mains socket.
Close the water tap.
Put the two ends of the inlet hose in a container and let the water flow out of the hose.
Empty the drain pump. Refer to the emergency drain procedure.
When the drain pump is empty, install the inlet hose again.
WARNING! Make sure that the temperature is higher than 0 °C before you use the appliance again. The manufacturer is not responsible for damages caused by low temperatures.
TROUBLESHOOTING
WARNING! Refer to Safety chapters
Introduction
The appliance does not start or it stops during operation.
First try to find a solution to the problem (refer to the table). If the problem persists, contact the Authorised Service Centre.
WARNING! Deactivate the appliance before carrying out any check.
In case of major problems, the acoustic signals operate, the display shows an alarm code and the Start/Pause button may flash continuously:
- The mains supply is unstable. Wait until the mains supply is stable.
- No communication between electronic elements of the appliance. Switch it off and switch on again. The programme was not finished properly or the appliance stopped too early. If the alarm code appears again, contact the Authorised Service Centre.
- The anti-flood device is on. Disconnect the appliance and close the water tap. Contact the Authorised Service Centre.
- The appliance does not fill with water properly. After the proper check, start the appliance again by pressing Start/Pause button the appliance tries to resume the cycle . If the error persists the alarm code will appear again.
- The appliance does not drain the water.
- The appliance door is open or not closed correctly. Please check the door!
If the appliance is overloaded, remove some items from the drum and/or hold the door shut while touching the Start/Pause button until the indicator stops flashing (see the picture below
Possible failures
Problem
Possible solution
The programme does not start.
Make sure that the mains plug is connected to the mains socket.
Make sure that the appliance door is closed.
Make sure that there is no damaged fuse in the fuse box.
Make sure that the Start/Pause has been touched.
If the delay start is set, cancel the setting or wait for the end of countdown.
Deactivate the Child Lock function if it is on.
Check the position of the knob on the selected programme.
The appliance does not fill with water properly.
Make sure that the water tap is open.
Make sure that the pressure of the water supply is not too low. For this information, contact your local water authority.
Make sure that the water tap is not clogged.
Make sure that the inlet hose has no kinks, damages or bends.
Make sure that the connection of the water inlet hose is correct.
Make sure that the filter of the inlet hose and the filter of the valve are not clogged. Refer to 'Care and cleaning'.
The appliance fills with water and drains immediately
Make sure that the drain hose is in the correct position. The hose may be positioned too low. Refer to "Installation instruction".
The appliance does not drain the water.
Make sure that the sink spigot is not clogged.
Make sure that the drain hose has no kinks or bends.
Make sure that the drain filter is not clogged. Clean the filter, if necessary. Refer to "Care and cleaning".
Make sure that the connection of the drain hose is correct.
Set the drain programme if you set a programme without drain phase.
Set the drain programme if you set an option which ends with water in the tub.
The spin phase does not operate or the washing cycle lasts longer than usual.
Set the spin programme.
Make sure that the drain filter is not clogged. Clean the filter, if necessary. Refer to "Care and cleaning".
Adjust manually the items in the tub and start the spin phase again. This problem may be caused by balance problems.
There is water on the floor.
Make sure that the couplings of the water hoses are tight and there is not water leakages.
Make sure that the water inlet hose and the drain hose have no damages.
Make sure you use the correct detergent and the correct quantity of it.
You cannot open the appliance door.
Make sure that a washing programme that ends with water in tub, has been selected.
Make sure that the washing programme is finished.
Set the drain or the spin programme if there is water in the drum.
Make sure that the appliance receives electrical power.
This problem may be caused by a failure of the appliance. Contact the Authorised Service Centre.
If you need to open the door, please read carefully "Emergency door opening".
The appliance makes an unusual noise and vibrates.
Make sure the levelling of the appliance is correct. Refer to "Installation instruction".
Make sure that the packaging and/or the transit bolts are removed. Refer to "Installation instruction".
Add more laundry in the drum. The load may be too small.
The programme duration increases or decreases during programme execution.
The ProSense System is able to adjust the programme duration according to the type and the laundry load size. Refer to "The ProSense System load detection" in "Daily Use" chapter.
The washing results are not satisfactory.
Increase the detergent quantity or use a different detergent.
Use special products to remove the stubborn stains before you wash the laundry.
Make sure that you set the correct temperature.
Decrease the laundry load.
Too much foam in the drum during the washing cycle.
Reduce the quantity of detergent.
After the washing cycle, there are some detergent residues in the dispenser drawer.
Make sure that the flap is in the correct position (UP for powder detergent - DOWN for liquid detergent).
Make sure you have used the detergent dispenser according the indications given in this user manual.
The appliance does not dry or does not dry correctly.
Turn the water tap on.
Make sure the drain filter is not clogged.
Reduce the laundry load.
Make sure you have set the correct cycle. if necessary, set again a short drying time.
The laundry is full of different colours fluff.
The fabrics washed in the previous cycle released fluff of a different colour:
The drying phase helps to eliminate some fluff.
Clean the clothes with a fluff remover.
In case of an excessive amount of fluff in the drum run the special programme to clean it (refer to “Fluff in the fabrics" for more details).
Emergency door opening
In case of power failure or functioning failure the appliance door remains locked. The washing programme continues when the power is restored. If the door remains locked in case of failure, it is possible to open it using the emergency unlock function.
Before opening the door:
CAUTION! Risk of burns! Make sure that the water temperature is not too high and the laundry is not hot. If necessary, wait until they cool down.
CAUTION! Risk of injury! Make sure that the drum is not rotating. If necessary, wait until the drum stops rotating.
Make sure that the water level inside the drum is not too high. If necessary, proceed with an emergency drain (refer to «Emergency drain» in «Care and cleaning» chapter).
To open the door, proceed as follows:
Press the On/Off button to switch the appliance off.
Disconnect the mains plug from the mains socket.
Pull the emergency unlock trigger downward once. Pull it once again, keep it tensed and, in the meanwhile, open the appliance door. The emergency unlock trigger is located where indicated by the following picture.
4. Take out the laundry and then close the appliance door.
We will contact you when your item is ready to be dispatched by email and text within 4 working days*. This will confirm your timeslot for delivery the following day. U.K. Mainland only**
- We take your appliance to your room of choice - We unpack and inspect your appliance to ensure it's in perfect condition - We take away packaging and leave the work area clean and tidy


 . Set this option to deactivate all spin phases. The appliance performs the only draining phase of the selected washing programme. Set this option for very delicate fabrics. The rinses phase uses more water for some washing programmes
 option. The final spin is not performed. The water of the last rinse is not drained out to prevent the fabrics from creasing. The washing programme ends with water in the drum.
 comes on/ goes off on the display.
 dashes.
 suitable for a full load of normally soiled garments.
 a quick cycle for a full load of lightly soiled garments.
 very quick cycle for a smaller lightly soiled load (max. half load recommended).
 the shortest cycle to freshen up a small amount of laundry.


 comes on/goes off on the display.
 Iron dry: laundry to be ironed.
 Cupboard dry: laundry to be put in store.
 Extra dry: laundry to be fully dried.
 . This action activates the drain system.

 ). This quantity will however guarantee the best washing results.


 .
. .
. placed below the time digits play a simple animation, the drum rotates shortly.
 is flashing in the display: In this case, for 30 seconds, it is possible to pause the appliance and remove the exceeding garments.
 .
. .
.
 and the display shows the door locked
  .
. disappears. If you have selected No Spin
  , the appliance will only drain the water.
 , the appliance automatically turns off in 30 seconds.
 Iron dry: for cotton items;
 Cupboard dry: for cotton and synthetic items;
 Extra dry: for cotton items. The display shows the drying programme duration.
 indicator comes on.
 comes on. Each time you tap on this button the time value increases by 5 minutes. The display shows the set new time value.
 comes on.
 ).
).


 .
.


 - The mains supply is unstable. Wait until the mains supply is stable.
 - No communication between electronic elements of the appliance. Switch it off and switch on again. The programme was not finished properly or the appliance stopped too early. If the alarm code appears again, contact the Authorised Service Centre.
 - The anti-flood device is on. Disconnect the appliance and close the water tap. Contact the Authorised Service Centre.
 - The appliance does not fill with water properly. After the proper check, start the appliance again by pressing Start/Pause button the appliance tries to resume the cycle . If the error persists the alarm code will appear again.
 - The appliance does not drain the water.
 - The appliance door is open or not closed correctly. Please check the door!
 stops flashing (see the picture below