Loading ...
Loading ...
Loading ...
9
3. Position mounting plate on the wall.
4. Push the bolt with toggle nut through the drywall and finger
tighten the bolt to make sure toggle nut has opened against
drywall.
5. Insert a lag screw into the remaining end hole.
6. If installing on a second wall stud, insert a lag screw into
the other hole drilled in Step 2 of “Installation for Wall Stud
at One End Hole” in the “Drill Holes in Rear Wall” section.
Check alignment of mounting plate, making sure it is level.
7. Securely tighten the lag screw(s) and bolt.
Wall Studs at Both End Holes (Figure 4)
1. Position mounting plate on the wall.
2. Insert lag screws into both end holes.
3. Check alignment of mounting plate, making sure it is level.
4. Securely tighten the lag screws.
Prepare Upper Cabinet
1. Disconnect power to outlet.
2. Remove all contents from upper cabinet.
3. Place Mounting Template against the bottom of the upper
cabinet. Make sure the template centerline aligns with the
vertical centerline on the rear wall.
The “rear wall” arrows must be against the rear wall so that
the holes cut into the upper cabinet align with the holes in
the top of the microwave oven.
NOTE:
■ If the wall behind the microwave oven (as installed) has a
partial wall covering (for example, tile backsplash), be sure
the “Rear Wall” arrows align to the thickest part of the rear
wall (for example, the thickness of the tiles rather than the
drywall).
4. Make sure the 10
3
/
4
"(27.3 cm) dimension from the rear wall
to points “D” and “E” on the template is maintained.
5. Cut the 1¹⁄
2
" (3.8 cm) diameter hole at the circular shaded
area “G” on the template. This hole is for the power supply
cord.
NOTE: If upper cabinet is metal, the supply cord bushing needs
to be installed around the supply cord hole as shown.
.
6. Drill
3
⁄
8
" (10 mm) holes at points “D” and “E” on the template.
These are for two
1
⁄
4
-20 x 3" bolts and washers used to
secure the microwave oven to the upper cabinet.
For Roof Venting Installation Only
7. Cut
3
⁄
4
" (19 mm) hole at one corner of the shaded rectangular
area.
8. Using a keyhole saw, cut out the rectangular area.
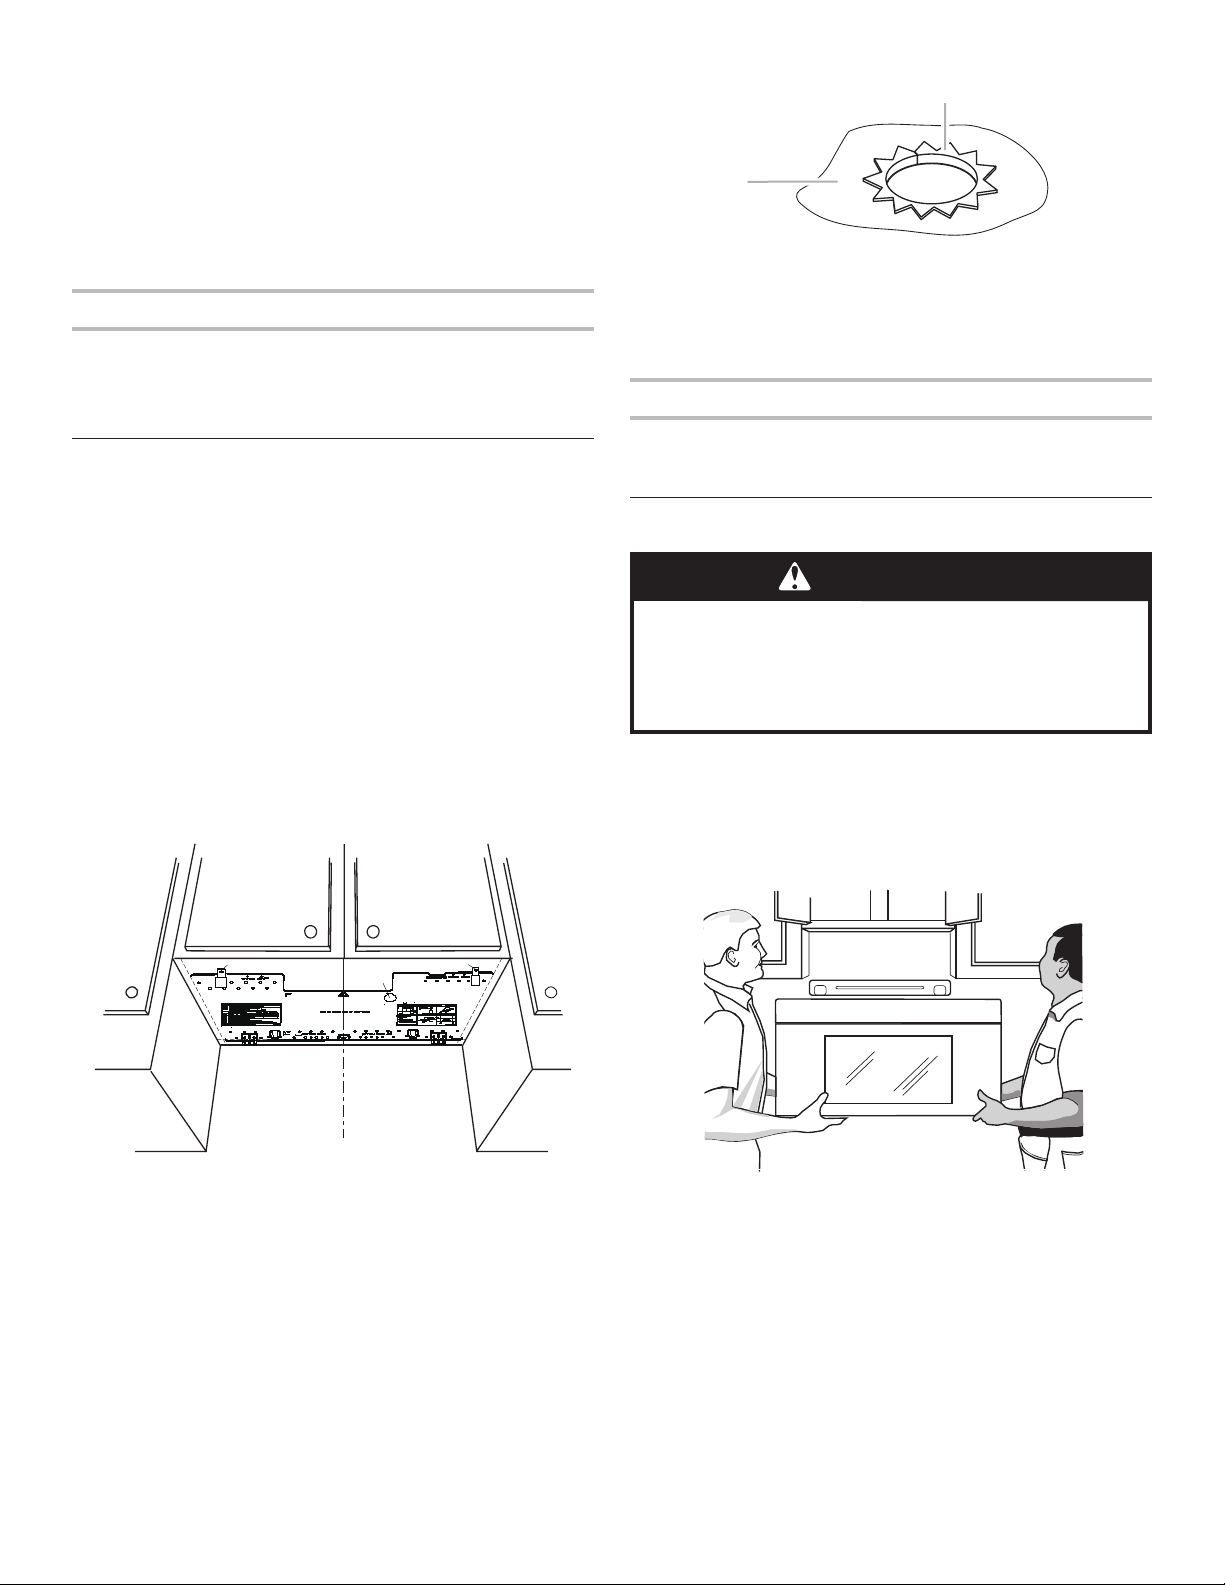
Install the Microwave Oven
IMPORTANT: The control side of the microwave oven is the
heavy side. Handle the microwave oven gently.
1. Place a washer on each
1
⁄
4
-20 x 3" flat-head bolt and place
inside upper cabinet near the
3
⁄
8
" (10 mm) holes.
2. Make sure the microwave oven door is closed and taped
shut.
3. Using 2 or more people, lift microwave oven and hang it on
support tabs at the bottom of mounting plate.
NOTE: To avoid damage to the microwave oven, do not grip or
use the door or door handle while the microwave oven is being
handled.
4. With front of microwave oven still tilted, thread power supply
cord through the power supply cord hole in the bottom of the
upper cabinet.
t
D
E
G
A
B
A. Metal cabinet
B. Power supply cord bushing
WARNING
Excessive Weight Hazard
Use two or more people to move and install
microwave oven.
Failure to do so can result in back or other injury.
Loading ...
Loading ...
Loading ...