Loading ...
Loading ...
Loading ...
5
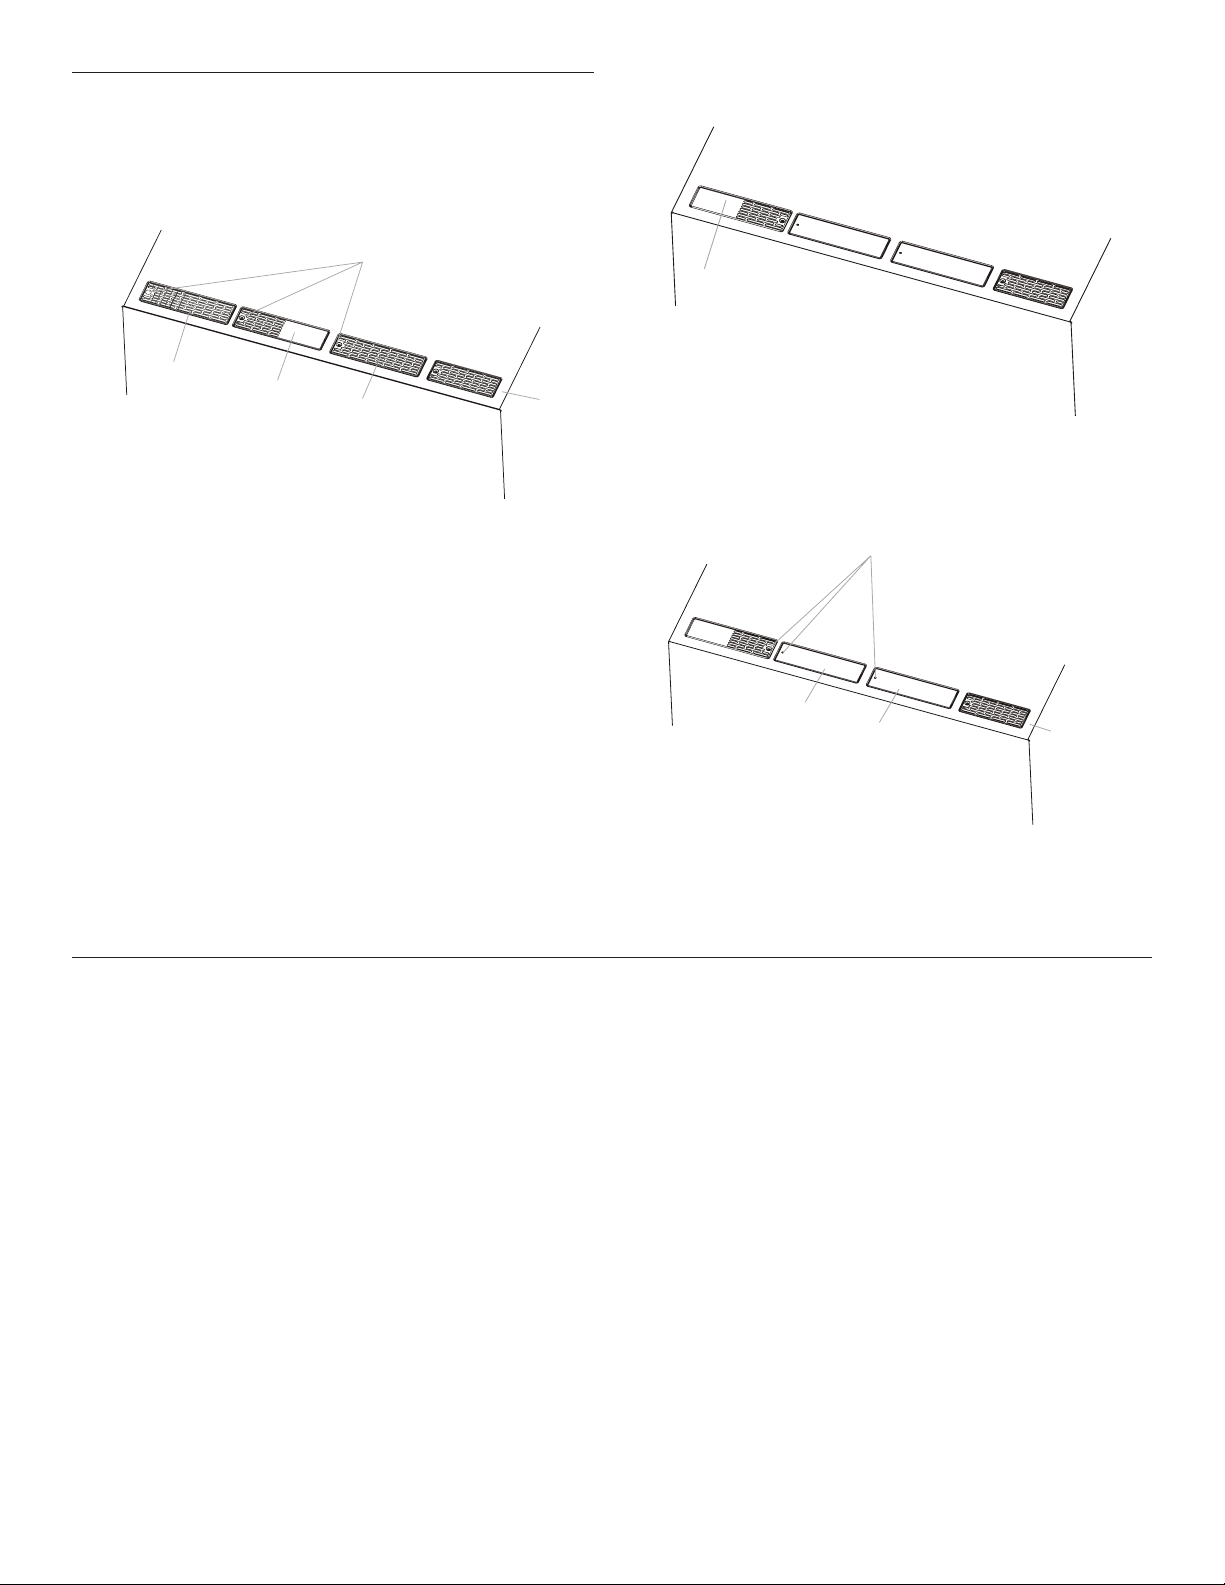
Vent Cover Installation
(for both upper vent and wall vent installation)
1. Remove screws attaching vent cover B, C and D to top of
microwave exterior. Slide out vent covers B, C and D.
Keep the vent cover C for step 2 use.
NOTE: Keep the vent cover B and vent cover D for recirculation
in future.
2. Place the vent cover C (removed from step 1) to the first
position to the left and rotate it 180 degrees.
3. Remove the vent covers located in the upper polyfoam (see
item J in "Parts Supplied" section).
4. Attach the vent covers to vents B & C using the screws
removed in step 1.
Locate Wall Stud(s)
NOTE: If no wall studs exist within the cabinet opening, do not
install the microwave oven.
See illustrations in “Possible Wall Stud Configurations.”
1. Using a stud finder, locate the edges of the wall stud(s)
within the opening.
2. Mark the center of each stud and draw a plumb line down
each stud center. See illustrations in “Possible Wall Stud
Configurations.”
A
B
C
D
E
A. Screws
B. Vent Cover
C. Vent Cover
D. Vent Cover
E. Top front of the
microwave
C
A
E
B
C
A. Screw
B. Vent cover (located
in upper polyfoam)
C. Vent cover (located
in upper polyfoam)
E. Top front of the
microwave
Loading ...
Loading ...
Loading ...