Loading ...
Loading ...
Loading ...
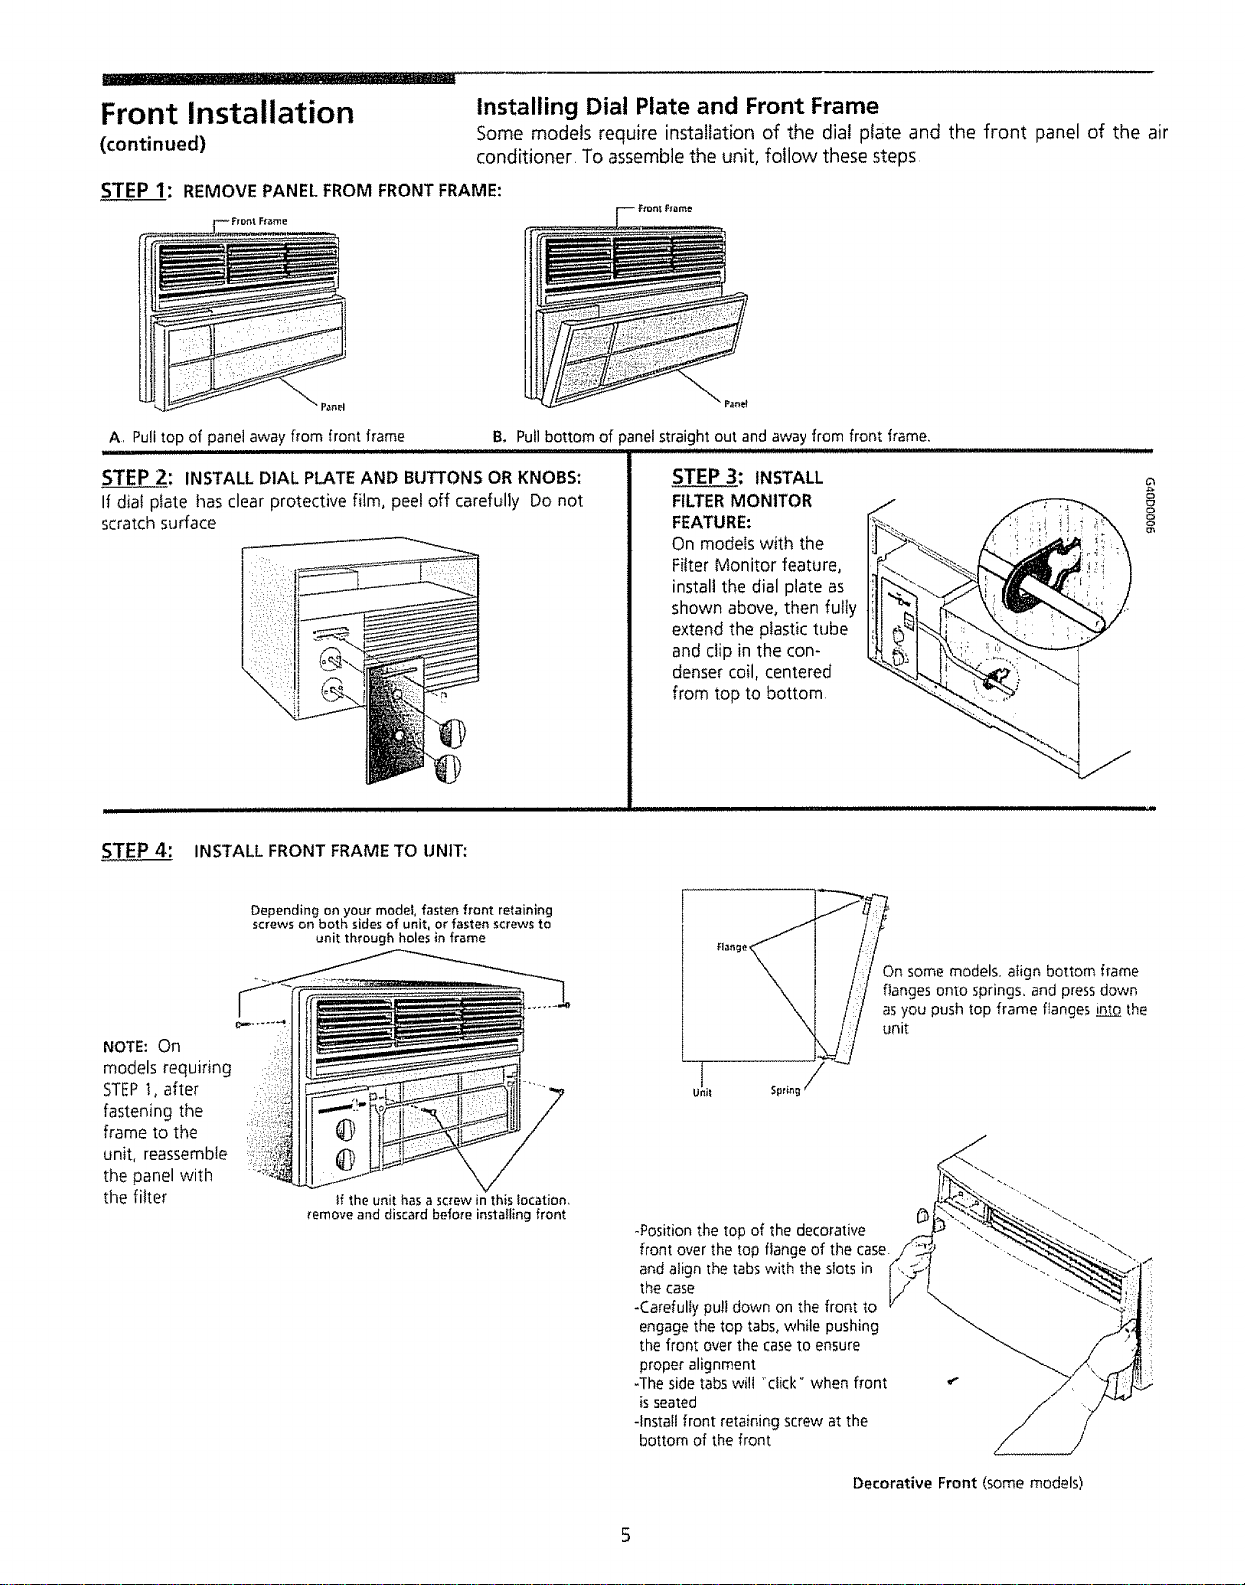
Front Installation
(continued)
Installing Dial Plate and Front Frame
Some models require installation of the dial plate and the front panel of the air
conditioner. To assemblethe unit, follow these steps
STEP 1: REMOVE PANEL FROM FRONT FRAME:
A, Pull top of panel away from front frame
iiii1,1 i,i1,11ii ....................................................................................................
STEP 2: INSTALL DIAL PLATE AND BUTTONS OR KNOBS:
If dial plate has clear protective film, peel off carefully Do not
scratch surface
B, Pull bottom of panel straight out and away from front frame,
STEP 3: INSTALL
FEATURE: '_
On models with the
Filter Monitor feature° i,_.
install the dial plate as
shown above, then fully
extend the plastic tube
and clip in the con-
denser coil, centered
from top to bottom
%
I
J
J;;
STEP 4: INSTALL FRONT FRAME TO UNIT:
Depending on your model, fasten front retaining
screws on both sides of unit, or fasten screws to
unit through holes in frame
NOTE: On
models requiring
STEP t, after
fastening the
frame to the
unit, reassemble
the panel with
the filter
If the unit has a screw in this location.
_emove and discard before installing front
I /:/ On some models, align bottom frame
_, I // as you push top frame flanges into the
unit
Unil Spring _
-Position the top of the decorative
front over the top flange of the case.
and align the tabs with the slots in
the case
-Carefully pull down on the front to
engage the top tabs, while pushing
the front over the case to ensure
proper alignment
-The side tabs will "dick" when front
is seated
-Install front retaining screw at the
bottom of the front
Decorative Front (some models)
Loading ...
Loading ...
Loading ...