Loading ...
Loading ...
Loading ...
to a different power source (5.0 V, 1.0 A
o
r higher).
Charging the outdoor camera
C
harge for about 7 hours.
R Turn the camera off before charging the
battery. If the camera is turned on while
charging, it may take longer to charge.
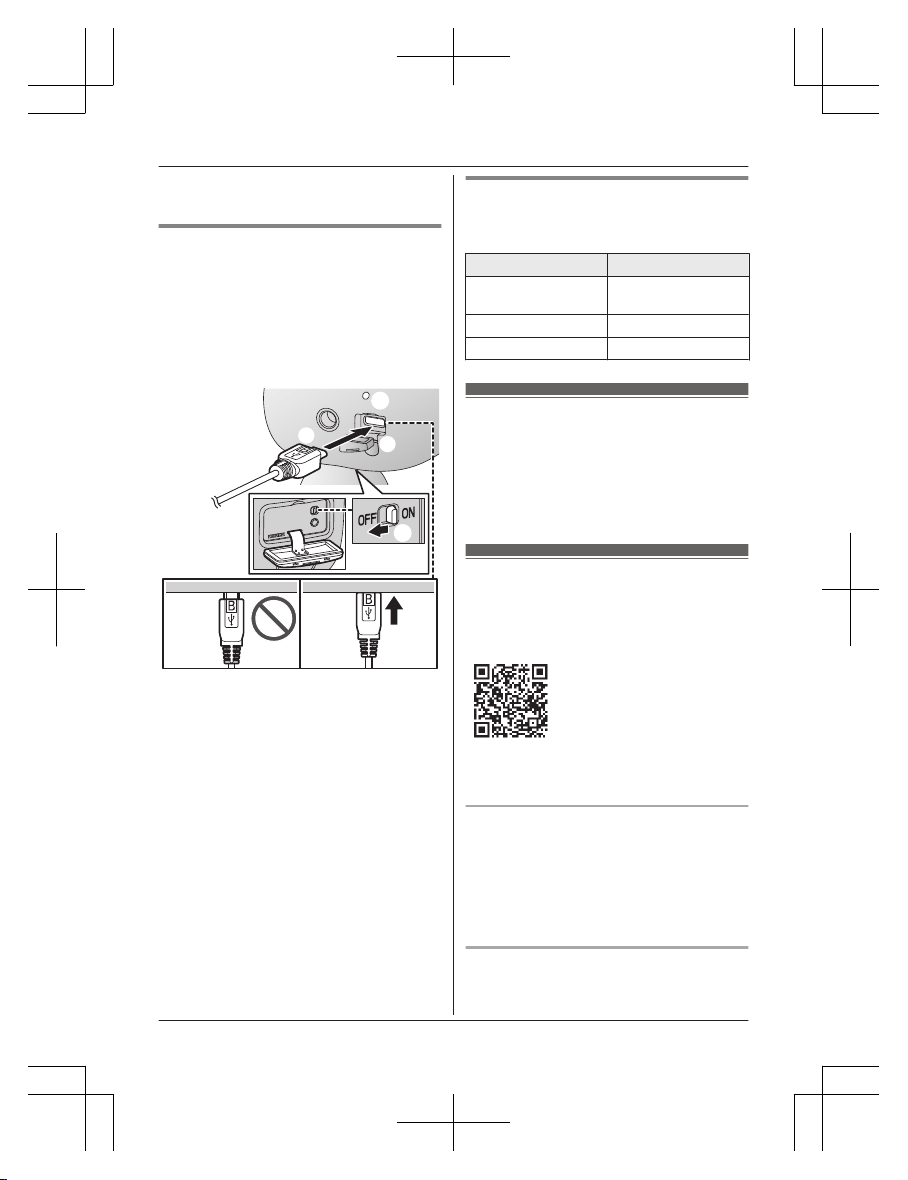
1 Open the USB cover (A).
2 Insert the USB cable into the micro-USB
connector (B).
2
1
2
3
1
1
Power off
2
5.0 V, 1.0 A or higher power source
W
e recommend using the supplied USB cable.
3
Charging LED indicator
N
ote:
R Check the charging LED indicator
continues to blink in red for more than 10
seconds after connecting the USB cable.
If the indicator stops blinking and turns off
within 10 seconds, perform the following.
– If you are not using the supplied USB
cable, use it.
– If the indicator still turns off within 10
seconds, try connecting the USB cable
to a different power source (5.0 V, 1.0 A
or higher).
Camera charging LED indicators
You can use the charging LED indicators to
confirm the charging status of the cameras.
Camera indicator Status
Red, lit Charging is
c
ompleted
Red, blinking slowly Charging
Red, blinking quickly Charging failure
Turning the power on for
t
he cameras
Open the cover of the cameras, and then slide
the power slide switch to ON. (page 19, n
Front door camera M, page 20, n Outdoor
camera J)
Downloading the
[HomeHawk] app
Download information is available at the web
page listed below.
https://panasonic.net/cns/pcc/support/
h
omehawk
Using your device’s app store
iPhone, iPad users
Search for “Panasonic HomeHawk”. iPad
users should search in the “iPhone only”
category.
Android™ device users
Search for “Panasonic HomeHawk”.
Compatible mobile devices
P
lease check the latest information at the
following supported page.
For assistance, please visit http://shop.panasonic.com/support
23
Setup
HN7001(enen)0209ver.140.pdf23 2018/02/0911:33:53
Loading ...
Loading ...
Loading ...