User Manual
Preparations
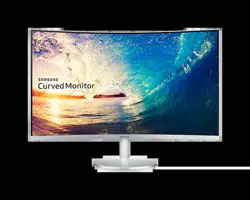
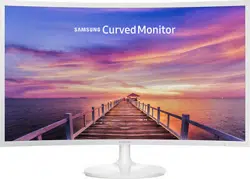
Parts
Control Panel
― The colour and shape of parts may differ from what is shown. Specifications are subject to change without notice to improve quality.
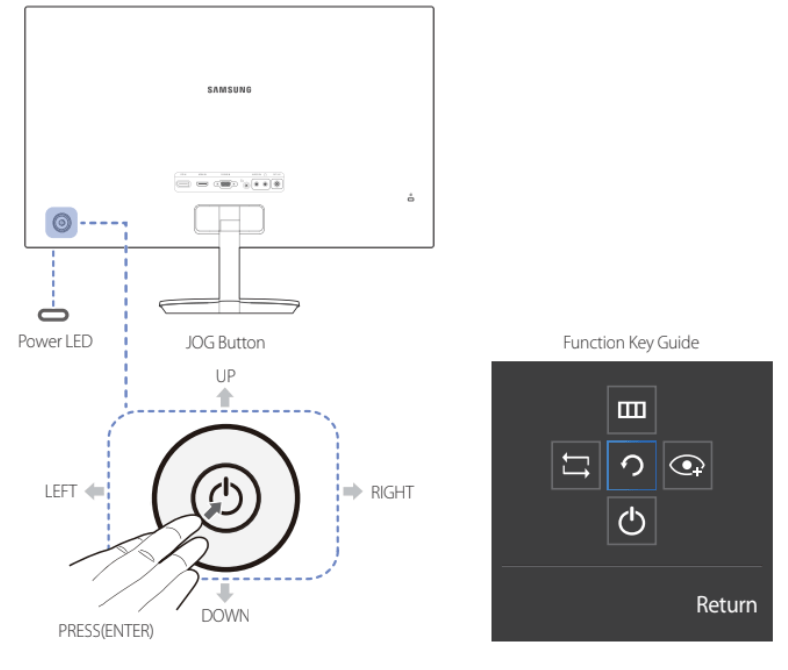
Icons: JOG Button
Multi directional button that helps navigate.
― The JOG button is located on the rear left side of the product. The button can be used to move up, down, left or right, or as Enter.
Icons: Power LED
This LED is power status indicator and works as
- Power On (Power button): Off
- Power saving mode: Blinking
- Power Off (Power button): On
― The power Indicator operation can be swapped by changing in the menu.
(System Power LED On) Actual models because of functional variation maybe haven’t this function.
Icons: Function Key Guide
Press the JOG button when the screen is turned on. The Function Key Guidewill appear. To access the onscreen menu when the guide is displayed, pressthe corresponding direction button again.
― Function Key Guide may vary depending on the function or product model.Please refer to the actual product.
Connecting and Using a Source Device
Connecting and Using a PC
Select a connection method suitable for your PC.
- Connecting parts may differ in different products.
- Provided ports may vary depending on the product.
Connection Using the D-SUB Cable (Analogue Type)

Connection Using the HDMI Cable

Connection Using an HDMI-DVI Cable

- The audio function is not supported if the source device is connected using the HDMI-DVI cable.
Connection Using an DP Cable

- A DP cable shorter under 1.5 m in length is recommended. Using a cable longer than 1.5 m can affect the picture quality.
Connecting to Headphones

- Use headphones when activating sound with a D-SUB + AUDIO, HDMI-HDMI or DP cable
Connecting the Power

- Connect the power cable to the DC power adapter. Then, connect the DC power adapter to the DC 14V port on the back of the product.
- Next, connect the power cable to the power outlet.
- Press the JOG button on the back of the monitor to turn it on.
- The input voltage is switched automaticall
Screen Setup
SAMSUNG MAGIC Bright
This menu provides an optimum picture quality suitable for the environment where the product will be used.
- This menu is not available when Eco Saving Plus is enabled.
- This menu is not available when Game Mode is enabled.
- This menu is not available when Eye Saver Mode is enabled.
You can customize the brightness to suit your preferences.

In PC mode
- Custom: Customize the contrast and brightness as required.
- Standard: Obtain a picture quality suitable for editing documents or using Internet.
- Cinema: Obtain the brightness and sharpness of TVs suitable for enjoying video and DVD content.
- Dynamic Contrast: Obtain balanced brightness through automatic contrast adjustment.
- Basic Color: This model supports a photochromic station. When switching to this mode, the colour area is adjusted to be similar to the standard colour gamut of sRGB.
In AV mode
When the external input is connected through HDMI/DP and PC/AV Mode is set to AV,  has four automatic picture settings (Dynamic, Standard, Movie and Custom) that are preset at the factory. You can activate either Dynamic, Standard, Movie or Custom. You can select Custom which automatically recalls your personalized picture settings.
- Dynamic: Select this mode to view a sharper image than in Standard mode.
- Standard: Select this mode when the surroundings are bright. This also provides a sharp image.
- Movie: Select this mode when the surroundings are dark. This will save power and reduce eye fatigue.
- Custom: Select this mode when you want to adjust the image according to your preferences.
Brightness
You can adjust the general brightness of the picture. (Range: 0~100)
A higher value will make the picture appear brighter.
- This menu is not available when
 is set to Dynamic Contrast mode.
- This menu is not available when Eco Saving Plus is enabled.
- This menu is not available when Eye Saver Mode is enabled.
Contrast
Adjust the contrast between the objects and background. (Range: 0~100)
A higher value will increase the contrast to make the object appear clearer.
- This option is not available when
 is in Cinema or Dynamic Contrast mode.
- This menu is not available when Game Mode is enabled.
Sharpness
Make the outline of objects more clear or blurry. (Range: 0~100)
A higher value will make the outline of objects clearer.
- This option is not available when
 is in Cinema or Dynamic Contrast mode.
- This menu is not available when
 is in Mode1 or Mode2 mode.
- This menu is not available when Game Mode is enabled.
Color
Adjust the tint of the screen.
- This menu is not available when
 is set to Cinema or Dynamic Contrast mode.
- This menu is not available when Game Mode is enabled.
- This menu is not available when Eye Saver Mode is enabled.
- Red: Adjust the red saturation level. Values closer to 100 mean greater intensity for the colour.
- Green: Adjust the green saturation level. Values closer to 100 mean greater intensity for the colour.
- Blue: Adjust the blue saturation level. Values closer to 100 mean greater intensity for the colour.
- Color Tone: Select a colour tone that best suits your viewing needs.
- Cool 2: Set the colour temperature to be cooler than Cool 1.
- Cool 1: Set the colour temperature to be cooler than Normal mode.
- Normal: Display the standard colour tone.
- Warm 1: Set the colour temperature to be warmer than Normal mode.
- Warm 2: Set the colour temperature to be warmer than Warm 1.
- Custom: Customize the colour tone.
- When the external input is connected through HDMI/DP and PC/AV Mode is set to AV, Color Tone has four colour temperature settings (Cool, Normal, Warm and Custom).
- Gamma: Adjust the middle level of luminance.
Picture Size
Change the picture size.
In PC mode
- Auto: Display the picture according to the aspect ratio of the input source.
- Wide: Display the picture in full screen regardless of the aspect ratio of the input source.
In AV mode
- 4:3: Display the picture with an aspect ratio of 4:3. Suitable for videos and standard broadcasts
- 16:9: Display the picture with an aspect ratio of 16:9.
- Screen Fit: Display the picture with the original aspect ratio without cutting off.
- The function may not be supported depending on the ports provided with the product.
- Changing the screen size is available when the following conditions are satisfied.
- A digital output device is connected using the HDMI/DP cable.
- The input signal is 480p, 576p, 720p, or 1080p and monitor can display normally (Not every model can support all of these signals.).
- This can only be set when the external input is connected through HDMI/DP and PC/AV Mode is set to AV.(DisplayPort/HDMI: This option is available when FreeSync is disabled)
Screen Adjustment
- This menu is only available when Picture Size is set to Screen Fit in AV Mode.
- When a 480P or 576P or 720P or 1080P signal is input in AV mode and the monitor can display normally, select Screen Fit to adjust horizontal position in 0-6 levels.
Troubleshooting Guide
Requirements Before Contacting Samsung Customer Service Centre
Before calling Samsung Customer Service Centre, test your product as follows. If the problem persists, contact Samsung Customer Service Centre.
Testing the Product
Check if your product is operating normally by using the product test function.
If the screen is turned off and the power indicator blinks even though the product is properly connected to a PC, perform a self-diagnosis test.
- Power off both the PC and product.
- Disconnect the cables from the product.
- Power on the product.
- If the message Check Signal Cable appears, the product is working normally.
- If the screen remains blank, check the PC system, video controller and cable.
Checking the Resolution and Frequency
For a mode that exceeds the supported resolution(refer to Standard Signal Mode Table), the message Not Optimum Mode will appear for a short time.
- The displayed resolution may vary, depending on the computer system settings and cables.
Check the following.
Installation issue (PC mode)
- The screen keeps switching on and off.
- Check the cable connection between the product and PC, and ensure the connectors are locked.
- Blank spaces are found on all four sides of the screen when an HDMI or HDMI-DVI cable is connected to the product and PC.
- The blank spaces found on the screen have nothing to do with the product.
Blank spaces on the screen are caused by the PC or graphics card. To resolve the problem, adjust the screen size in the HDMI or DVI settings for the graphics card.
If the graphics card settings menu does not have an option to adjust the screen size, update the graphics card driver to the latest version.
Please contact the graphics card or computer manufacturer for further details about how to adjust the screen settings.)
Screen issue
- The power LED is off. The screen will not switch on.
- Check that the power cable is connected properly.
- The message Check Signal Cable appears.
- Check that the cable is properly connected to the product.
- Check that the device connected to the product is powered on
- Not Optimum Mode is displayed.
- This message appears when the signal from the graphics card exceeds the maximum resolution or frequency for the product.
- Change the maximum resolution and frequency to suit the product performance, referring to Standard Signal Mode Table
- The images on the screen look distorted.
- Check the cable connection to the product.
- The screen is not clear. The screen is blurry.
- Adjust Coarse and Fine.
- Remove any accessories (video extension cable, etc.) and try again.
- Set the resolution and frequency to the recommended level.
- The screen appears unstable and shaky. There are shadows or ghost images left on the screen.
- Check that the resolution and frequency for the PC are within the range of resolution and frequency compatible with the product. Next, if required, change the settings, referring to Standard Signal Mode Table (P.36) in this manual and the Information menu on the product.
- The screen is too bright. The screen is too dark.
- Adjust Brightness and Contrast.
- Screen colour is inconsistent.
- Change the Color settings.
- The colours on the screen have a shadow and are distorted.
- Change the Color settings.
- White does not really look white.
- Change the Color settings.
- There is no image on the screen and the power LED blinks every 0.5 to 1 second.
- The product is operating in power-saving mode.
- Press any key on the keyboard or move the mouse to return to normal operating mode.
- Text is blurry.
- If using a Windows OS (e.g. Windows 7, Windows 8, Windows 8.1 or Windows 10): Go to Control Panel FontsAdjust ClearType text and change Turn on ClearType.
- Video playback is choppy.
- Playback of high-definition large video files can be choppy. This may be because the video player is not optimized for the computer resource.
- Try playing the file on another video player.
Sound issue
- There is no sound.
- Check the connection of the audio cable or adjust the volume.
- Check the volume.
- The volume is too low.
- Adjust the volume.
- If the volume is still low after turning it up to the maximum level, adjust the volume on your PC sound card or software Programme.
- Video is available but there is no sound.
- Sound cannot be heard if a HDMI-DVI cable is used to connect the input device.
- Connect the device using an HDMI cable or a DP cable.
Source device issue
- A beeping sound is heard when my PC is booting.
- If a beeping sound is heard when your PC is booting, have your PC serviced.
Q & A
Refer to the user manual for your PC or graphics card for further instructions on adjustment.
How can I change the frequency?
Set the frequency on your graphics card.
- Windows 7: Go to Control Panel →Appearance and Personalization→ Display→ Screen Resolution→ Advanced settings→ Monitor, and adjust Refresh rate under Monitor settings.
- Windows 8(Windows 8.1): Go to Settings→Control Panel →Appearance and Personalization→ Display→ Screen Resolution→ Advanced settings →Monitor, and adjust Refresh rate under Monitor settings.
- Windows 10: Go to Settings→ System→ Display →Advanced display settings →Display adapter properties →Monitor, and adjust Screen refresh rate under Monitor settings.
How can I change the resolution?
- Windows 7: Go to Control Panel →Appearance and Personalization →Display →Adjust Resolution, and adjust the resolution.
- Windows 8(Windows 8.1): Go to Settings→ Control Panel →Appearance and Personalization→ Display →Adjust Resolution, and adjust the resolution.
- Windows 10: Go to Settings→ System→ Display →Advanced display settings, and adjust the resolution.
How do I set power-saving mode?
- Windows 7: Set power-saving mode in Control Panel →Appearance and Personalization→ Personalize→ Screen Saver Settings→ Power options or BIOS SETUP on the PC.
- Windows 8(Windows 8.1): Set power-saving mode in Settings→Control Panel →Appearance and Personalization →Personalize →Screen Saver Settings →Power options or BIOS SETUP on the PC.
- Windows 10: Set power-saving mode in Settings → Personalization→ Lock screen→ Screen timeout settings→ Power & sleep or BIOS SETUP on the PC.