Documents: Go to download!
- Owner's manual - (English, French)
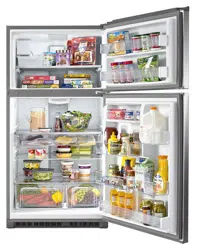
User care Maytag MRT711SMFW Refrigeration
Table of Contents
- REFRIGERATOR SAFETY
- Proper Disposal of Your Old Refrigerator
- INSTALLATION INSTRUCTIONS
- Unpack the Refrigerator
- Location Requirements
- Electrical Requirements
- Water Supply Requirements
- Connect the Water Supply
- Refrigerator Doors
- Reversibility Kit Instructions
- Adjust the Doors
- Install Air Filter
- REFRIGERATOR USE
- Using the Controls
- Ice Maker
- REFRIGERATOR FEATURES
- Refrigerator Shelves
- Deli Drawer
- Crisper
- FREEZER FEATURES
- Glass Freezer Shelf
- DOOR FEATURES
- Door Rails
- Door Bins
- Utility Compartment
- REFRIGERATOR CARE
- Cleaning
- Changing the Light Bulbs
- Vacation and Moving Care
- TROUBLESHOOTING
- ACCESSORIES
- WARRANTY
- BRAND BADGE PLACEMENT TEMPLATE...........BACK COVER
Connect to Refrigerator
- Unplug refrigerator or disconnect power.
- Attach the copper tubing to the valve inlet using a compression nut and sleeve, as shown. Tighten the compression nut. Do not overtighten.
- Use the tube clamp on the back of the refrigerator to secure the tubing to the refrigerator, as shown. This will help avoid damage to the tubing when the refrigerator is pushed back against the wall.
- Turn shut-off valve on.
- Check for leaks. Tighten any connections (including connections at the valve) or nuts that leak.
Replacing the Air Filter
The disposable air filter should be replaced every 6 months.
To order a replacement air filter, contact us using the assistance/service information following the warranty.
- Remove the old air filter by squeezing in on the side tabs.
- Remove the old status indicator.
- Install the new air filter and reset the status indicator using the instructions in the previous sections.
Installing the Air Filter
The filter should be installed behind the vented door which is located (depending on your model) along either the rear or left interior wall near the top of the refrigerator compartment.
- Remove the air filter from its packaging.
- Lift open the vented door.
- Snap the filter into place.
Ice Production Rate
- NORMAL Ice Production: The ice maker should produce approximately 8 to 12 batches of ice in a 24-hour period. If ice is not being made fast enough, turn the Freezer control toward a higher (colder) number in half number steps. (For example, if the control is at 3, move it to between 3 and 4.) Wait 24 hours and, if necessary, gradually turn the Freezer control to the highest setting, waiting 24 hours between each increase.
- MAXIMUM Ice Production (on some models): The ice maker should produce approximately 16 to 20 batches of ice in a 24-hour period. If your refrigerator has the maximum ice production feature, push the switch to MAX.
See other models: MRT311FFFM MRT118FFFZ REFRIGERATOR MSC21C6MFZ SIDE-BY-SIDE
