Loading ...
Loading ...
Loading ...
11
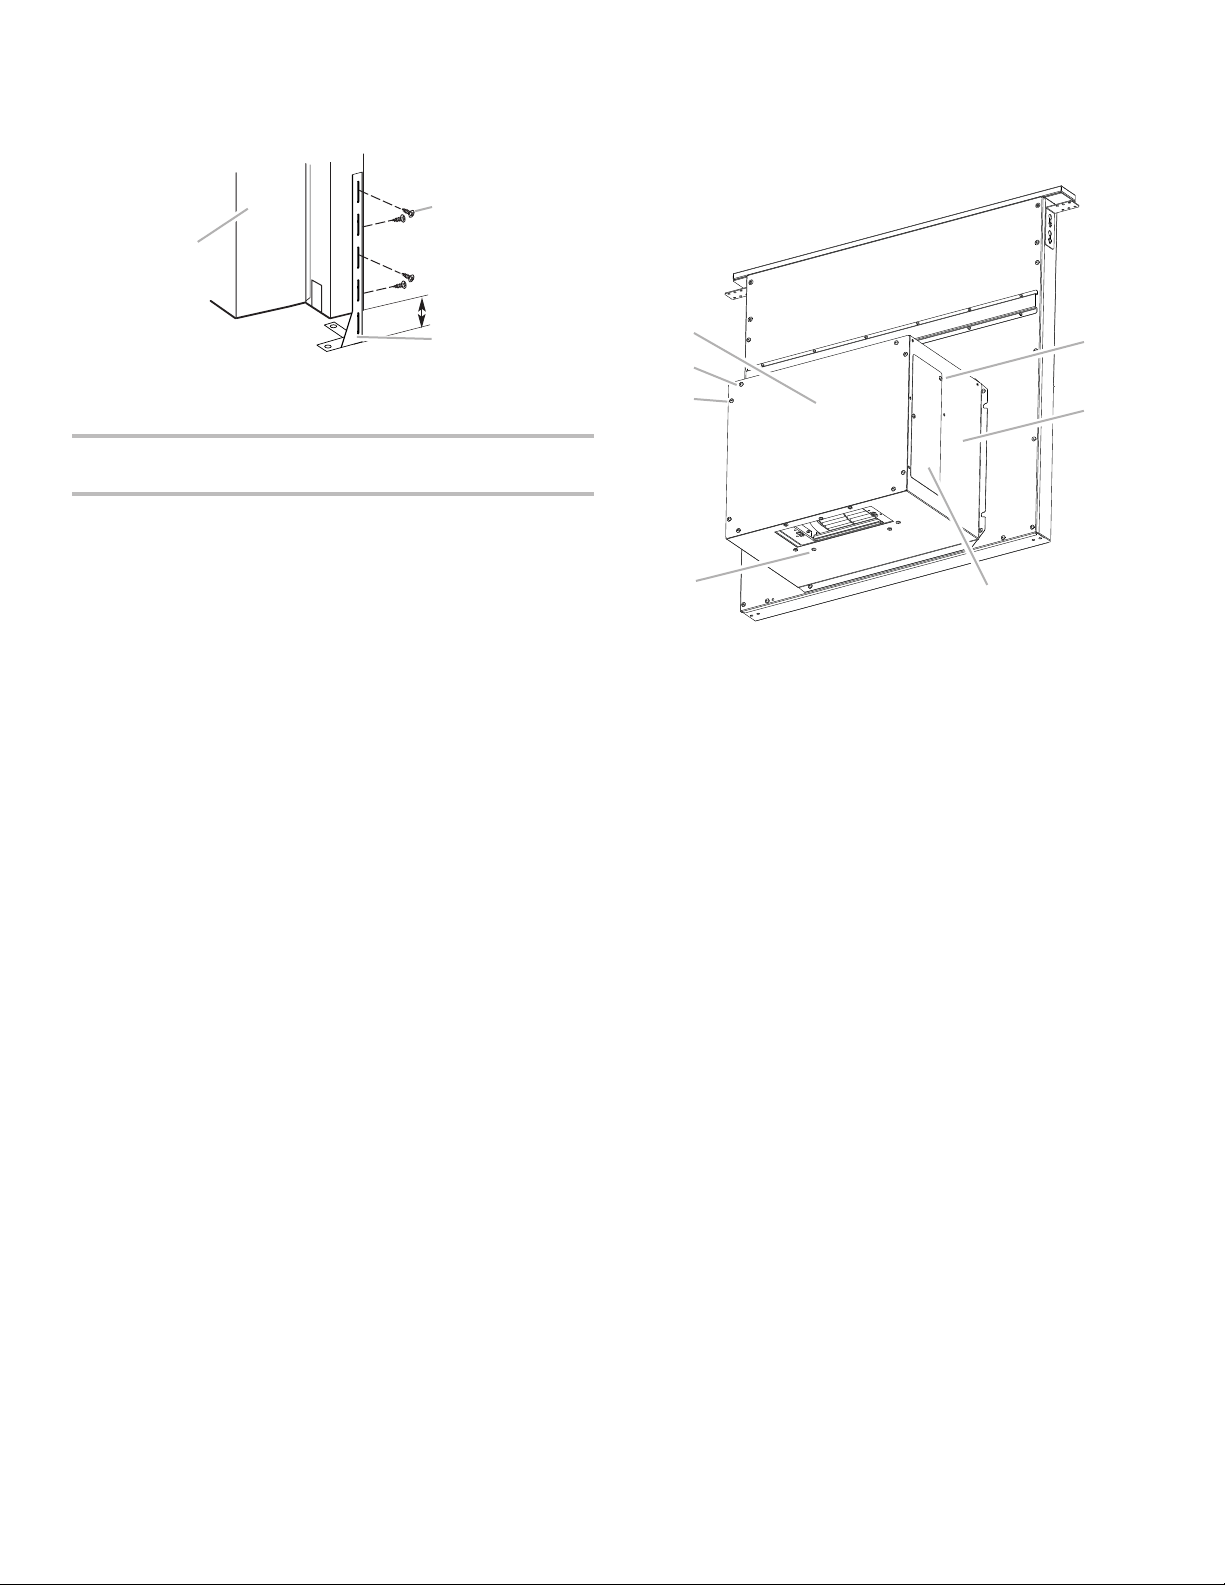
5. Attach the support legs to the side of the vent box with
4 - 4 x 8 mm screws in each support leg. Adjust to dimension
“Y” from the bottom of the vent box to the bottom of the
support legs. Tighten screws.
Determine Which Vent Direction Is Best for
Your Installation
When installed in a cabinet, vent system can exhaust through
the bottom, left, or right of the cabinet.
IMPORTANT: When using the 6" (15.2 cm) vent transition
(supplied) for 6" round venting, only left or right venting is
recommended.
Bottom Venting:
NOTE: If installing the vent damper in the down position, a wall
or roof cap with a damper at the exit end of the vent system
is required.
■ Downdraft vent is shipped with blower in down-venting
position, so no modification is required.
■ If rear mounting of the blower motor is not required, go
to the “Complete Installation” section.
■ To mount the blower motor to the rear side of the vent box,
go to the “Rear Mounting — Blower Motor” section.
A
B
Dim.
“Y”
C
A. Motor box
B. Support leg
C. 4 x 8 mm screws (4)
Left or Right Venting:
1. Using 2 or more people, place the downdraft vent system
on its back.
2. Remove the 4 screws from the cover plate mounted to the
face of the motor box and set them aside.
3. Slide the cover plate up and slip it over the keyhole slot
shoulder screws. Set the cover aside.
4. Remove 4 screws from the bottom of the motor box that
hold the motor assembly to the motor box.
NOTE: Disconnect the electrical wiring connection from
motor if needed.
5. Remove 3 screws and the vent cover plate from the left
or right side of the motor box for the venting direction to
be used.
6. Rotate the blower motor assembly 90° to the left or right side
to the chosen venting direction and secure to the blower box
with motor mounting screws previously removed. Do not
twist or bind the wires.
7. Install the vent cover plate over the rectangular opening in the
bottom of the motor box and secure with vent cover screws.
NOTE: Reinstall the electrical wiring connection to motor
if removed.
8. Reinstall the cover plate to the face of the motor box and
secure with 4 cover plate screws previously removed.
9. For mounting the blower motor to the back of the vent
box, go to the “Rear Mounting - Blower Motor” section.
Otherwise, go to the “Complete Installation” section.
A
B
C
E
D
G
F
A. Cover plate
B. Cover plate screws (4)
C. Cover plate keyhole slot
shoulder screws (4)
D. Motor mounting screws (4)
E. Vent cover plate
F. Motor box
G. Vent cover screws (3)
Loading ...
Loading ...
Loading ...