Loading ...
Loading ...
Loading ...
11
■ There will be water in the lter. Some spilling may occur.
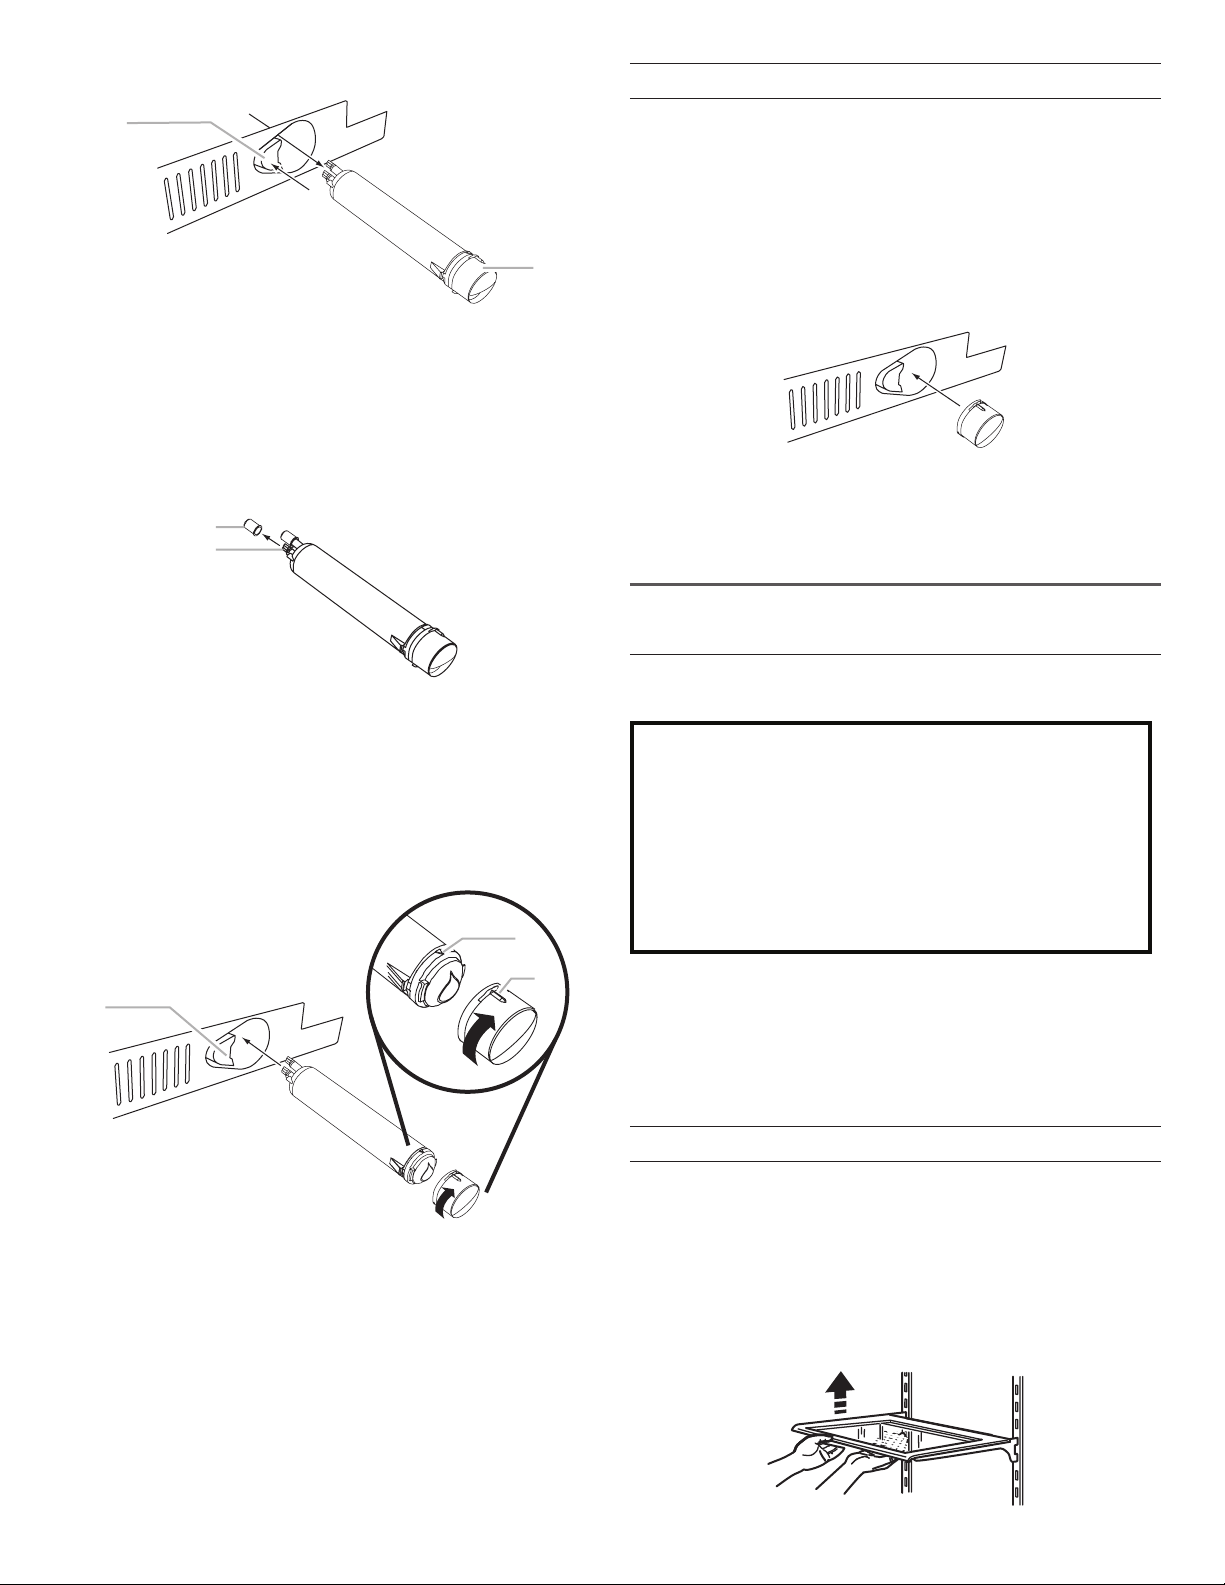
2. Remove the cap by turning it counterclockwise until it stops.
IMPORTANT: Do not discard the cap. It is part of your
refrigerator. Keep the cap to use with the replacement lter.
3. Align the ridge on the cap with the arrow on the new lter, and
turn the cap until it snaps into place.
4. Remove the covers from the O-rings. Make sure that O-rings
are still in place after the covers are removed.
5. Place the cap (removed in Step 2) on the new lter. Align the
ridge on the cap with the arrow on the lter. Turn the cap
clockwise until it snaps into place.
6. Push the new lter into the opening in the base grille. As the
lter is inserted, the eject button will depress. The eject button
will pop back out when the lter is fully engaged.
7. Pull gently on the cap to check that the lter is securely in
place.
8. Flush the water system. Depending on your model, see
“Water and Ice Dispensers” or “Ice Maker and Storage Bin.”
Using the Ice Maker Without a Water Filter
You can operate the ice maker without a water lter. Your ice will
not be ltered.
1. Remove the lter by pressing the eject button and pulling on
the cap. See “Changing the Water Filter” earlier in this section.
2. Remove the cap by turning it counterclockwise until it stops.
IMPORTANT: Do not discard the cap. It is part of your
refrigerator.
3. With the cap in a horizontal position, insert the cap into the
base grille until it stops.
4. Turn the cap counterclockwise until the cap slips into the
attachment slot. Then, turn the cap clockwise until it is in a
horizontal position.
NOTE: The cap will not be even with the base grille.
REFRIGERATOR FEATURES
Refrigerator Shelves
The shelves in your refrigerator are adjustable to meet your
individual storage needs.
Storing similar food items together in your refrigerator and
adjusting the shelves to t different heights of items will make
nding the exact item you want easier. It will also reduce the
amount of time the refrigerator door is open and help save energy.
Shelves and Shelf Frames
To remove and replace a shelf/frame:
1. Remove the shelf/frame by tilting it up at the front and lifting it
out of the shelf supports. Pull shelf straight out.
2. Replace the shelf/frame by guiding the rear shelf hooks into
the shelf supports. Tilt the front of the shelf up until the rear
shelf hooks drop into the shelf supports.
3. Lower the front of the shelf and check that the shelf is in
position.
A
B
A. Eject button
B. Filter cap
A
B
A. Cover
B. O-rings
A
B
C
A. Eject button
B. Arrow on lter
C. Ridge on cap
Important information to know about glass shelves
and covers:
Do not clean glass shelves or covers with warm water when
they are cold. Shelves and covers may break if exposed to
sudden temperature changes or impact, such as bumping.
Tempered glass is designed to shatter into many small,
pebble-size pieces. This is normal. Glass shelves and covers
are heavy. Use both hands when removing them to avoid
dropping.
Loading ...
Loading ...
Loading ...