Loading ...
Loading ...
Loading ...
12 13
OPERATING INSTRUCTIONS
6 Speeds
Natural Breeze
Season Slide
Switch
Light On/Off
/Dimming
Walk Away
Light Delay
Fan on/off
Home Shield
Sleep Timer
M
2
1
Learn key
Dip switches
Open the battery
housing cover.
O
L
19
D
20
H
H
I
K
Flat Are
a
Raised
Dimples
ASSEMBLY INSTRUCTIONSASSEMBLY INSTRUCTIONS
R
21
M
Small plate
Wall bracket
Screws
R
Lowes.com/harborbreeze Lowes.com/harborbreeze
12V
19. Install bulbs (L) into sockets.
IMPORTANT NOTE: The fan has an energy-saving
wattage limiter included. lf bulbs are more than 190
watts, the fan will automatically turn off. Please ensure
bulb wattage is always less than 190 watts.
20. Place glass (K) into fitter plate (I), aligning three flat
areas on top flange of glass (K) with three raised
dimples in the fitter plate (I). Turn glass (K) clockwise
until it stops.
OPTIONAL:
21. If desired, the wall bracket in remote pack (M) can be
installed to house the remote control. Remove the
small plate preassembled on the wall bracket and use
the screws in remote pack (M) to secure the wall
bracket at desired mounting location. Replace the
small plate, then rest the remote control from remote
pack (M) into wall bracket.
REMOTE CONTROL TRANSMITTER:
Note: The receiver is already wired and built into the fan housing from the factory. Receiver assembly is not
needed. “Tap” refers to pressing a button on the remote for less than one second. “Press and hold” refers to
pressing a button and holding the button down for one second then release the button.
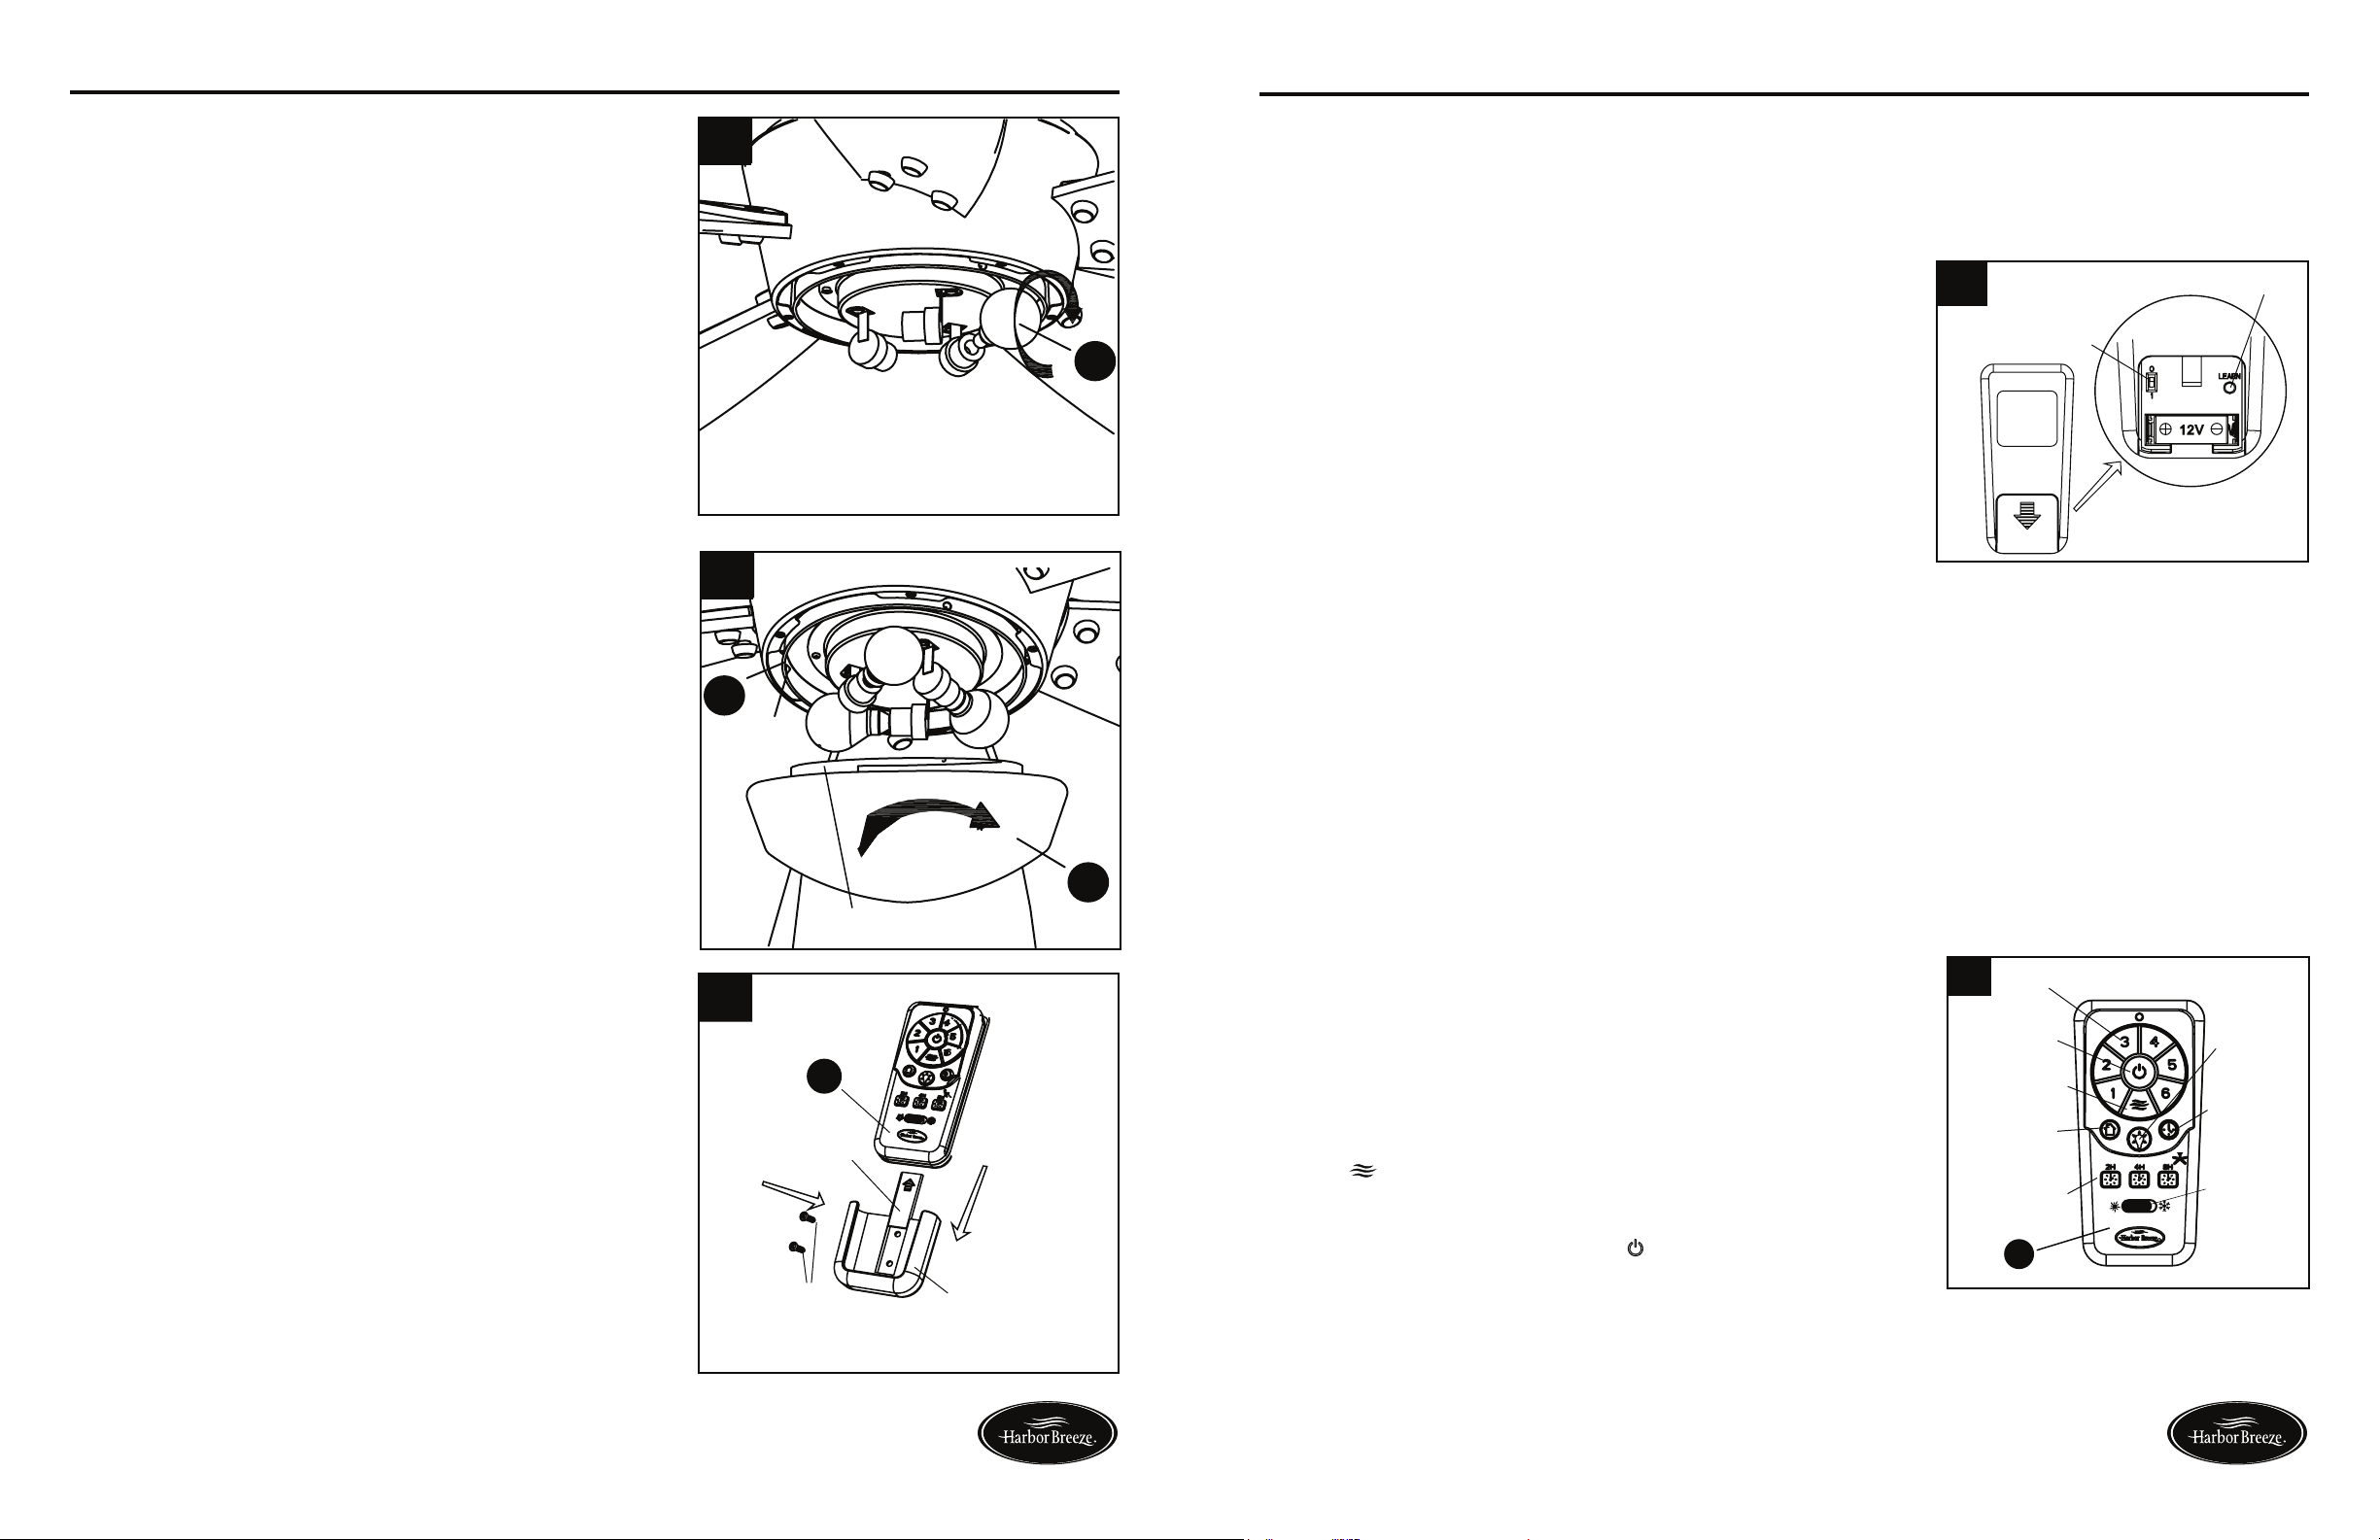
1. Install Battery:
Remove the battery cover from the back of the remote found in
the remote pack (M). Insert the battery from the remote pack (M)
into the remote; ensure polarity of battery matches the polarity
indicated in the battery compartment -- positive (+) to positive (+)
and negative (-) to negative (-). Replace the battery cover.
2. Learning/Pairing (see Fig. 1):
The dip switch in the remote control has been set to “0” to match
the receiver in the fan. If there is more than one remote control in
a room, changing dip switch settings may be needed.
To change a dip switch setting, slide the switch inside the battery
compartment to “1”, turn off power to the fan, then turn on the
power. Within 30 seconds of restoring power, tap the “learn” key
on the back of the remote control. If learning is successful, the fan
light will blink three times and turn on.
Note: The fan will run at the highest speed in corresponding
direction per seasonal slide switch.
• In warmer weather, counterclockwise rotation creates a downward air flow, which cools the air. Push
the switch LEFT and see a Sun icon.
• In cooler weather, clockwise rotation creates an upward air flow,
which moves hot air from the ceiling into the room. Push the switch
RIGHT and see a Snowflake icon.
3. Season Slide Switch:
When the season changes, you may want to change the direction your fan spins. To switch between
clockwise and counterclockwise rotation, flip the season slide switch.
Note: Wait for the fan to stop before reversing switch.
4. Fan Speeds: 6 Speeds and Natural Breeze (See Fig. 2):
• Tap “1”, “2”, “3”, “4”, “5” or “6” key to switch fan to corresponding
speed, “1” being the lowest and “6” being the highest.
• Tap “ ” key to enter Natural Breeze mode. Natural Breeze mode
will simulate a natural breeze, like being outside. (Fan blades will
turn at different speeds randomly.)
• To exit Natural Breeze mode, tap “ ” then one of the numerical
settings to shift to relative key function/speed.
Loading ...
Loading ...