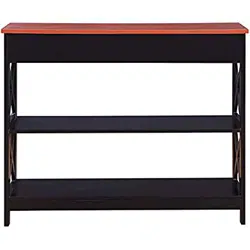
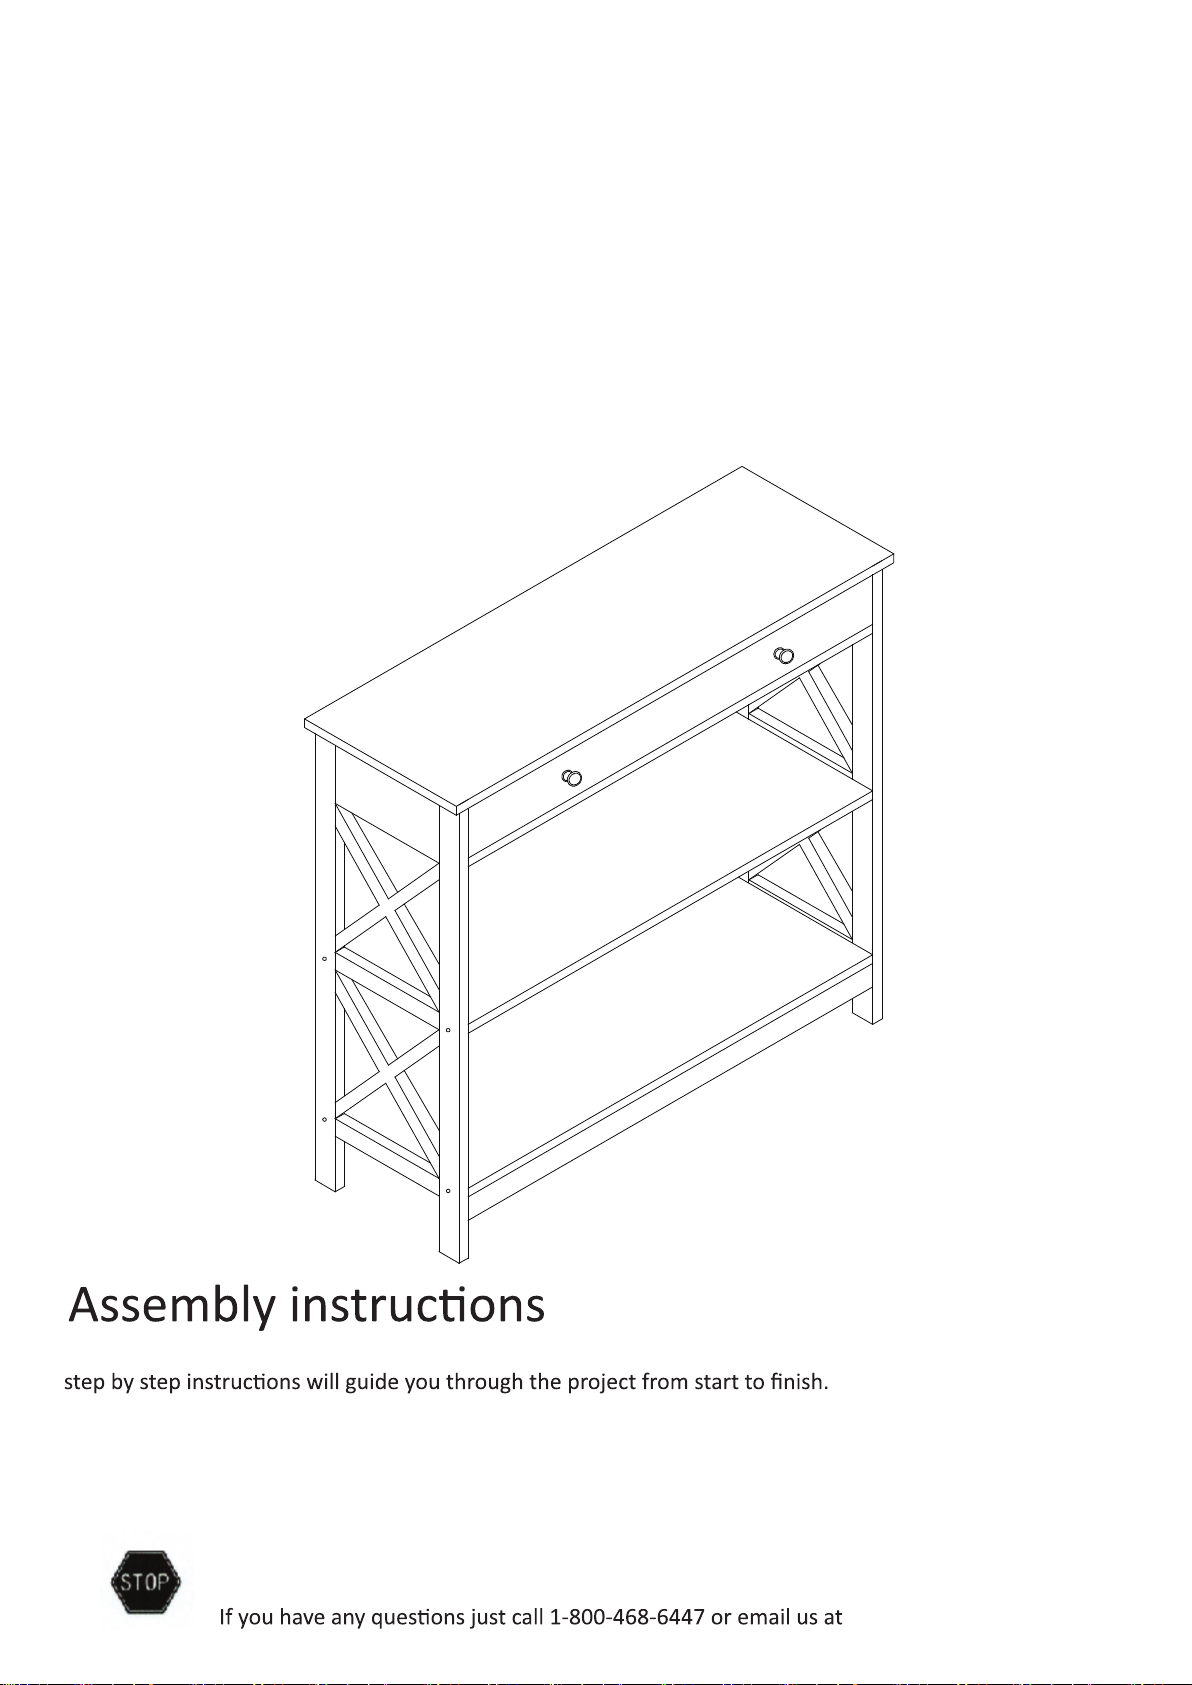
Oxford 1 Drawer Console Table
203295W/203295BL/203295ES
We have designed our furniture with you,the customer in mind.Our clear,easy to follow
Feel confident that this will be a fun and rewarding project. The final product will be a quality piece of
furniture that will go together smoothly and give years of enjoyment.
Please do not return to the store
Broken or missing Hardware?
Neen help with Assembly?
parts@convenience-concepts.com
CONVENIENCE
CONCEPTS
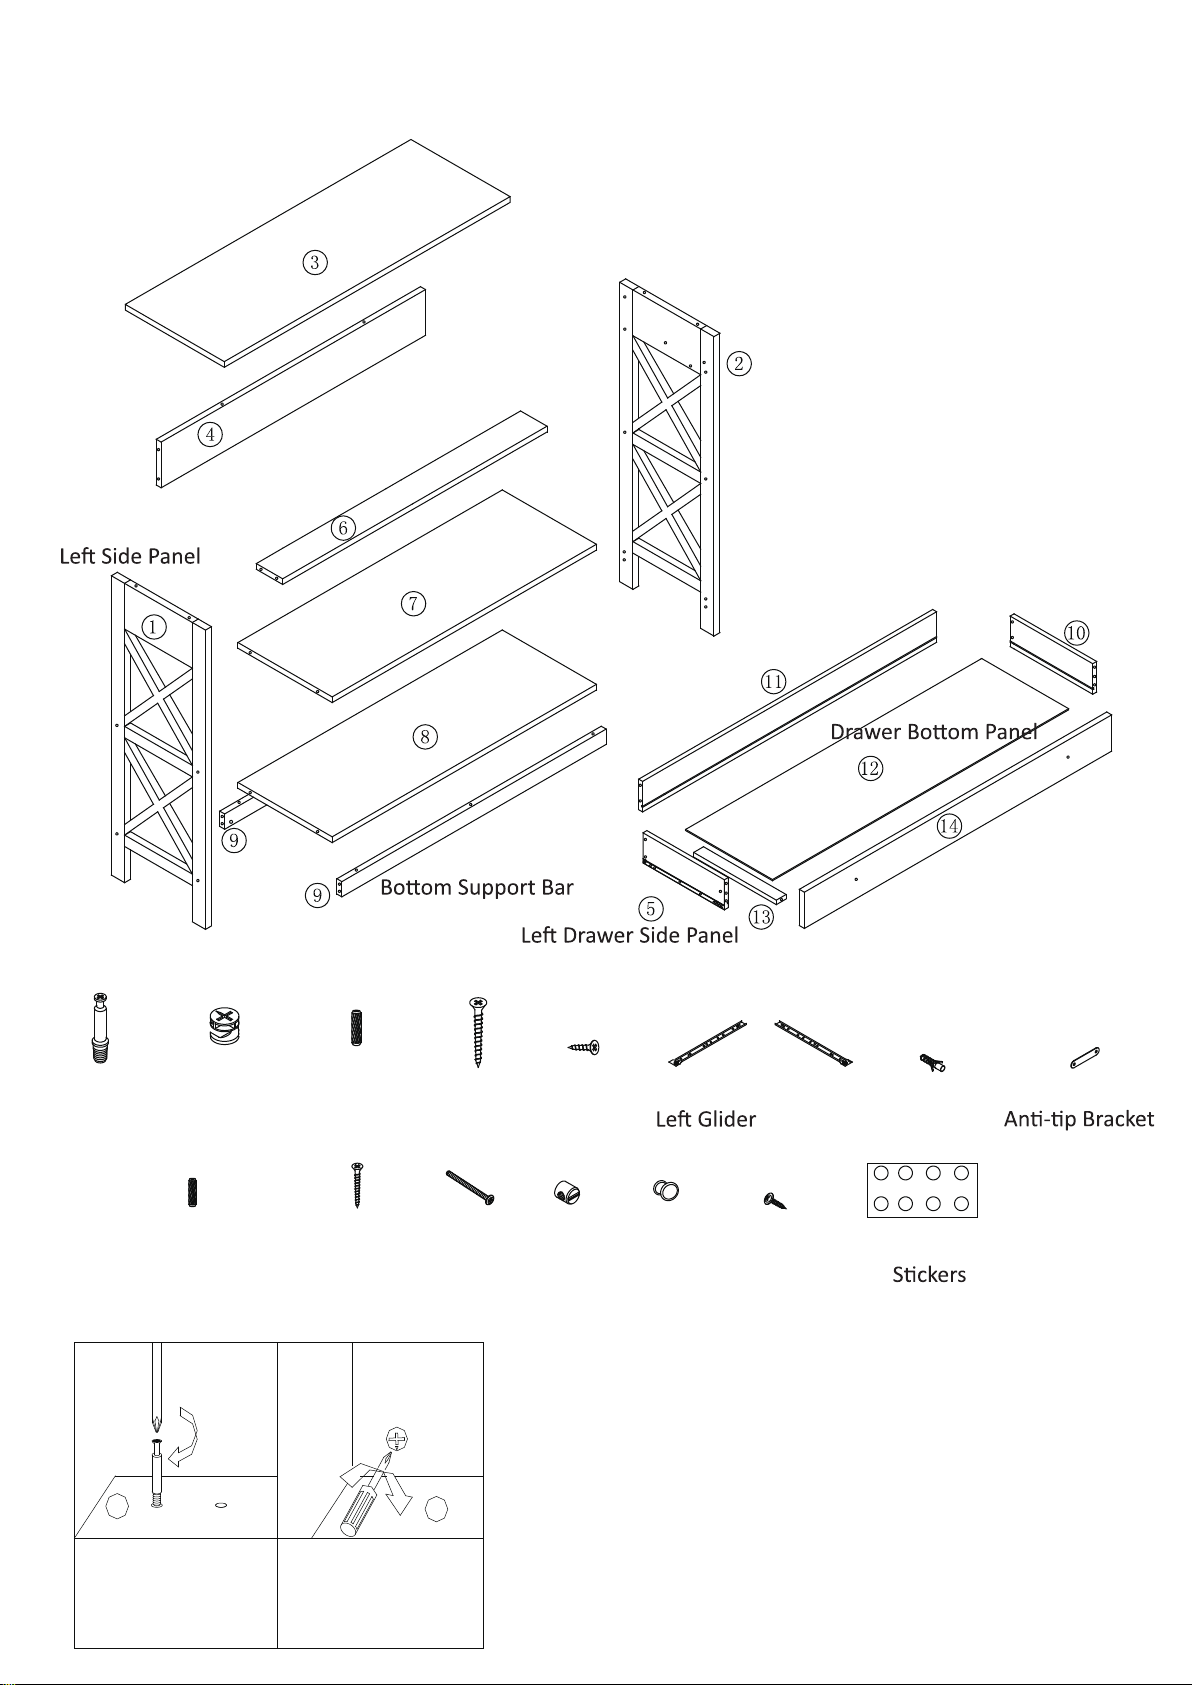
Top Panel
Back Support Bar
Right Side Panel
Support Bar
Shelf
Shelf
Right Drawer Side Panel
Drawer Back Panel
Drawer Support Bar
Drawer Front
A 17pcs B 17pcs C 4pcs D 13pcs E 4pcs F 1pc G 1pc
H 2pcs
I 2pcs
J 4pcs
K 8pcs L 8pcs M 8pcs N 2pcs O 2pcs
Cam Bolt Cam Lock Wooden Dowel Screw Small Screw
Right Glider
Wooden Dowel
Bolt Lock Nut Handle Small Screw
Anchor
Assembling the unit with cams .
A
Gently screw cam
bolt into the
threaded anchor.
Insert cam lock with
arrow pointing down.
Screw the cam firmly
into locked position.
D
Page 2 of 5
P 8pcs
3*12
3*15
Skinny
Handle Screw
Step 1
E×4
F×1
G×1
D×6
A×4
B×4
C×2
L×4
M×4
Step 2
Step 3
Page 3 of 5
1. Screw com bolts (A) into le side panel 1 .
2. Connect back support bar 4 and support bar 6 to le side panel 1 using combolts (A) and camlocks (B).
3. Connect shelves 7 and 8 using bolts (L) and locknuts (M) as shown.
Step 4
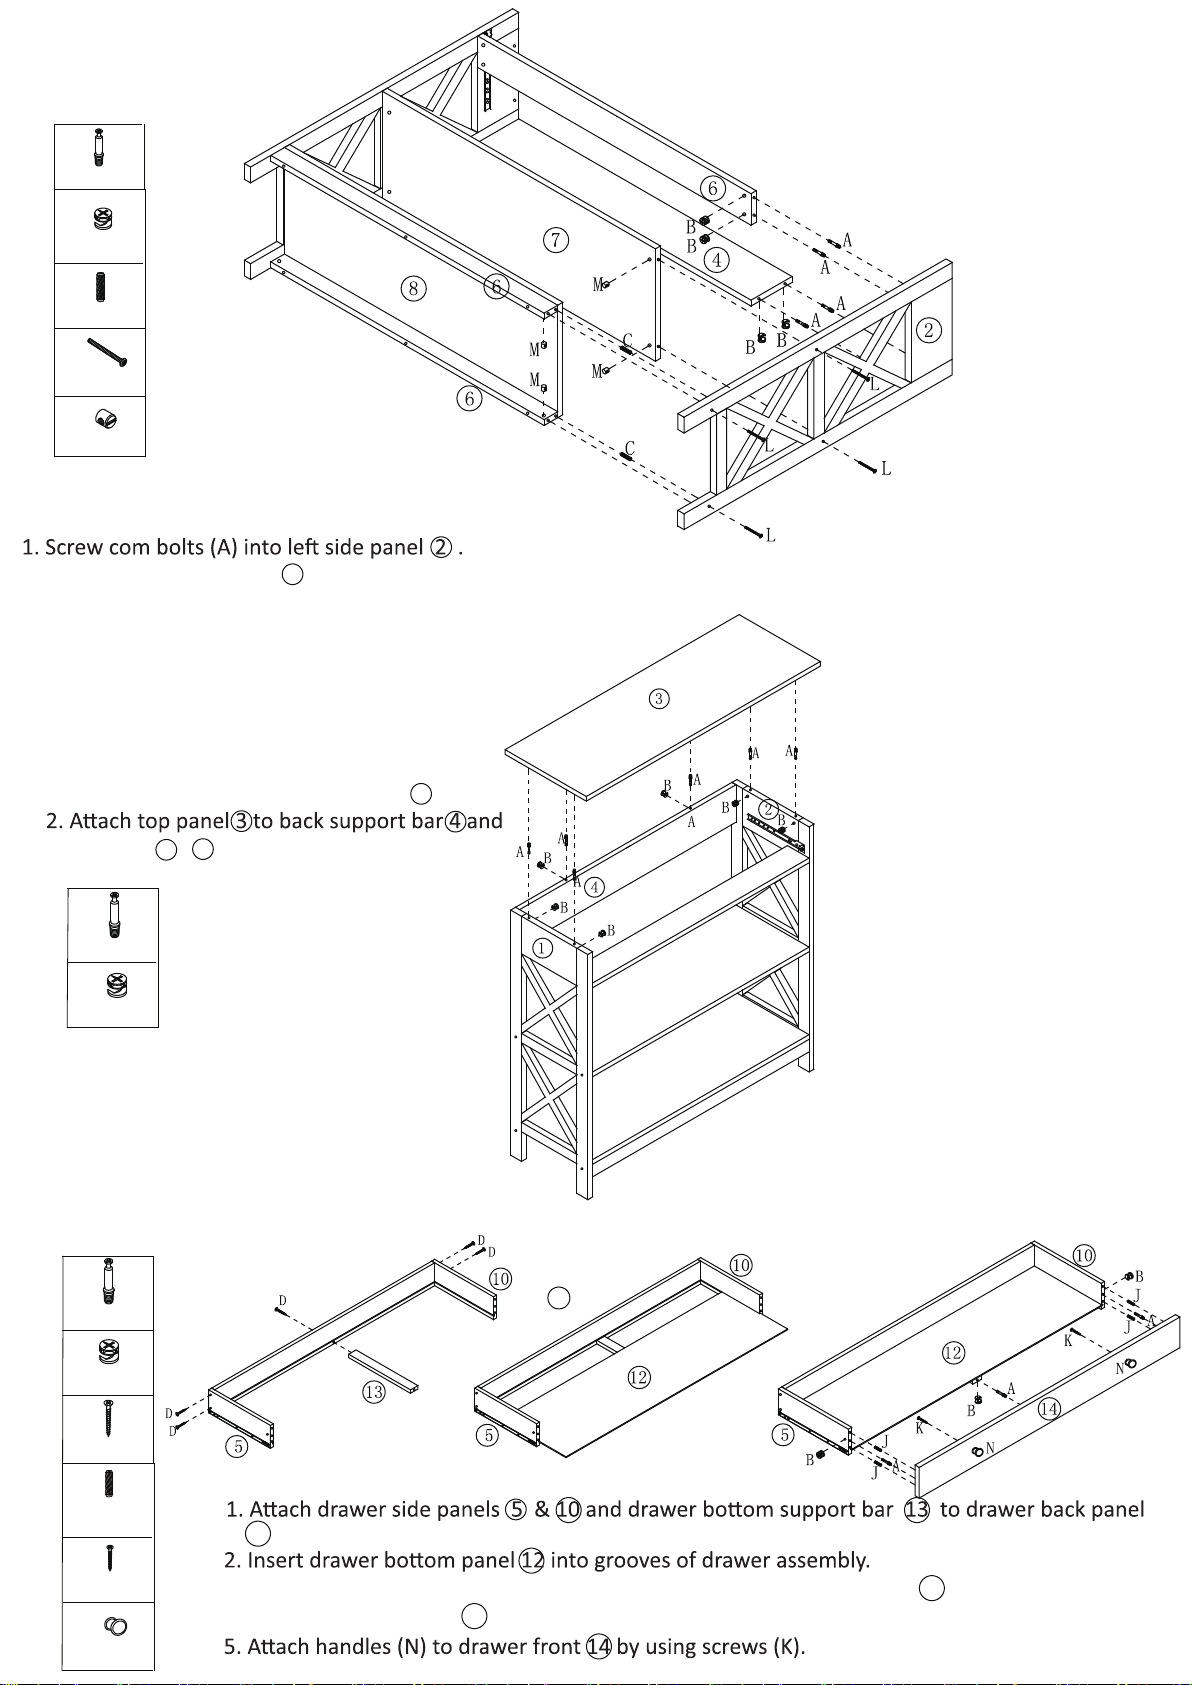
A×3
B×3
D×5
J×4
K×2
N×2
A×6
B×6
A×4
B×4
C×2
L×4
M×4
Step 5
Step 6
side panels 4 & 2 using
com locks (B).
11
Page 4 of 5
2. Connect right side panel 2 to unit using combolts (A), comlocks (B),bolts (L) and lock nuts (M).
1. Screw com bolts (A) into top panel 3 .
3. Screw combolts (A) and insert skinny wood dowels
4. Connect drawer front 14 to assembly by using comlocks (B).
11 using screws (D).
into drawer front 14 .
Step 7
Step 8
D×2
H×2
I×2
O×2
P×8
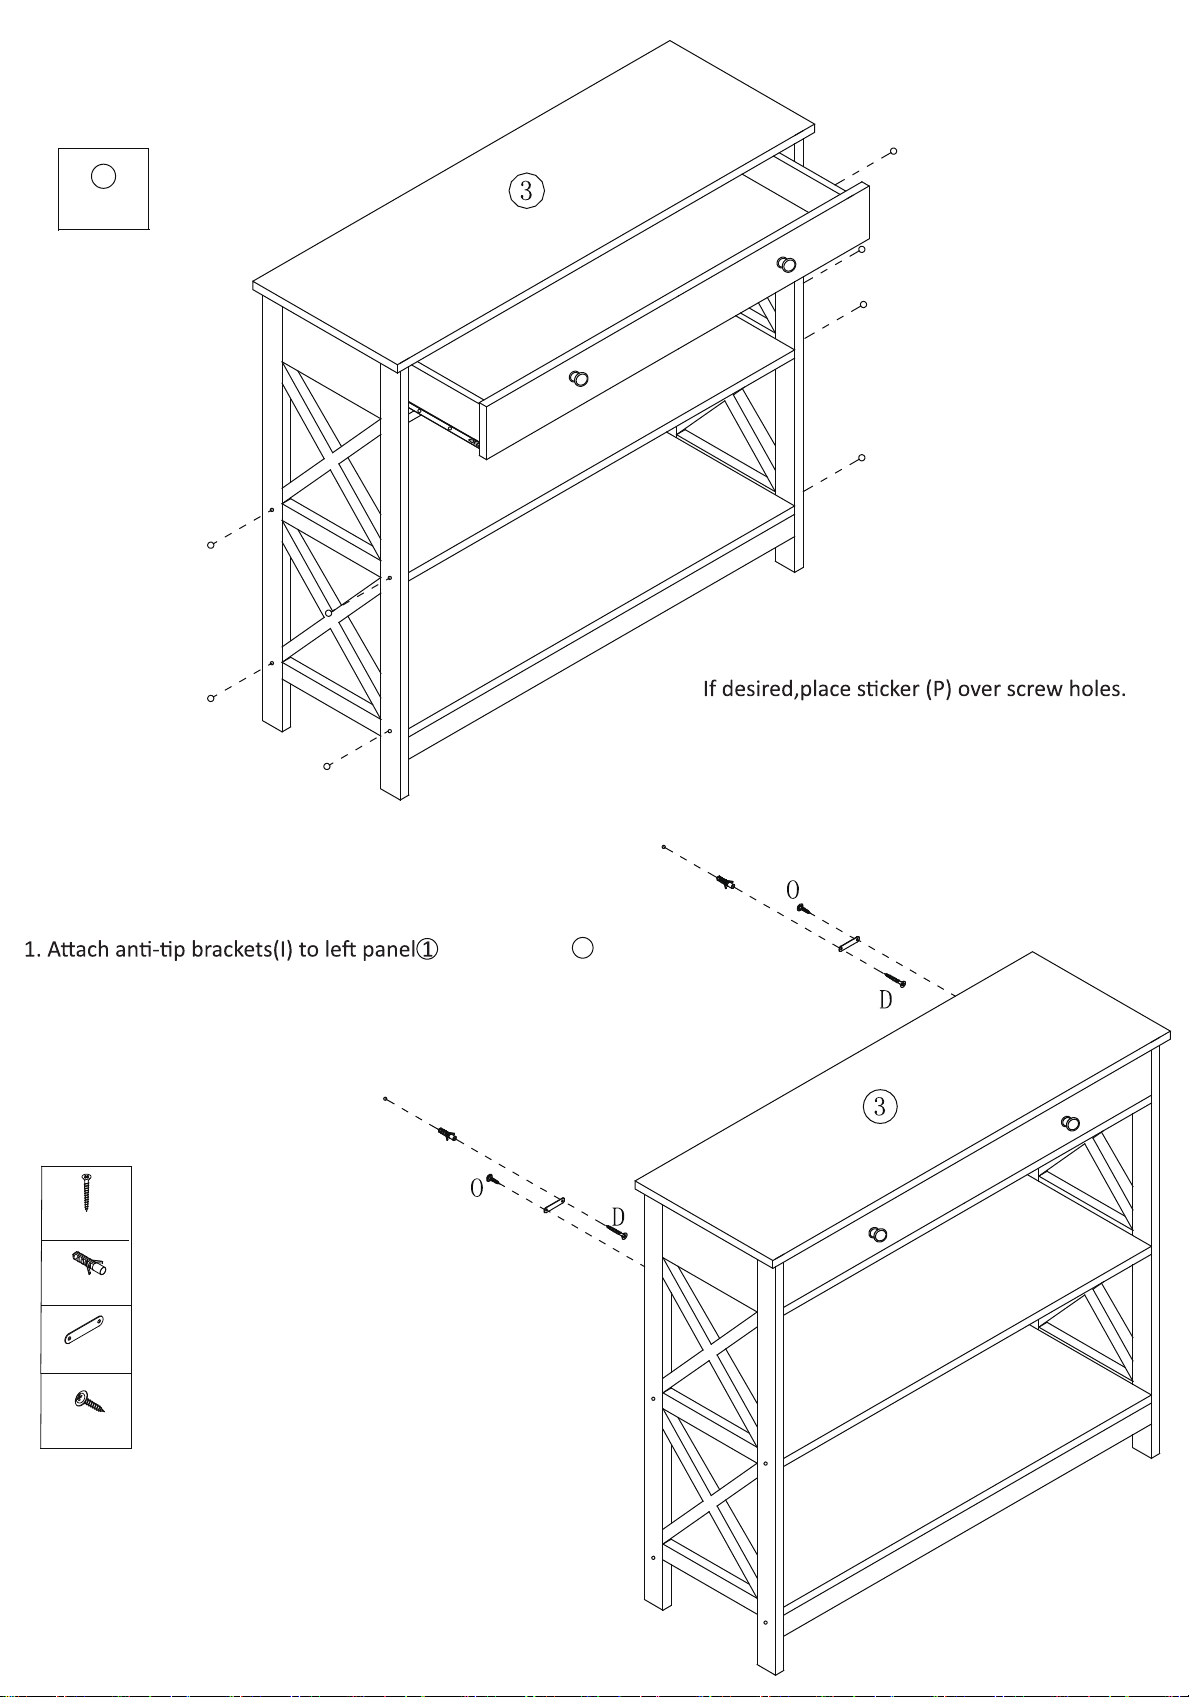
& right panel 2 using small screw (O)
2. Place unit against wall and mark bracket holes.
3. Drill holes in wall sligh
tly smaller than
anchor (H)
4. Fasten unit to wall using screw (D) thr
ough
5. Enjoy.
Page 5 of 5
H
H
I
I
P
P
P
P
P
P
P
P
and gently tap anchors into holes.
brackets (I).
1. Carefully insert drawer into unit.