Loading ...
Loading ...
Loading ...
“Relay Operation Icon” shows the working state of relays. The icon will keep lighting up
if contacts are connected, and will be off if contacts are disconnected.
“Number Display” is LED Nixie Tube.
Control Function and Instructions
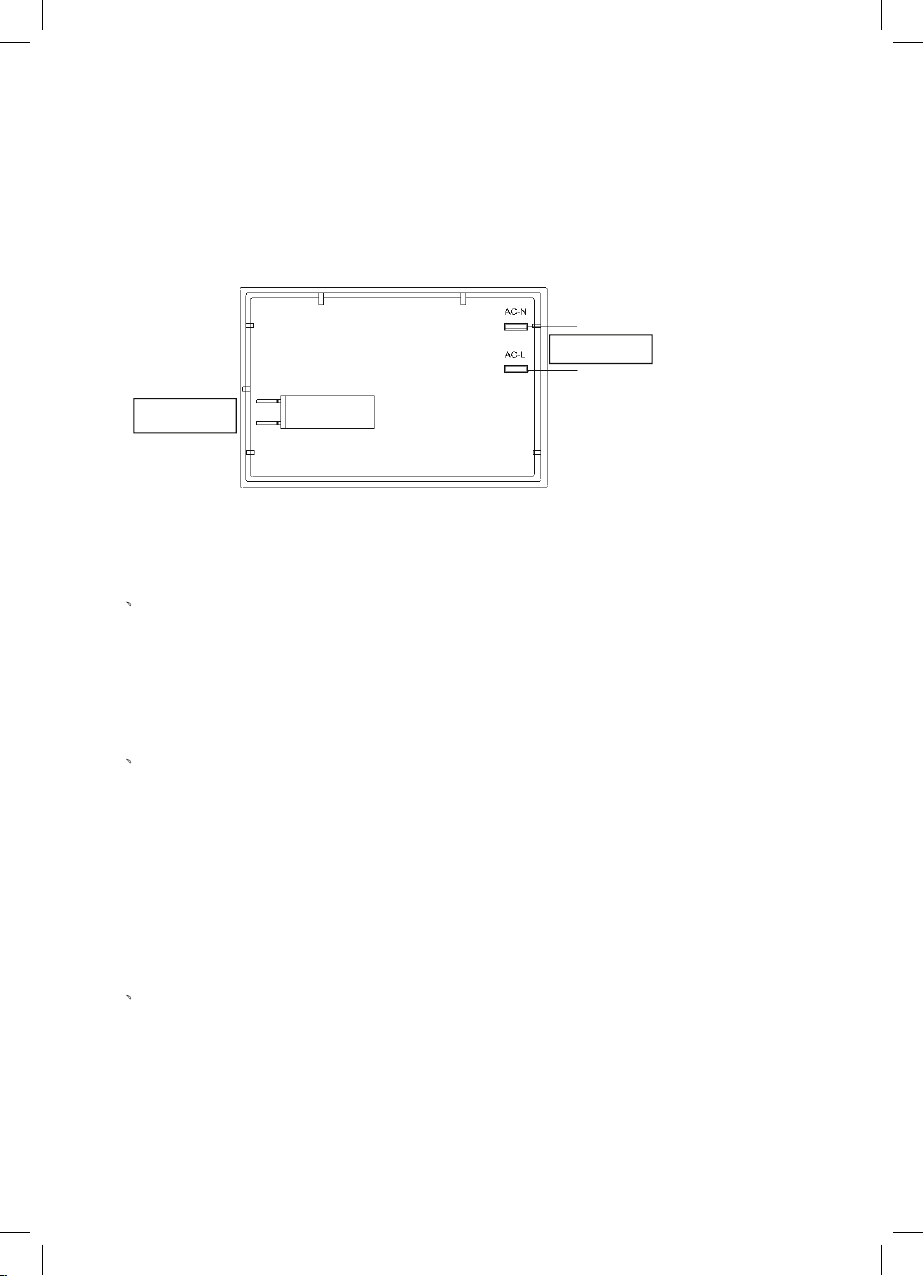
As shown in the picture, on-off control is used to control heating components of oven, the
left is power source which can be connected under the 220V.
1、
Time Adjustment after Starting up
When the power is on, it shows 12:00 and flashes. The relay contact is disconnected,
auto-programming icon keeps lighting up, time setting icon flashes.
Press K1 or K3 to adjust the present time or press K2 to get into the working mode. The
relay contact is connected.
Press K2 by 4 times to get into the present time-setting mode under the common mode.
2、
Alarm and Buzz Function
Press K2 once under the common mode: “Alarm Icon” flashes. Press K1 or K3 to adjust the
present alarm clock.
5s after adjusting to the time you need, “Alarm Icon” keeps flashing, and will work after
setting up. In this case, pressing K1 can know the alarming time( it will show seconds at
one last minute).
When alarm counts down to zero, alarming program ends, alarm icon flashes, and the
buzzer is buzzing. Press any key to stop the buzzing or it will turn off automatically after 2
minutes.
3、
Auto-programming Setting and Instructions
① Sem
iautomatic program m
ode
Use this setting for oven working tim
e, automatic heating switch-of
f at the end of setting
time, buzzer will inform the user.
on-off control
Power source
Press K2 twice or three times to get into the auto-programming time setting,
“Auto-programming Icon” flashes. Press K1 and K3 to adjust continuous time and end
time.
26
5s after setting, it will work automatically work, “ Auto-programming Icon” keeps
lighting up. If continuous time is 0, turn off the relay contact, and “ Relay Operation
Icon” is dark, “ Auto-programming Icon” flashes, the buzzer is buzzing.
This mode’s range of continuous time and end time:
Adjustment range for continuous time: > 0 but ≤ 10 hours
Adjustment range for end time: present time< end time<= present time + 10 hours
If meet this standard: end time = present time + continuous time
For example: the present time is 2:00, then the max. end time is adjusted to 12:00(2:
00+10:00=12:00. When the end time is adjusted to 12:00, then the continuous time
is 10:00.
5s after adjusted, automatic program is working. After 10 hours, if continuous time is
counting down to 0, turn off the relay contact, and “Relay Operation Icon” is dark,
“Auto-programming Icon” flashes, the buzzer is buzzing.
Note:
1. only use this setting for either continuous time or end time.
For example: the present time is 2:00, and if let the oven work for 3 hours, set the
continuous time to 3:00, and the end time will automatically change to 5:00 and
vice versa.
2. If the continuous time is equal to 0 or the end time is equal to the present time, it
means that the automatic program is over.
3. When the automatic program is over, the continuous time is 0 and the end time is
equal to the present time.
② Automatic Mode
Use this mode for setting oven’s starting time and end time, which means make an
appointment to boot. When the time is over, it will automatically turn off the heating
and the buzzer is buzzing to inform the user.
Press twice to get into the continuous time setting mode under the common mode, press
three times to get into the end time setting mode.
When the continuous time setting is ok or the end time setting is ok, then press K2 to get
into the other kind of automatic program time setting, “ Auto-programming Icon”
flashes, press K1 and K3 to adjust continuous time and end time.
5s after automatic program setting, it will automatically work, and “Auto-programming
Icon” keeps lighting up. Turn off the relay contact, and the icon is dark. When work
until the starting time, the relay contact is connected, the icon is light. When the
continuous time is counting down, if the continuous time is 0, turn off the relay contact,
“Relay Operation Icon” is dark, “ Auto-programming Icon” flashes, and the buzzer is
buzzing.
27
Loading ...
Loading ...
Loading ...