Loading ...
Loading ...
Loading ...
EN 3
INSTALLATION INSTRUCTIONS:
The hood is supplied with all the accessories necessary
for its installation. The minimum distance between the
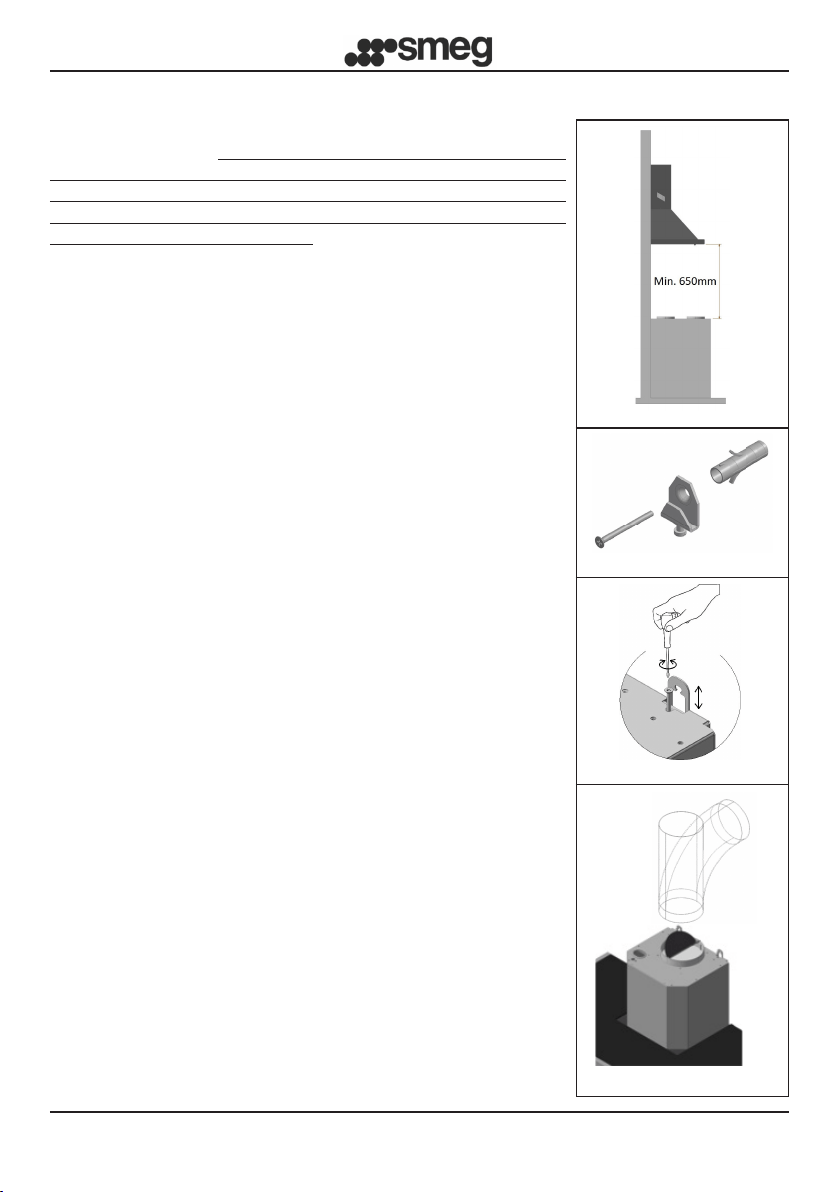
lower surface of the hood and the hob must be at least
650mm for electric hobs (Fig. 1). If the motor inlet is
equipped with a non-return valve for fumes, make sure
it can open and close freely.
For easy installation it is recommended to follow the
procedures described below:
1) The hood must be centred with respect to the hob surface.
2) There are different installation procedures depending
on the hood model. Choose one of the following xing
systems:
a) 2 levelling hooks that fasten on with the supplied
expansion plugs (Fig. 2)
b) Rear levelling bracket that fastens on with the
supplied expansion plugs (Fig. 3)
c) For island models refer to the special installation
attachment.
N.B.: Fixing systems a) and b) t on to the back of the
hood in the holes L1 (Fig. 5).
3) Remove the grease lters and position the hood on the
wall and mark the reference position for the holes to
anchor the relative xing system.
4) Drill the 2 holes previously marked after removing the
hood from the wall
5) Anchor the xing system to the wall by tightening the
expansion plug
6) Mark holes L2 on the wall to secure the plugs safely in
the holes. (plugs supplied)
7) Hang the hood on the xing system (g. 2 and 3) and
level it using the adjustment screws ( g.2 ).
8) Securely x the hood by fully tightening the two expansion
screws of the holes L2
AIR CONNECTION SYSTEMS:
EXTRACTION version:
Connect the fume expulsion duct (inside diameter Ø 150
mm) to the exhaust of the motor inlet. The expulsion duct
must not have a diameter Ø of less than 120 mm.
Note that if the hood is supplied with an active carbon
lter, this must be removed (see page 8)
Deviation for Germany:
When the hood and other appliances powered by energy
other than electricity are simultaneously ON, the negative
pressure in the room must not exceed 4 Pa (4 x 10
-5
bar).
Fig. 1
Fig. 2
Fig. 3
Ø150
Fig. 4
Loading ...
Loading ...
Loading ...