Loading ...
Loading ...
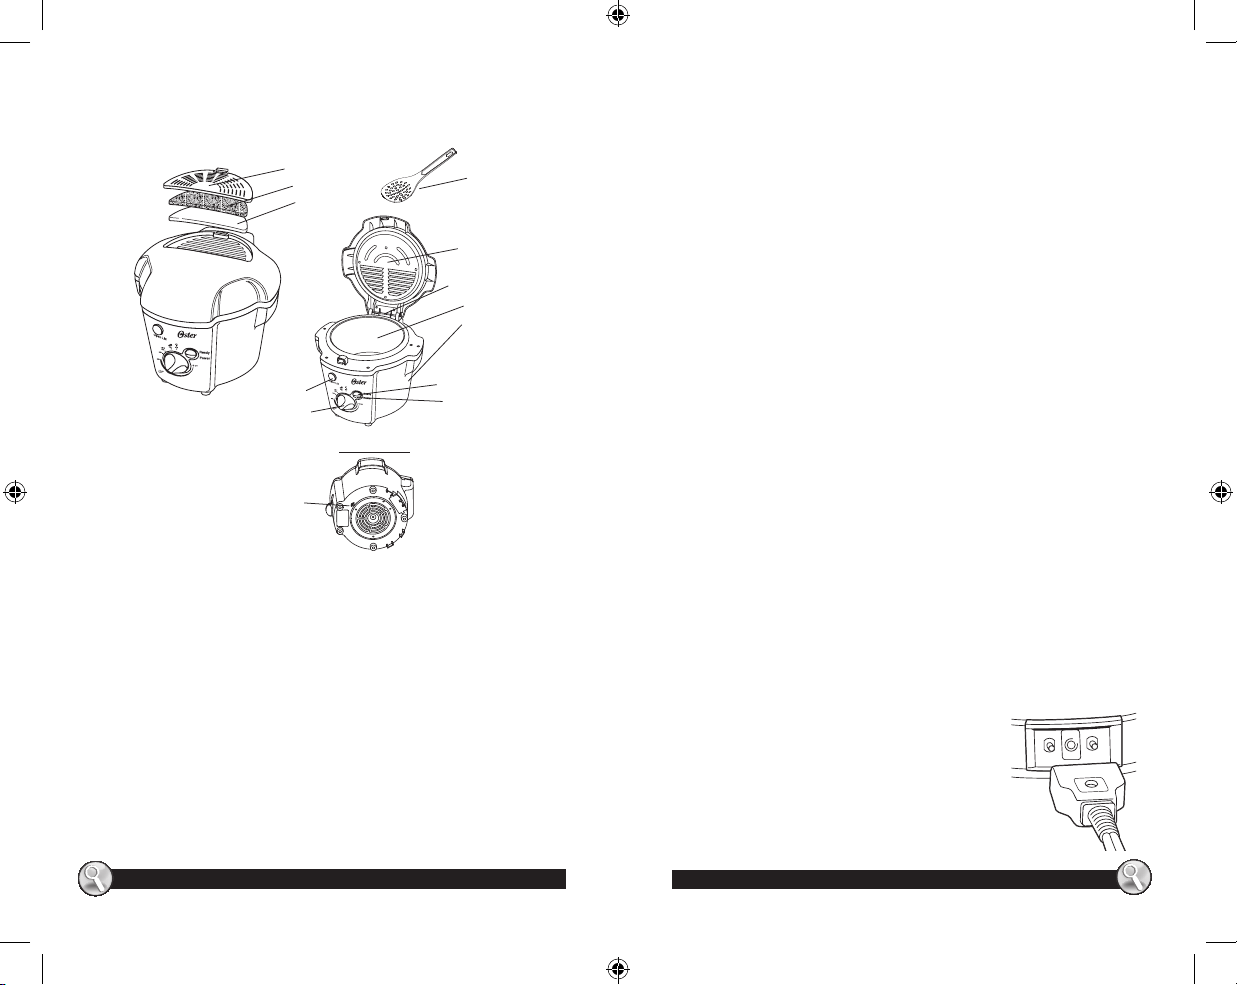
KNOW YOUR DEEP FRYER
• Serving spoon included.
PREPARING YOUR FRYER FOR USE
Prior to first use, remove all packaging materials from the exterior and interior of
the fryer. Make sure fryer is unplugged and wipe the interior and exterior
surfaces
with a damp soapy cloth. Towel dry thoroughly. See CARE AND CLEANING.
CAUTION: Do not immerse fryer, cord, or plug in water.
Removable Lid
Removable
Condensation Tray (back
of fryer, not shown)
Oil Reservoir
Fryer Housing
Ready Indicator (Green)
Power Indicator (Red)
Open Lid Button
Adjustable Thermostat
Removable Filter Cover
Charcoal Odor Filter
White Grease Filter
spoon
Bottom View
Reset Button
TIPS FOR DEEP FRYING
• Fill the unit between the maximum and minimum capacity lines only.
• To achieve quality results deep frying food needs to be surrounded by oil.
Too much food causes the oil temperature to drop, resulting in “soggy”
food.
• Be sure that all ice crystals are removed from the food and food is
completely dry. Excessive water and ice can cause the oil to splatter and/or
overflow.
• Coated foods (bread crumbs, batters, etc.) are best for deep frying. The
coating acts as a protective layer keeping food moist on the inside and
crisp on the outside.
• Before deep frying, remove ice crystals from food and blot dry with a
towel. Excessive water and ice can cause the oil to splatter and/or
overflow.
• For best results, defrost frozen foods for 20 minutes to create a crispier
final product.
• Fry foods at the correct temperature for best results. This will prevent
burning and give you even colored, crispy food.
• Prepackaged frozen cooked chicken may cook faster then uncooked food.
HOW TO USE YOUR DEEP FRYER
NOTE: Never turn on the fryer with an empty OIL RESERVOIR. Always use your
fryer on a flat, heat resistant surface.
1. Attach magnetic end of cord assembly directly to the
fryer (See Figure 1). This should be done prior to
plugging the cord into the wall outlet. The
magnetic end of the cord is designed to only go on
one way. Be sure the side stating "THIS SIDE UP" is
facing up.
2. Unlock LID by depressing OPEN LID BUTTON.
www.oster.com
www.oster.com
4 5
Figure 1
CKSTDFFM15-B_13ESM1.indd 5-6 5/24/13 3:50 PM
Loading ...
Loading ...
Loading ...