Loading ...
Loading ...
Loading ...
CI
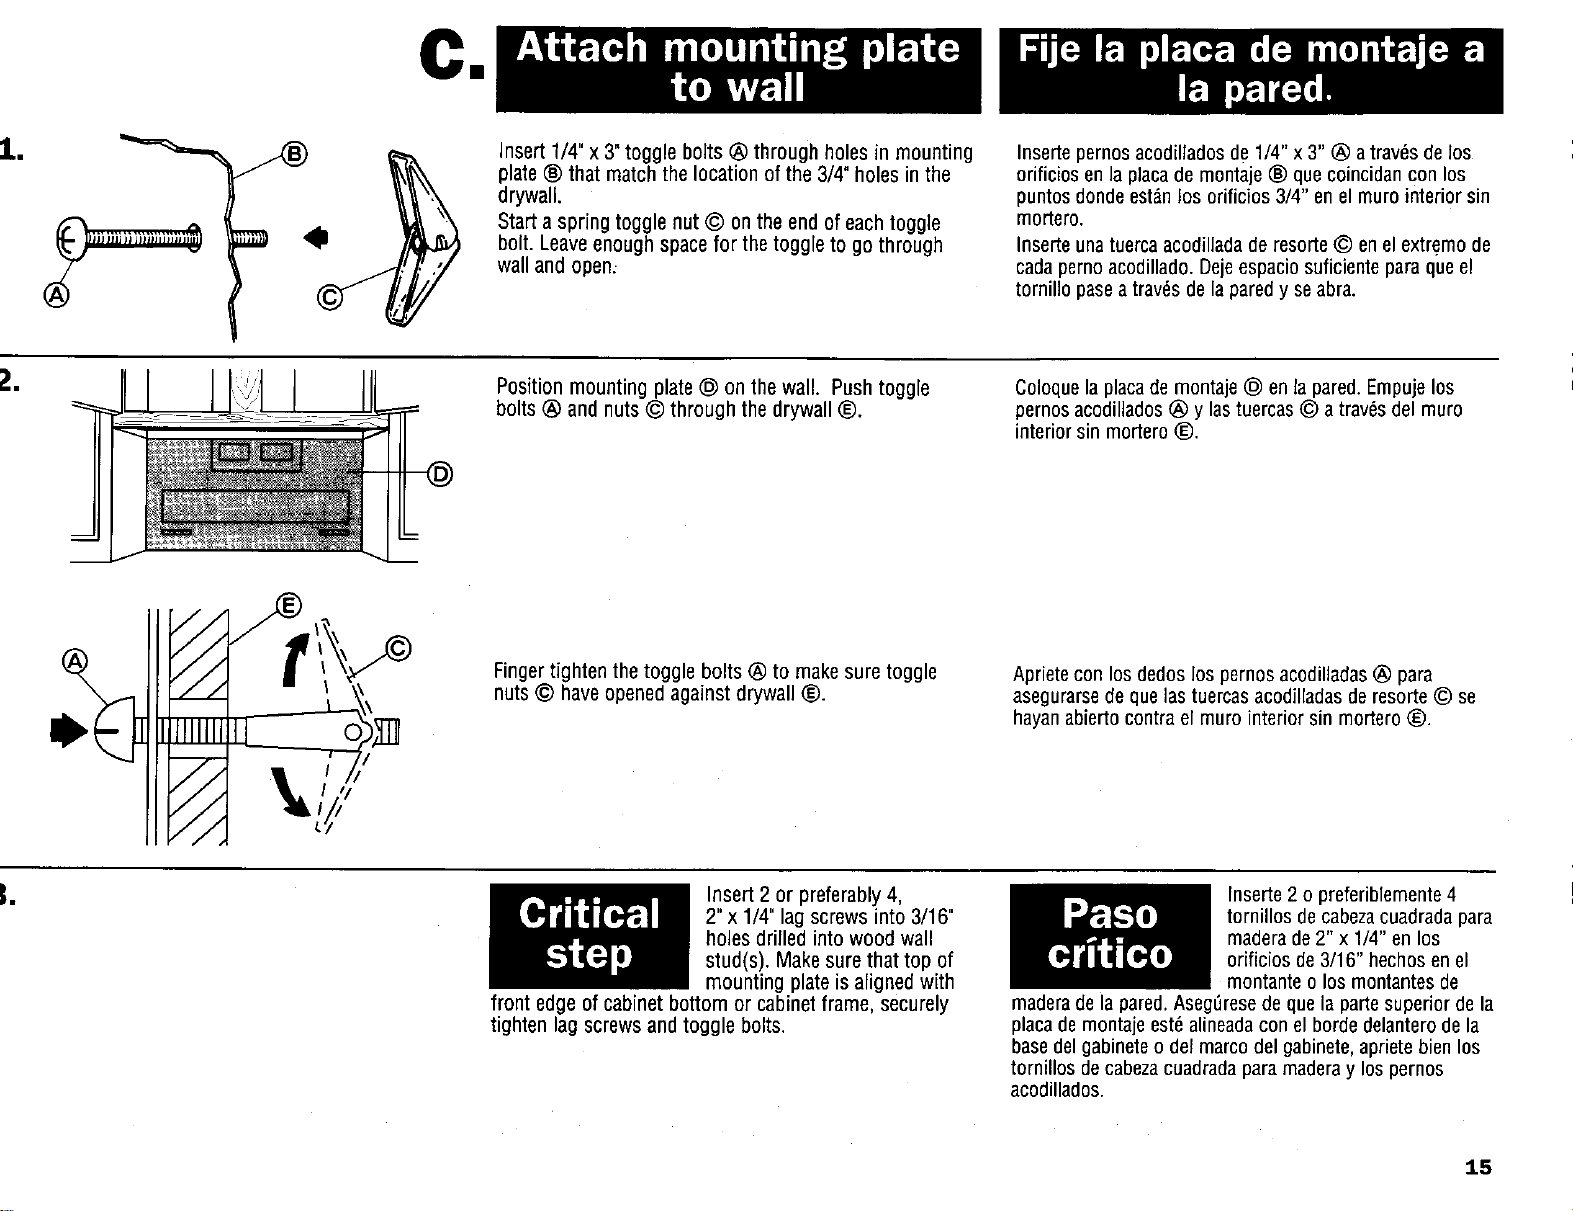
insert 1/4" x 3"toggle bolts _) through holes in mounting
plate ® that match the location of the 3/4" holes in the
drywall.
Start a spring toggle nut © on the end of eachtoggle
bolt. Leaveenough space for the toggle to go through
wall and open:
Insertepernosacodillados de 1/4" x 3" (_ a tray,s de los
orificios en la placade montaje ® que coincidan con los
puntos donde est_nlos orificios 3/4" en el muro interior sin
mortero.
Inserte unatuerca acodillada de resorte© en elextremo de
cadapernoacodillado. Dejeespacio suficiente para que el
tornillo paseatray,s de la paredy seabra.
Position mounting plate © on the wall. Push toggle
bolts @ and nuts © through the drywall ®.
Coloquela placade montaje © enla pared. Empujelos
pernos acodillados _) y las tuercas© a tray,s del rnuro
interior sin mortero ®.
Finger tighten the toggle bolts _) to make sure toggle
nuts © have opened against drywall ®.
Apriete con los dedos los pernos acodilladas_) para
asegurarsede que lastuercas acodilladas de resorte© se
hayanabierto contra el muro interior sin mortero ®.
Insert 2 or preferably 4,
2"x 1/4" lag screws into 3/16"
holes drilled into wood wall
stud(s). Make sure that top of
mounting plate is aligned with
front edge of cabinet bottom or cabinet frame, securely
tighten lag screws and toggle bolts.
Inserte 2 o preferiblemente4
tornillos decabezacuadradapara
maderade2" x 1/4" en los
orificios de 3/16" hechos en el
montante o los montantes de
maderade la pared.Aseg0resede que la pane superior de la
placademontaje est6 alineadacon el horde delantero de la
basedelgabineteo del marco del gabinete, aprietebien los
tornillos de cabezacuadradaparamaderay los pernos
acodillados.
15
Loading ...
Loading ...
Loading ...