Loading ...
Loading ...
Loading ...
17
Hisense Refrigerator
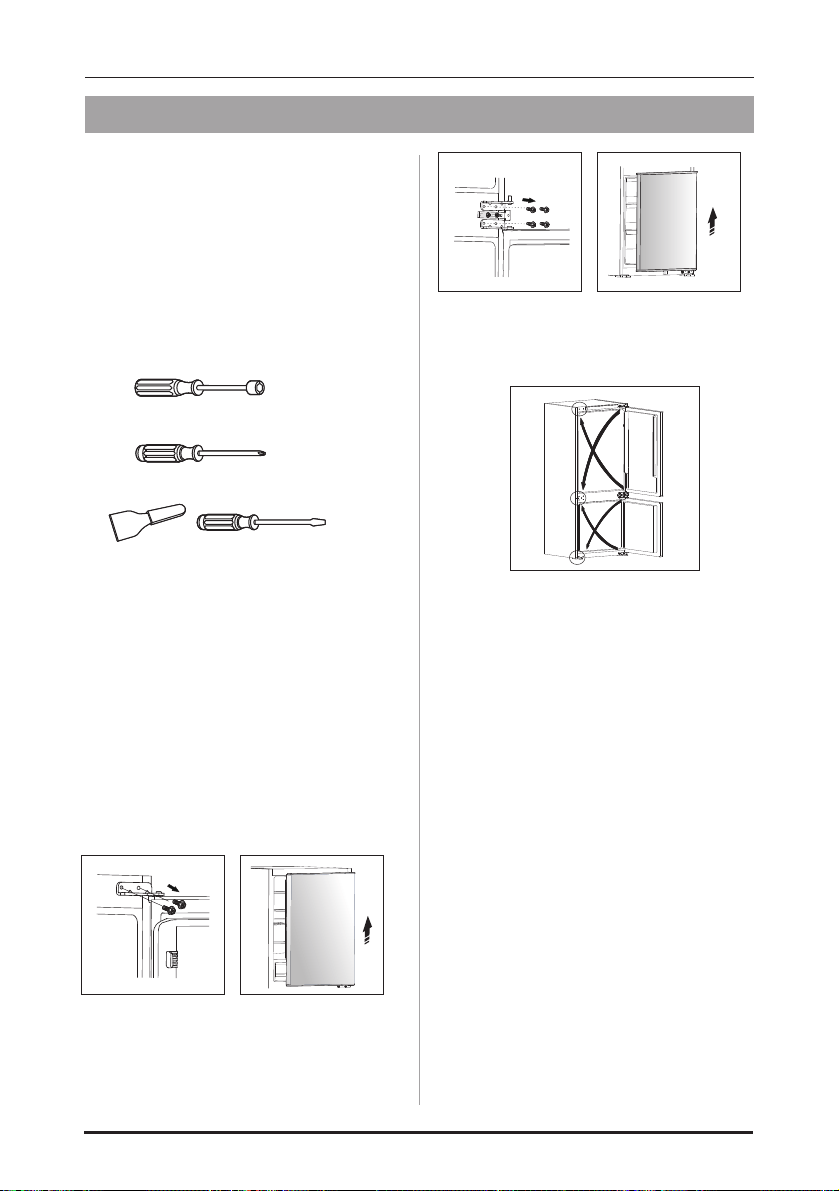
Reverse the door
The side in which the door opens can be
changed from the right side (as supplied) to
the left side, if the installation site
Tools you will need:
1. 8mm socket driver
2. Cross-shaped screwdriver
allows for it.
3. Putty knife or thin-blade screwdriver
Note: When required, tilt the refrigerator side
in order to gain access to the base, you
should rest the appliance on soft foam
packaging or similar material to avoid damage.
180°
180°
Warning! When reversing the door, the
appliance must not be connected to the
mains. Ensure that the plug is removed from
the mains socket.
1. Stand the refrigerator upright. Open the
upper door to take out all door racks (to avoid
racks damaged) and then close the door.
2. Unscrew the upper door hinge and remove
it. Remove the upper door from the middle
hinge by carefully lifting the door straight up.
Then place it on a smooth surface with its
upper cover upwards.
3. Loose screws used to fix the middle door
hinges and remove them. Then remove the
lower door. And unscrew the lower door hinge.
4. Change screw hole covers from left to
right, and change the door hinges to opposite
side (as shown in figure below).
5. Fix the lower hinge with screws, and slot
the lower door onto the bottom hinge pin and
hold in position. Adjust the middle hinges to
to the appliance position and then install it
ensuring the lower door in secured in place.
6. Install the upper door and the upper hinge
as the same way.
Note: When reversing the door, the cabinet
installation can refer to Built-In Fridge Freezer
installation instructions.
Loading ...
Loading ...