Loading ...
Loading ...
Loading ...
Hisense Refrigerator
Cleaning and Care
Cleaning and care
For hygienic reasons, the appliance ( the
including exterior and interior accessories)
should be cleaned regularly at least every
two months.
Warning! Danger of electrical shock!
The appliance must not be connected to
the during cleaning.
Before cleaning, switch the appliance off
and remove the plug from the main power
fuse.
main power supply
supply, or shut off the circuit breaker or
Door seals cleaning
Take care to keep door seals clean.
Sticky food and drinks can cause seals
to the cabinet and tear when you open
the door. Wash seal with a mild detergent
and warm water. Rinse and dry it
thoroughly after cleaning.
Caution!
Only after the door seals are completely
dry should the appliance be powered on.
Exterior cleaning
To maintain good appearance of your
appliance, you should clean it regularly.
Wipe the digital panel and display panel
with a clean, soft cloth.
Spray water onto the cleaning cloth
instead of spraying directly on the surface
of the appliance. This helps ensure an
even distribution of moisture to the surface.
Clean the doors and cabinet surfaces with
a mild detergent and then wiped dry with
a soft cloth.
Caution!
Don’t use sharp objects as they are likely
to scratch the surface.
Don’t use Thinner, Car detergent, Clorox,
ethereal oil, abrasive cleansers or organic
solvent such as Benzene for cleaning.
They may damage the surface of the
appliance and may cause fire.
Interior cleaning
You should clean the appliance interior
regularly. It will be easier to clean when
food stocks are low. Wipe the inside of
the fridge freezer with a weak solution of
bicarbonate of soda, and then rinse with
warm water using a wrung-out sponge
or cloth. Wipe completely dry before
replacing the shelves and baskets.
Thoroughly dry all surface and removable
parts
Although this appliance automatically
defrosts, a layer of frost may occur on the
freezer compartment’s interior walls if the
freezer door is opened frequently or kept
open too long. If the frost is too thick,
choose a time when the supply of food
stocks are low and proceed as follows:
Remove existing food and accessories
baskets, unplug the appliance from the
mains power and leave the doors open
Ventilate the room thoroughly to
accelerate the thawing process.
When defrosting is completed, clean
your freezer as described above.
Caution!
Don’t use sharp objects to remove frost
from the freezer compartment. Only after
the interior is completely dry should the
appliance be switched back on and plug.
back into the mains socket.
Defrosting
A) Fridge compartment
This compartment defrosts automatically.
The defrosting water runs to the drain tube
via a collection container at the back of the
appliance.
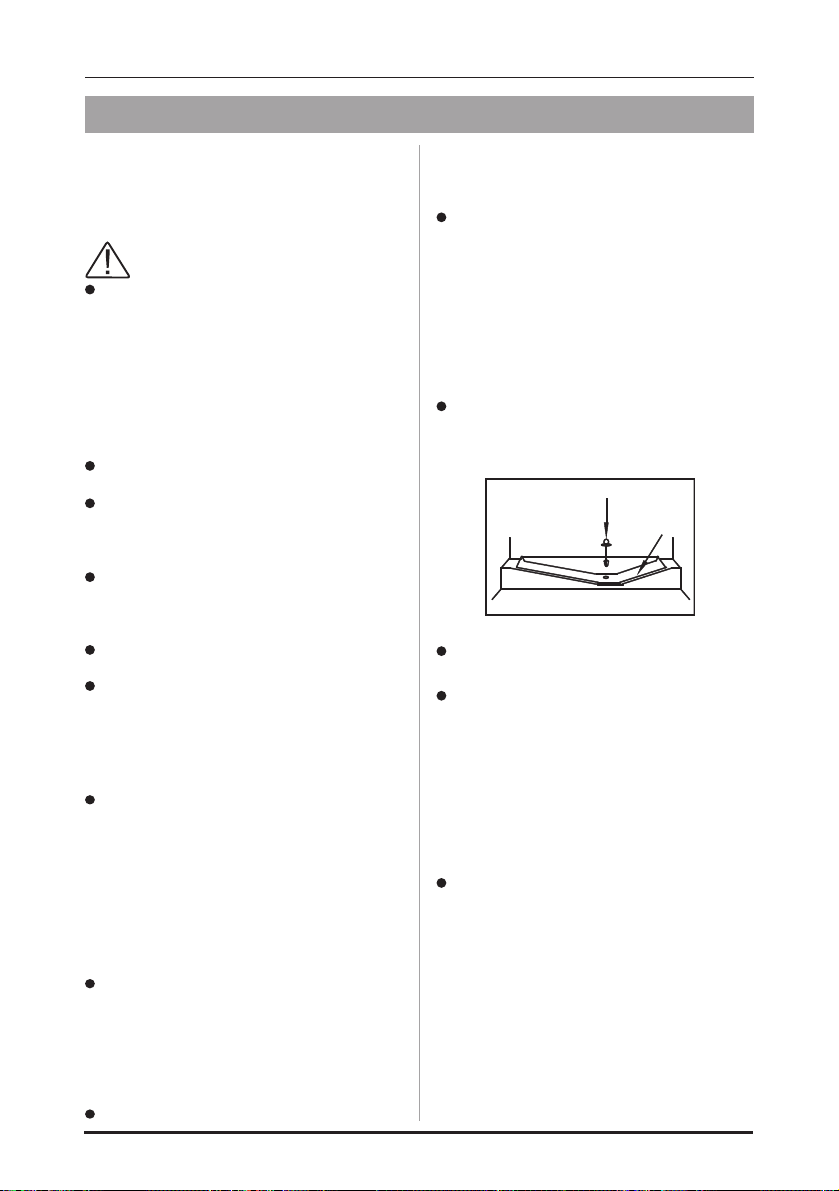
Drain tube
Defrost
Water
Collection
B) Freezer compartment
This compartment defrosts automatically.
Replacing the LED light
Warning: The LED light must not be
replaced by the user! If damaged, contact
the customer helpline for assistance. To
replace the LED light, the below steps can
be followed:
1. Unplug your appliance.
2. Remove light cover by pushing up and
out.
3. Hold the LED cover with one hand and
pull it with the other hand while pressing
the connector latch.
4. Replace LED light and snap it correctly
in place.
14
Loading ...
Loading ...
Loading ...