Loading ...
Loading ...
Loading ...
Getting Started
WARNING
See the Important Safety and Product Information guide in the
product box for product warnings and other important
information.
Keys
UP Hold to turn the device on and off.
Select to scroll through menus and settings. During play,
select to scroll through hazards, layups, and doglegs.
DOWN Select to scroll through menus, and settings. While viewing
the clock, select to view sunrise and sunset times. During
play, select to scroll through hazards, layups, and doglegs.
OK Select to choose menu options and acknowledge
messages. During play, select to access in-round features.
BACK Select to return to the previous menu.
Turning On the Device
The first time you turn on the device, you are prompted to
configure system settings.
1
Hold .
2
Follow the on-screen instructions.
Status Icons
Battery status
Battery charging
Sunrise
Sunset
Playing Golf
Before you can play golf, you must wait until the device acquires
satellite signals, which may take 30 to 60 seconds.
1
Select OK.
2
Select Start Round.
The device locates satellites, calculates your location, and
selects a course if there is only one course nearby.
3
If the course list appears, select a course from the list.
4
Follow the on-screen instructions to complete the setup and
start a round.
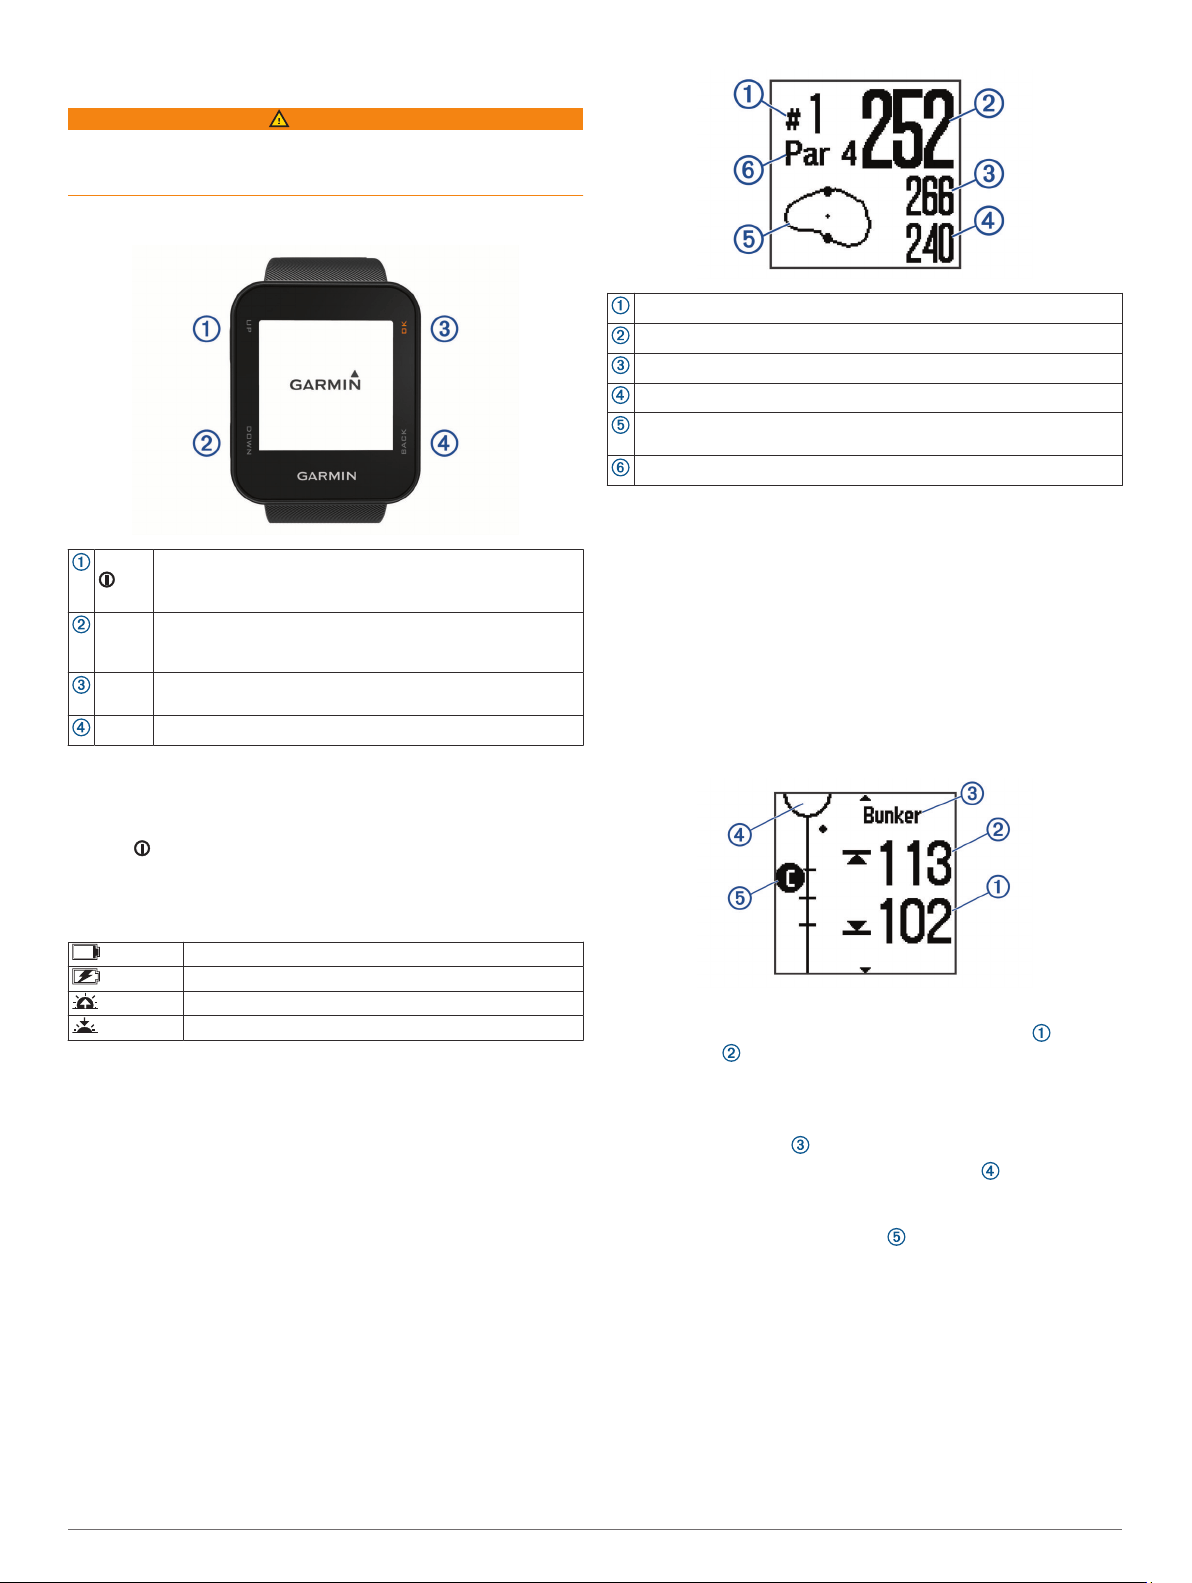
Hole View
The device shows the current hole you are playing, and
automatically transitions when you move to a new hole.
NOTE: Because pin locations change, the device calculates the
distance to the front, middle, and back of the green, but not the
actual pin location.
Current hole number.
Distance to the middle of the green.
Distance to the back of the green.
Distance to the front of the green.
Approximate view of the green. The middle of the green is indicated
with +.
Par for the hole.
Measuring a Shot
1
While playing golf, hold OK.
The Measuring Shot screen appears.
2
Walk to your ball.
TIP: You can select DOWN to reset the measurement.
Viewing Course Features
You can view distances to course features, such as hazards,
layups, and doglegs, for par 4 and 5 holes.
1
While playing golf, select UP or DOWN.
2
Select a feature.
• The distances to the feature appear on the screen:
◦ For large hazards, the distances to the front and
back of the hazard are listed. For small hazards,
only the distance to the front of the hazard is listed.
◦ For layups and doglegs, the distance to the feature is
listed.
• The feature type is listed at the top of the page.
• The green is represented as a half circle at the top of
the screen. The line below the green represents the center
of the fairway.
• Features for the current hole are shown below the
green in approximate locations relative to the fairway.
3
Select UP or DOWN to view other features for the current
hole.
Keeping Score
When scoring is enabled, you are prompted to enter your score
when you are on the green. You can adjust the score manually
at any time during a game.
1
While playing golf, select OK.
2
Select an option:
• If scoring is not enabled, select Start Scoring.
Getting Started 1
Loading ...
Loading ...
Loading ...