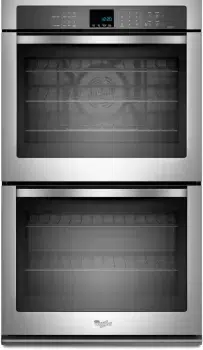
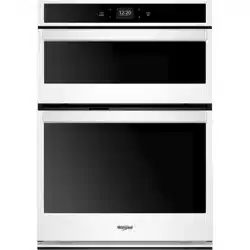
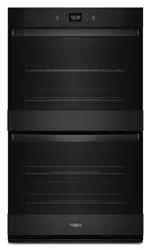
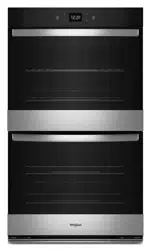
This manual covers different models. The oven you have purchased may have some or all of the items listed. The locations and appearances of the features shown here may not match those of your model.
A.Electronic oven control
B.Oven vent
C.Model and serial number plate (on center vent under control panel)
D.Broil element
E.Gasket
F.Bottom vent
G.Lower oven (on double oven models)
H.Hidden bake element
I.Convection element and fan
J.Oven lights (left side not shown)
K.Oven door lock latch and oven light switch
Parts and Features not shown
Oven racks
ELECTRONIC OVEN CONTROLS
This manual covers different models. The oven you have purchased may have some or all of the items listed. The locations and appearances of the items shown here may not match those of your model.
The oven's controls are accessed through its control panel.
Single Oven Control Panel
Double Oven Control Panel
Display
When power is first supplied to the oven or if a power failure occurs, “12:00” will appear on the display. See “Clock” in the “Settings” section to set time of day.
When the oven is not in use, the display shows the time of day.
Cancel
The Cancel pads stop any function except the Timer and Control Lock.
Oven Lights
While the oven doors are closed, press OVEN LIGHT to turn the lights on and off. Both oven lights will come on when either door is open. The oven lights will not come on during the Self-Clean cycle.
Timer
The Timer can be set in hours or minutes up to 9 hours and 59 minutes, and counts down the set time. The Timer does not start or stop the oven.
To Set:
1.Press TIMER SET/OFF. “Set TIMER” will scroll down in the text display area, and the clock will display “--:--”.
2.Press the Temp/Time keypad to enter the desired Timer. “Press TIMER” will scroll down in the text display area.
3.Press TIMER SET/OFF to start the timer. The time begins counting down. “TIMER Started” will scroll down in the text display area. The last minute of the timer countdown will be displayed in seconds.
At the end of the set time, 4 tones will sound, and “TIMER End” will be displayed.
4.Press TIMER SET/OFF to clear the display.
NOTE: A reminder beep will sound until the Timer is canceled.
To Cancel:
Press TIMER SET/OFF.
Settings
Fahrenheit and Celsius
The temperature is factory preset to Fahrenheit but can be changed to Celsius.
1.Press SETTINGS twice. “TEMP UNIT” and “FAHRENHEIT. Press (1) for CELSIUS” will appear in the display text area.
2.Press the Temp/Time “1” keypad to change the temperature unit.
3.“CELSIUS Selected” will scroll in the text area. The temperature unit has been changed.
NOTE: A similar procedure can be done to return the temperature unit to FAHRENHEIT.
Tones
Tones are audible signals, indicating the following:
Basic Functions
One tone
Valid pad press
Function has been entered
Oven is preheated
Three tones
Invalid pad press
Four tones
End of cycle
End of Kitchen Timer
Adjusting Sound On or Off
The oven sound is factory preset for On but can be changed to Off.
1.Press SETTINGS three times. “SOUND” and “ON. Press (1)for OFF” will appear in the display text area.
2.Press the Temp/Time “1” keypad to change the sound setting.
3.“OFF Selected” will scroll in the text area. The sound setting has been changed.
NOTE: A similar procedure can be done to return the sound setting to On.
Adjusting Sound Volume
The oven sound is factory preset for High but can be changed to Low.
1.Press SETTINGS four times. “SOUND VOLUME” and “HIGH. Press (1) for LOW” will appear in the display text area.
2.Press the Temp/Time “1” keypad to change the sound volume setting.
3.“LOW Selected” will scroll in the text area. The sound volume setting has been changed.
NOTE: A similar procedure can be done to return the sound volume setting to High.
Adjusting End Tone On or Off
The end tone is factory preset for On but can be changed to Off.
1.Press SETTINGS five times. “END TONE” and “ON. Press
(1)to OFF” will appear in the display text area.
2.Press the Temp/Time “1” pad to change the end tone setting.
3.“OFF Selected” will scroll in the text area. The end tone setting has been changed.
NOTE: A similar procedure can be done to return the end tone setting to On.
Adjusting Keypress Tone On or Off
The keypress tone is factory set for On but can be changed to Off.
1.Press SETTINGS six times. “KEYPRESS TONE” and “ON. Press (1) to OFF” will appear in the display text area.
2.Press the Temp/Time “1” pad to change the keypress tone setting.
3.“OFF Selected” will scroll in the text area. The keypress tone setting has been changed.
NOTE: A similar procedure can be done to return the keypress tone setting to ON.
Adjusting Reminder Tone On or Off
The reminder tone is factory preset for On but can be changed to Off.
1.Press SETTINGS seven times. “REMINDER TONE” and “ON. Press (1) to OFF” will appear in the display text area.
2.Press the Temp/Time “1” pad to change the reminder tone setting.
3.“OFF Selected” will scroll in the text area. The reminder tone setting has been changed.
NOTE: A similar procedure can be done to return the reminder tone setting to ON.
Clock
To Set the Clock:
Before setting, make sure the oven(s) and Timer are off.
1.Press SETTINGS once, and “CLOCK” appears in the text area.
2.Press the Temp/Time keypad to enter the desired time. The text area will change to “Press START.”
3.Press START. “Time Set” will appear in the text area. Once the display clears, the time is set.
The clock can be set to display time in a 12-hour or 24-hour format. The clock is factory preset for the 12-hour format.
To Change the Clock to 24-Hour Format:
1.Press SETTINGS eight times. “12/24 HOUR” and “12HR. Press (1) for 24HR” will appear in the display text area.
2.Press the Temp/Time “1” keypad to change the 12/24 hour setting.
3.“24HR Selected” will scroll in the text area. The 12/24 hour setting has been changed.
NOTE: A similar procedure can be done to return the 12/24 hour setting to 12HR.
Sabbath Mode
Sabbath Mode is used to configure the oven system so that certain features and modes are disabled or defeatured. By enabling Sabbath Mode, the oven will conform to Star-K Jewish Sabbath requirements.
The oven is factory preset with Sabbath Mode Off.
To Enable Sabbath mode:
1.Press SETTINGS nine times. “SABBATH” and “OFF. Press
(1)for ON” will appear in the display text area.
2.Press the Temp/Time “1” pad to change the Sabbath setting.
3.“ON Selected” will scroll in the text area. The Sabbath setting has been changed.
NOTE: A similar procedure can be done to return the Sabbath setting to OFF.
12-Hour Auto Off
The oven control is factory preset to automatically shut off the oven 12 hours after the oven turns on. This will not interfere with any timed or delayed cook function.
To Cancel 12-Hour Auto Off:
1.Press SETTINGS ten times. “12Hr AUTO_OFF” and “ON. Press (1) to OFF” will appear in the display text area.
2.Press the Temp/Time “1” pad to change the 12-hour auto off setting.
3.“OFF Selected” will scroll in the text area. The 12-hour auto off setting has been changed.
NOTE: A similar procedure can be done to return the 12-hour auto off setting to ON.
Language
The Language is factory preset to English but can be changed to French or Spanish.
To Change the Language to French:
1.Press SETTINGS eleven times. “LANGUAGE” and “ENGLISH. Appuyez sur 1 pour FRANÇAIS” will appear in the display text area.
2.Press the Temp/Time “1” pad to change the language.
3.“FRANÇAIS Sélectionné” will scroll in the text area. The language has been changed.
NOTE: A similar procedure can be done to return the language to English.
Demo Mode
Demo Mode is intended for sales floor demonstration. It should be Off for normal operation. While Demo Mode is active the oven will not heat.
To turn off Demo Mode:
1.Press SETTINGS twelve times. “Demo Mode” and “ON. Press
(1)to OFF” will appear in the display text area.
2.Press the “1” keypad to change the Demonstration Mode setting to Off.
3.“OFF Selected” will scroll in the text area. Demo Mode has been turned Off.
4.Press SETTINGS twelve times then follow the display prompts to return the Demo Mode setting to On.
Oven Temperature Control
The oven provides accurate temperatures; however, it may cook faster or slower than your previous oven, so the temperature calibration can be adjusted. It can be changed in Fahrenheit or Celsius.
Temperature adjustment applies to upper or lower ovens.
A minus sign means the oven will be cooler by the displayed amount. The absence of a minus sign means the oven will be warmer by the displayed amount. Use the following chart as a guide.
To Adjust Oven Temperature Calibration:
For Single Ovens:
1.Press SETTINGS thirteen times. “OVEN CALIBRATE. Press START” appears in the text area.
2.Press START to calibrate the oven. “Enter Offset: Press 1 to increase, 2 to decrease” will appear in the text area.
3.Press the Temp/Time “1” keypad to increase or the Temp/ Time “2” keypad to decrease the temperature in 5°F (3°C) increments. The adjustment can be set between 30°F (18°C) and -30°F (-18°C).
4.Press START to save the adjustment and exit the Temperature Calibration menu.
For Double Ovens:
1.Press SETTINGS thirteen times. “TEMP CALIB” and “UPPER CALIBRATE. Press START or Press 1 for Lower calibrate” appears in the text area.
2.Press the “1” keypad to toggle between upper and lower oven calibration.
3.Press START to calibrate the selected oven. “Enter Offset: Press 1 to increase, 2 to decrease” will appear in the text area.
4.Press the Temp/Time “1” keypad to increase or the Temp/ Time “2” keypad to decrease the temperature in 5°F (3°C) increments. The adjustment can be set between 30°F (18°C) and -30°F (-18°C).
5.Press START to save the adjustment and exit the Temperature Calibration menu.
Control Lockout
The control can be locked out to avoid unintended use of the oven.
The current time of day will remain in the display when the control is locked.
To Lock Control:
For single ovens:
Press and hold START for 3 seconds or until “CONTROL LOCKED” scrolls in the display.
For double ovens:
Press and hold LOWER OVEN START for 3 seconds or until “CONTROL LOCKED” scrolls in the display.
NOTE: “CONTROL LOCKED” scrolls while the control is locking, then “LOCKED” is displayed. “LOCKED” remains lit in the display.
To Unlock Control:
For single ovens:
Press and hold START for 3 seconds or until “CONTROL UNLOCKED” scrolls in the display.
For double ovens:
Press and hold LOWER OVEN START for 3 seconds or until “CONTROL UNLOCKED” scrolls in the display.
OVEN USE
Odors and smoke are normal when the oven is used the first few times, or when it is heavily soiled.
IMPORTANT: The health of some birds is extremely sensitive to the fumes given off. Exposure to the fumes may result in death to certain birds. Always move birds to another closed and well- ventilated room.
Aluminum Foil
IMPORTANT: To avoid permanent damage to the oven bottom finish, do not line the oven bottom with any type of foil, liner or cookware.
For best cooking results, do not cover entire rack with foil because air must be able to move freely.
To catch spills, place foil on rack below dish. Make sure foil is at least ¹⁄₂" (1.3 cm) larger than the dish and that it is turned up at the edges.
Positioning Racks and Bakeware
IMPORTANT: To avoid permanent damage to the porcelain finish, do not place food or bakeware directly on the oven door or bottom.
Racks
Position racks before turning on the oven.
Do not position racks with bakeware on them.
Make sure racks are level.
To Remove Oven Racks:
Flat Racks: Pull rack out to the stop position, raise the front edge, and then lift out.
To Replace Oven Racks:
Place rack on the rack support in the oven. Tilt the front edge up slightly, and slide rack back until it clears the stop position. Lower front and slide back into the oven.
Convection Cooking (on some models)
Rack Positions - Upper and Lower Oven
Traditional Cooking
Rack positions for 30" (76.2 cm) and 27" (68.6 cm) Convection and Non-Convection ovens
1rack baking: 3
2rack baking in single or upper oven: 2 and 5 Most 2-rack baking in lower oven: 2 and 5 Roasting small cuts of meat and poultry: 2 Roasting large cuts of meat and poultry: 1
Rack positions and pan placement for layer cakes in 30" (76.2 cm) Convection and Non-Convection ovens
For best results when baking layer cakes on 2 racks, use racks 2 and 5 in the single or upper oven. Place the cakes on the racks as shown.
For best results when baking layer cakes on 2 racks in the lower oven, use racks 3 and 5. Place the cakes on the racks as shown.
Rack positions and pan placement for layer cakes in 27" (68.6 cm) Convection and Non-Convection ovens
For best results when baking layer cakes on 2 racks in the upper and lower oven, use racks 2 and 5. Place the cakes on the racks as shown.
BAKEWARE
To cook food evenly, hot air must be able to circulate. Allow 2" (5.0 cm) of space around bakeware and oven walls.
Meat Thermometer
Use a meat thermometer to determine whether meat, poultry and fish are cooked to the desired degree of doneness. The internal temperature, not appearance, should be used to determine doneness. A meat thermometer is not supplied with this appliance. Follow manufacturer's directions for using a meat thermometer.
Oven Vent(s)
Single and Double Oven
A.Control panel
B.Oven vent
C.Single oven or upper double oven
G. Bottom vent
Double Oven
D.Upper oven
E.Oven vent
F.Lower oven
G.Bottom vent
The oven vent(s) should not be blocked or covered since they allow the inlet of fresh air into the cooling system. Also, the bottom vent should not be blocked or covered since it allows the inlet of fresh air into the cooling system and the outlet of hot air from the cooling system. Blocking or covering vents will cause poor air circulation, affecting cooking, cleaning and cooling results.
Baking
Before baking, position racks according to the “Positioning Racks and Bakeware” section.
To Bake:
1.Press BAKE for the desired oven. “BAKE” and “Set temp or Press START” will scroll in the text area and 350°F (177°C) will be displayed.
2.Press the Temp/Time keypad to enter the desired temperature. The temperature can be set from 170°F (77°C) to 550°F (288°C).
3.(Optional) If a Set Cooking Time is desired, press COOK TIME. Press the Temp/Time keypad to enter the desired cook time. “Press START” will scroll in the text area.
4.(Optional) If a Set Start Time is desired, press START TIME. Press the Temp/Time keypad to enter the desired time to delay the beginning of the cooking cycle. “Press START” will scroll in the text area. If a cooking time was not set, the control will prompt you to Set Cooking Time. Set Cooking Time is mandatory when using the Set Start Time function.
5.After pressing START the oven will preheat and it will sound a beep when the preheat is done.
6.Place the food in the oven and close the oven door when preheat is completed.
7.Press CANCEL for the selected oven when finished.
8.Remove food from the oven.
NOTES:
The temperature may be changed at any time by pressing the Temp/Time keypad to enter the desired temperature and then pressing START. Changing the temperature once food is placed in the oven could affect the performance.
You can set or change the cooking time at any time while the oven is cooking by pressing COOK TIME. At the end of the time set, the oven will turn off automatically, the end of cycle tone will sound and “Cooking Complete” will appear in the text area.
Broiling
Broiling uses direct radiant heat to cook food. The lower the temperature, the slower the cooking. Thicker cuts and unevenly shaped pieces of meat, fish and poultry may cook better at lower broiling temperatures.
For best results, use a broiler pan and grid (not provided). It is designed to drain juices and help avoid spatter and smoke. If you would like to purchase a broiler pan, one may be ordered. See “Assistance or Service” section to order.
For proper draining, do not cover the grid with foil. The bottom of the pan may be lined with aluminum foil for easier cleaning.
Trim excess fat to reduce spattering. Slit the remaining fat on the edges to avoid curling.
Select 550°F (288°C) broil for most broiling. Select 450°F (232°C) broil for low-temperature broiling of longer cooking foods such a poultry to avoid over browning.
Pull out oven rack to stop position before turning or removing food. Use tongs to turn food to avoid the loss of juices. Very thin cuts of fish, poultry or meat may not need to be turned.
After broiling, remove the pan from the oven when removing the food. Drippings will bake on the pan if left in the heated oven, making cleaning more difficult.
Before broiling, position rack according to the Broiling Chart. Position food on grid in the broiler pan, then place it in the center of the oven rack. Close the oven door and set the control.
To Broil:
1.Place the food in the oven, preheating is not necessary.
2.Close the oven door.
3.Press BROIL for the desired oven. “BROIL” and “Set temp or Press START” will scroll in the text area and “550ºF” (288ºC) is displayed.
4.Press the Temp/Time keypad to enter the desired broil temperature. The temperature can be set from 450°F (232°C) to 550°F (288°C).
5.Press START for the selected oven.
“Broil” scrolls in the selected oven text area.
NOTE: The broil temperature may be changed at any time by pressing the Time/Temp keypad to enter the desired temperature and then pressing START. Changing the temperature once food is placed in the oven could affect the performance.
6.Press CANCEL for the selected oven when finished.
7.Remove food from the oven.
Convection Cooking - Upper Oven Only
(on some models)
During convection cooking, the fan provides hot air circulation throughout the oven. The movement of heated air around the food can help to speed up cooking by penetrating the cooler outer surfaces. Food cooks more evenly, browning and crisping outer surfaces while sealing moisture inside.
During the Convect function, the ring element, bake and broil elements, and the fan operate to heat the oven cavity. If the oven door is opened during convection cooking or preheating, the fan turns off immediately and the element(s) will turn off after 30 seconds. Once the door is closed, the element(s) will turn back on.
It is important not to cover foods so that surface areas remain exposed to the circulating air, allowing browning and crisping.
Keep heat loss to a minimum by only opening the oven door when necessary.
Choose cookie sheets without sides and roasting pans with lower sides to allow air to move freely around the food.
Test baked goods for doneness a few minutes before the minimum cooking time with a method such as a toothpick.
Use a meat thermometer to determine the doneness of meats and poultry. Check the temperature of pork and poultry in 2 or 3 different places, including the thickest part.
Before convection cooking, position the rack(s) according to the “Positioning Racks and Bakeware” section.
When using more than one rack, position bakeware/ cookware on the racks to allow movement of the fan circulated air around the food. See the “Positioning Racks and Bakeware” section.
If the oven is full, extra cooking time may be needed.
For optimal cooking results, do not cover food.
When roasting poultry and meat, use a broiler pan and grid. It is not necessary to wait for the oven to preheat, unless recommended in the recipe.
To order a broiler pan, see the “Assistance or Service” section.
Convection Baking (on some models)
Use Convect Bake for single or multiple rack baking. When convection baking, reduce your recipe baking temperature by 25°F (15°C).
To Set Convect Bake:
1.Press CONVECT once. “CONVECT BAKE” and “Press Again or START” will scroll in the text area.
2.Press START. “CONVECT BAKE” and “Set Temp or Press START” will scroll in the text area, and 325ºF (162ºC) will be displayed.
3.Press the Temp/Time keypad to enter the desired temperature. The temperature can be set from 170°F (77°C) to 550°F (288°C).
4.(Optional) If a Set Cooking Time is desired, press COOK TIME. Press the Temp/Time keypad to enter the desired cook time. “Press START” will scroll in the text area.
5.(Optional) If a Set Start Time is desired, press START TIME. Press the Temp/Time keypad to enter the desired time to delay the beginning of the cooking cycle. “Press START” will scroll in the text area. If a cooking time was not set, the control will prompt you to Set Cooking Time. Set Cooking Time is mandatory when using the Set Start Time function.
6.After pressing START the oven will preheat and it will sound a beep when the preheat is done. There are two preheat modes on CONVECT BAKE function. Use Rapid Preheating when using a single rack only, use the Preheating when using multiple rack. It's possible to switch between “Rapid Preheating” and “Preheating” by pressing START during the preheating.
7.Place the food in the oven and close the oven door when preheat is completed.
8.Press CANCEL for the selected oven when finished.
9.Remove food from the oven.
NOTES:
The temperature may be changed at any time by pressing the Temp/Time keypad to enter the desired temperature and then pressing START. Changing the temperature once food is placed in the oven could affect the performance.
You can set or change the cooking time at any time while the oven is cooking by pressing COOK TIME. At the end of the time set, the oven will turn off automatically, the end of cycle tone will sound and “Cooking Complete” will appear in the text area.
Convection Broil (on some models)
When convection broiling, enter your normal broiling temperature. The oven door must be closed when using Convect Broil.
It is not necessary to preheat the oven for convect broil.
1.Place the food in the oven and close the oven door.
2.Press CONVECT twice. “CONVECT BROIL” and “Press Again or START” will scroll in the text area.
3.Press START. “CONVECT BROIL” and “Set Temp or Press START” will scroll in the text area, and 550ºF (288ºC) will be displayed.
4.Press the Temp/Time keypad to enter the desired temperature. The temperature can be set from 450°F (232°C) to 550°F (288°C).
5.After pressing START, “CONVECT BROIL” will be displayed in the text area.
6.Press CANCEL for the selected oven when finished.
7.Remove food from the oven.
Convection Roasting (on some models)
When convection roasting, enter your normal roasting temperature. The roasting time should be 15-30% less than conventional cooking.
It is not necessary to preheat the oven for convect roast.
1.Place the food in the oven and close the oven door.
2.Press CONVECT three times. “CONVECT ROAST” and “Press Again or START” will scroll in the text area.
3.Press START. “CONVECT ROAST” and “Set Temp or Press START” will scroll in the text area, and 350ºF (177ºC) will be displayed.
4.Press the Temp/Time keypad to enter the desired temperature. The temperature can be set from 170°F (77°C) to 550°F (288°C).
5.(Optional) If a Set Cooking Time is desired, press COOK TIME. Press the Temp/Time keypad to enter the desired cook time. “Press START” will scroll in the text area.
6.(Optional) If a Set Start Time is desired, press START TIME. Press the Temp/Time keypad to enter the desired time to delay the beginning of the cooking cycle. “Press START” will scroll in the text area. If a cooking time was not set, the control will prompt you to Set Cooking Time. Set Cooking Time is mandatory when using the Set Start Time function.
7.After pressing START the oven will display “CONVECT ROAST” while cooking.
8.Press CANCEL for the selected oven when finished.
9.Remove food from the oven.
NOTES:
The temperature may be changed at any time by pressing the Temp/Time keypad to enter the desired temperature and then pressing START. Changing the temperature once food is placed in the oven could affect the performance.
You can set or change the cooking time at any time while the oven is cooking by pressing COOK TIME. At the end of the time set, the oven will turn off automatically, the end of cycle tone will sound and “Cooking Complete” will appear in the text area.
Convection Recipe (on some models)
When using Convection Recipe, enter your normal cooking temperature. The oven door must be closed when using Convection Recipe.
It is not necessary to preheat the oven for convection recipe MEAT option.
1.For convection recipe MEAT only: Place food the in oven and close the oven door.
2.Press CONVECT four times. “CONVECT RECIPE” and “Press Again or START” will scroll in the text area.
3.Press START.
4.Press CONVECT to cycle between MEAT, BAKED FOODS and OTHERS options. Press START to select one of the options.
5.“Set Temp and Press START” will scroll in the text area. Press the Temp/Time keypad to enter the desired temperature then Press START. The temperature can be set from 170°F (77°C) to 550°F (288°C).
6.“Set cooking time” will scroll in the text area. Press the Temp/ Time keypad to enter the desired cook time. “Press START” will scroll in the text area. (Set Cooking Time is mandatory for convection recipe.)
NOTE: Preheating can cause overcooking. If preheat is required for the recipe, add 15 minutes to the cook time. Place food in the oven at appropriate time.
7.(Optional) If a Set Start Time is desired, press START TIME. Press the Temp/Time keypad to enter the desired time to delay the beginning of the cooking cycle. “Press START” will scroll in the text area. If a cooking time was not set, the control will prompt you to Set Cooking Time. Set Cooking Time is mandatory when using the Set Start Time function.
8.For BAKED FOODS and OTHERS options only: The preheating will start, once the preheat finish the unit will sound a beep. Place food the in oven and close the oven door.
9.At the end of the cooking time set, the oven will turn off automatically, the end of cycle tone will sound and “Cooking Complete” will appear in the text area. It's also possible to Press CANCEL to finish the cycle.
10. Remove food from the oven.
Hold Warm - Lower Oven Only
IMPORTANT: Food must be at serving temperature before placing it in the warmed oven. Food may be held up to 1 hour; however, breads and casseroles may become too dry if left in the oven during the Hold Warm, function. For best results, cover food.
The Hold Warm feature allows hot cooked foods to stay at serving temperature.
To Use:
1.Press the Hold Warm keypad.
“HOLD WARM” and “Set Temp or Press START” will scroll in the text area, and 170°F (78°C) will be displayed.
2.Press the Temp/Time keypad to enter the desired temperature. The temperature can be set from 145°F (63°C) to 200°F (94°C).
3.Press START. “HOLD WARM” will appear in the selected oven text area, and the set temperature will be displayed.
“HOLD WARM” and the temperature will be displayed while the Hold Warm setting is active or CANCEL is pressed for the selected oven.
4.Place food in the oven and close the door.
5.Press CANCEL for the selected oven when finished.
6.Remove food from the oven.
To Cancel Hold Warm Feature:
Press CANCEL for the oven that is in use. Remove food from oven.
NOTE: The temperature may be changed at any time by pressing the Temp/Time keypad to enter the desired temperature and then pressing START.
OVEN CARE
Self-Cleaning Cycle
IMPORTANT: The health of some birds is extremely sensitive to the fumes given off during the Self-Cleaning cycle. Exposure to the fumes may result in death to certain birds. Always move birds to another closed and well-ventilated room.
Self-clean the oven before it becomes heavily soiled. Heavy soil results in longer cleaning and more smoke.
Keep the kitchen well-ventilated during the Self-Cleaning cycle to help get rid of heat, odors, and smoke.
Do not block the oven vent(s) during the Self-Cleaning cycle. Air must be able to move freely. Depending on your model, see “Oven Vent” or “Oven Vents” section.
Do not clean, rub, damage or move the oven door gasket. The door gasket is essential for a good seal.
Prepare Oven:
Remove the broiler pan, grid, cookware and bakeware and, on some models, the temperature probe from the oven.
Remove oven racks to keep them shiny and easy to slide. See “General Cleaning” section for more information.
Remove any foil from the oven because it may burn or melt, damaging the oven.
Hand clean inside door edge and the 1½" (3.8 cm) area around the inside oven cavity frame, being certain not to move or bend the gasket. This area does not get hot enough during self-cleaning to remove soil. Do not let water, cleaner, etc., enter slots on door frame. Use a damp cloth to clean this area.
Wipe out any loose soil to reduce smoke and avoid damage. At high temperatures, foods react with porcelain. Staining, etching, pitting or faint white spots can result. This will not affect cooking performance.
How the Cycle Works
IMPORTANT: The heating and cooling of porcelain on steel in the oven may result in discoloring, loss of gloss, hairline cracks and popping sounds.
The Self-Cleaning cycle uses very high temperatures, burning soil to a powdery ash.
The oven is preset for a 4 hour clean cycle. However, the time can be changed. Suggested clean times are 3 hours for light soil and between 4 hours and 5 hours for average to heavy soil.
Once the oven has completely cooled, remove ash with a damp cloth. To avoid breaking the glass, do not apply a cool damp cloth to the inner door glass before it has completely cooled.
The oven light will not work during the Self-Cleaning cycle.
On some models, the surface elements will not work during the Self-Cleaning cycle.
When the lock symbol shows in the display, the door cannot be opened. To avoid damage to the door, do not force the door open when the lock symbol is displayed.
If an oven door is left open, “Door Open Clean Canceled” will appear in the display and a signal will beep. Close the oven door and press CLEAN MODES.
NOTE: Only one oven can use the Self-Clean cycle at a time, and 24 hours must pass before the next Self-Clean can begin.
To Self-Clean:
1.Close the oven door.
2.Press CLEAN MODES. “REMOVE RACKS” will scroll in the selected oven text area.
3.For Double ovens Only: “PRESS (1) FOR UPPER OVEN” will appear in the upper oven text area. “PRESS (2) FOR LOWER OVEN” will appear in the lower oven text area. Press the Temp/Time “1” or “2” keypads to select the desired oven.
4.“Select Option” will scroll on the display text are
5.Choose Precise Clean setting by pressing the Temp/Time pad.
6.Press the Temp/Time keypad to adjust the clean time. The time can be set from 3 to 5 hours.
7.Press START for the selected oven.
After the door is locked, “Precise CLEAN” will scroll in the selected text area until the clean cycle is finished.
When the self-clean cycle ends:
“CLN COMPLETE will scroll in the selected oven text area. “OVEN COOLING” will scroll in the display until the oven temperature falls below 500°F (260°C).
“UNLOCKING” will be displayed until the oven door unlocks and the lock icon turns off.
Steam Clean (on some models)
IMPORTANT: Do not use oven cleaners or any other additives with Steam Clean.
The Steam Clean feature is designed for light oven cavity bottom cleaning. Use the Steam Clean feature as soon as possible after spills occur. The longer a spill sits and dries in the oven, the more difficult it may be to remove.
Allow the range to cool to room temperature before using the Steam Clean feature. If your oven cavity is above 170°F (77°C), “Oven Cooling” will appear in the display and the Steam Clean feature will not activate until it cools down.
Remove all racks and accessories from the oven cavity.
For best results, pour 10 oz (295 mL) of distilled or filtered water onto the oven bottom.
The Steam Clean feature will take a total of 25 minutes. “Wipe the oven” will appear in the display at the end of the cycle.
IMPORTANT: Since the water in the oven bottom is hot, do not open the oven door during the Steam Clean cycle.
Press CANCEL at any time to end the cycle. The display will return to the time of day.
For double ovens, only one oven can run Steam Clean at a time. When running Steam Clean, the other oven should not be in use.
Helpful Hints
Once the Steam Clean cycle is complete, remove all remaining water and debris in the bottom of the oven with a sponge or cloth.
Wipe any remaining moisture from the oven door interior, oven cavity interior sides, and cooktop.
Use a soft brush or nylon scrubber to wipe the oven interior. This may help with more stubborn stains.
If any soil remains, run a second Steam Clean cycle to help loosen debris for easier removal.
Use the Steam Clean on small spills such as cheese or sauce from pizza or snacks, or drips from casseroles.
Food spills containing sugar, proteins or starches may require vigorous scrubbing to remove most of the debris.
It is recommended to use distilled or filtered water, as tap water may leave mineral deposits on the oven bottom. Use a cloth soaked with vinegar or lemon juice to remove any mineral deposits that may be left after the Steam Clean cycle.
General Cleaning
IMPORTANT: Before cleaning, make sure all controls are off and the oven is cool. Always follow label instructions on cleaning products.
Soap, water and a soft cloth or sponge are suggested first unless otherwise noted.
STAINLESS STEEL (on some models)
To avoid damage to stainless steel surfaces, do not use soap- filled scouring pads, abrasive cleaners, Cooktop Cleaner, steel- wool pads, gritty washcloths or abrasive paper towels.
Cleaning Method:
Rub in direction of grain to avoid damage.
Liquid detergent or all-purpose cleaner: Rinse with clean water and dry with soft, lint-free cloth.
Vinegar for hard water spots.
OVEN DOOR EXTERIOR
Cleaning Method:
Glass cleaner and a soft cloth or sponge: Apply glass cleaner to soft cloth or sponge, not directly on panel.
OVEN DOOR INTERIOR
Cleaning Method:
Self-Clean cycle:
For optimal door cleaning result, wipe away any deposits with a damp sponge before running cycle.
CONTROL PANEL
Activate the Button Lock to avoid touch screen activation during cleaning. See “Button Lock” section.
To avoid damage to the control panel, do not use abrasive cleaners, steel-wool pads, gritty washcloths or abrasive paper towels.
Cleaning Method:
Glass cleaner and soft cloth or sponge:
Apply glass cleaner to soft cloth or sponge, not directly on panel.
OVEN CAVITY
Do not use oven cleaners.
Food spills should be cleaned when oven cools. At high temperatures, foods react with porcelain and staining, etching, pitting or faint white spots can result.
Cleaning Method:
Self-Clean cycle: See “Self-Cleaning Cycle” section first.
OVEN RACKS
Cleaning Method:
Self-Clean cycle:
See “Self-Cleaning Cycle” section first. Remove racks, or they will discolor and become difficult to slide. If this happens, a light coating of vegetable oil applied to the rack guides will help them slide.
Steel-wool pad
Oven Light
The ovens light is a standard 25-watt appliance bulb.
Before replacing, make sure the oven and cooktop are cool and the control knobs are off.
To Replace:
1.Disconnect power.
2.Turn the glass bulb cover in the back of the oven counterclockwise to remove.15
3.Turn bulb counterclockwise to remove from socket.
4.Replace bulb, then bulb cover by turning clockwise.
5.Reconnect power.
Oven Door
IMPORTANT:
To avoid oven door glass breakage:
Do not close the oven door if the racks are not fully inserted into the oven cavity or when bakeware extends past the front edge of an oven rack.
Do not set objects on the glass surface of the oven door.
Do not hit glass surfaces with bakeware or other objects.
Do not wipe down glass surfaces until the oven has completely cooled.
For normal oven use, it is not suggested to remove the oven door. However, if removal is necessary, make sure the oven is off and cool. Then, follow these instructions. The oven door is heavy.
To Remove:
1.Open oven door all the way.
2.Flip up the hinge latch on each side.
3.Close the oven door as far as it will shut.
4.Lift the oven door while holding both sides.
Continue to push the oven door closed and pull it away from the oven door frame.
To Replace:
1. Insert both hanger arms into the door.
2.Open the oven door.
You should hear a “click” as the door is set into place.
3.Move the hinge levers back to the locked position. Check that the door is free to open and close. If it is not, repeat the removal and installation procedures.
TROUBLESHOOTING
Try the solutions suggested here first in order to avoid the cost of an unnecessary service call.
Nothing will operate
Has a household fuse blown, or has a circuit breaker tripped?
Replace the fuse or reset the circuit breaker. If the problem continues, call an electrician.
Oven will not operate
Is the electronic oven control set correctly?
See “Electronic Oven Controls” section.
On some models, is the oven control lockout set?
See “Control Lockout” section.
Oven temperature too high or too low
Does the oven temperature calibration need adjustment?
See “Oven Temperature Control” section.
On some models, does the cooling fan run during BAKE, BROIL or CLEAN?
It is normal for the fan to automatically run when the oven is in use. This helps cool the electronic control.
Oven indicator lights flash
Do the oven indicator lights flash?
See the “Display” and/or the “Oven Lights” section. If the indicator light(s) keeps flashing, call for service. See “Assistance or Service” section.
Display shows messages
Is the display showing a flashing time?
There has been a power failure. Clear the display. See “Display(s)” section. On some models, reset the clock, if needed. See “Clock” section.
Is the display showing a letter followed by a number? Depending on your model, press OFF/CANCEL, OFF or CANCEL/OFF to clear the display. See “Display(s)” section. If it reappears, call for service. See “Assistance or Service” section.
Self-Cleaning cycle will not operate
Is the oven door open?
Close the oven door all the way.
Has the function been entered?
See “Self-Cleaning Cycle” section.
On some models, has a delay start Self-Clean cycle been set?
See “Self-Cleaning Cycle” section.
Oven cooking results not what expected
Is the proper temperature set?
Double-check the recipe in a reliable cookbook.
Is the proper oven temperature calibration set?
See “Oven Temperature Control” section.
Was the oven preheated?
See “Baking” section.
Is the proper bakeware being used?
See “Bakeware” section.
Are the racks positioned properly?
See “Positioning Racks and Bakeware” section.
Is there proper air circulation around bakeware?
See “Positioning Racks and Bakeware” section.
Is the batter evenly distributed in the pan?
Check that batter is level in the pan.
Is the proper length of time being used?
Adjust cooking time.
Has the oven door been opened while cooking?
Oven peeking releases oven heat and can result in longer cooking times.
Are baked items too brown on the bottom?
Move rack to higher position in the oven.
Are pie crust edges browning early?
Use aluminum foil to cover the edge of the crust and/or reduce baking temperature.