Loading ...
Loading ...
Loading ...
Setting Up _9
01 SETTING UP
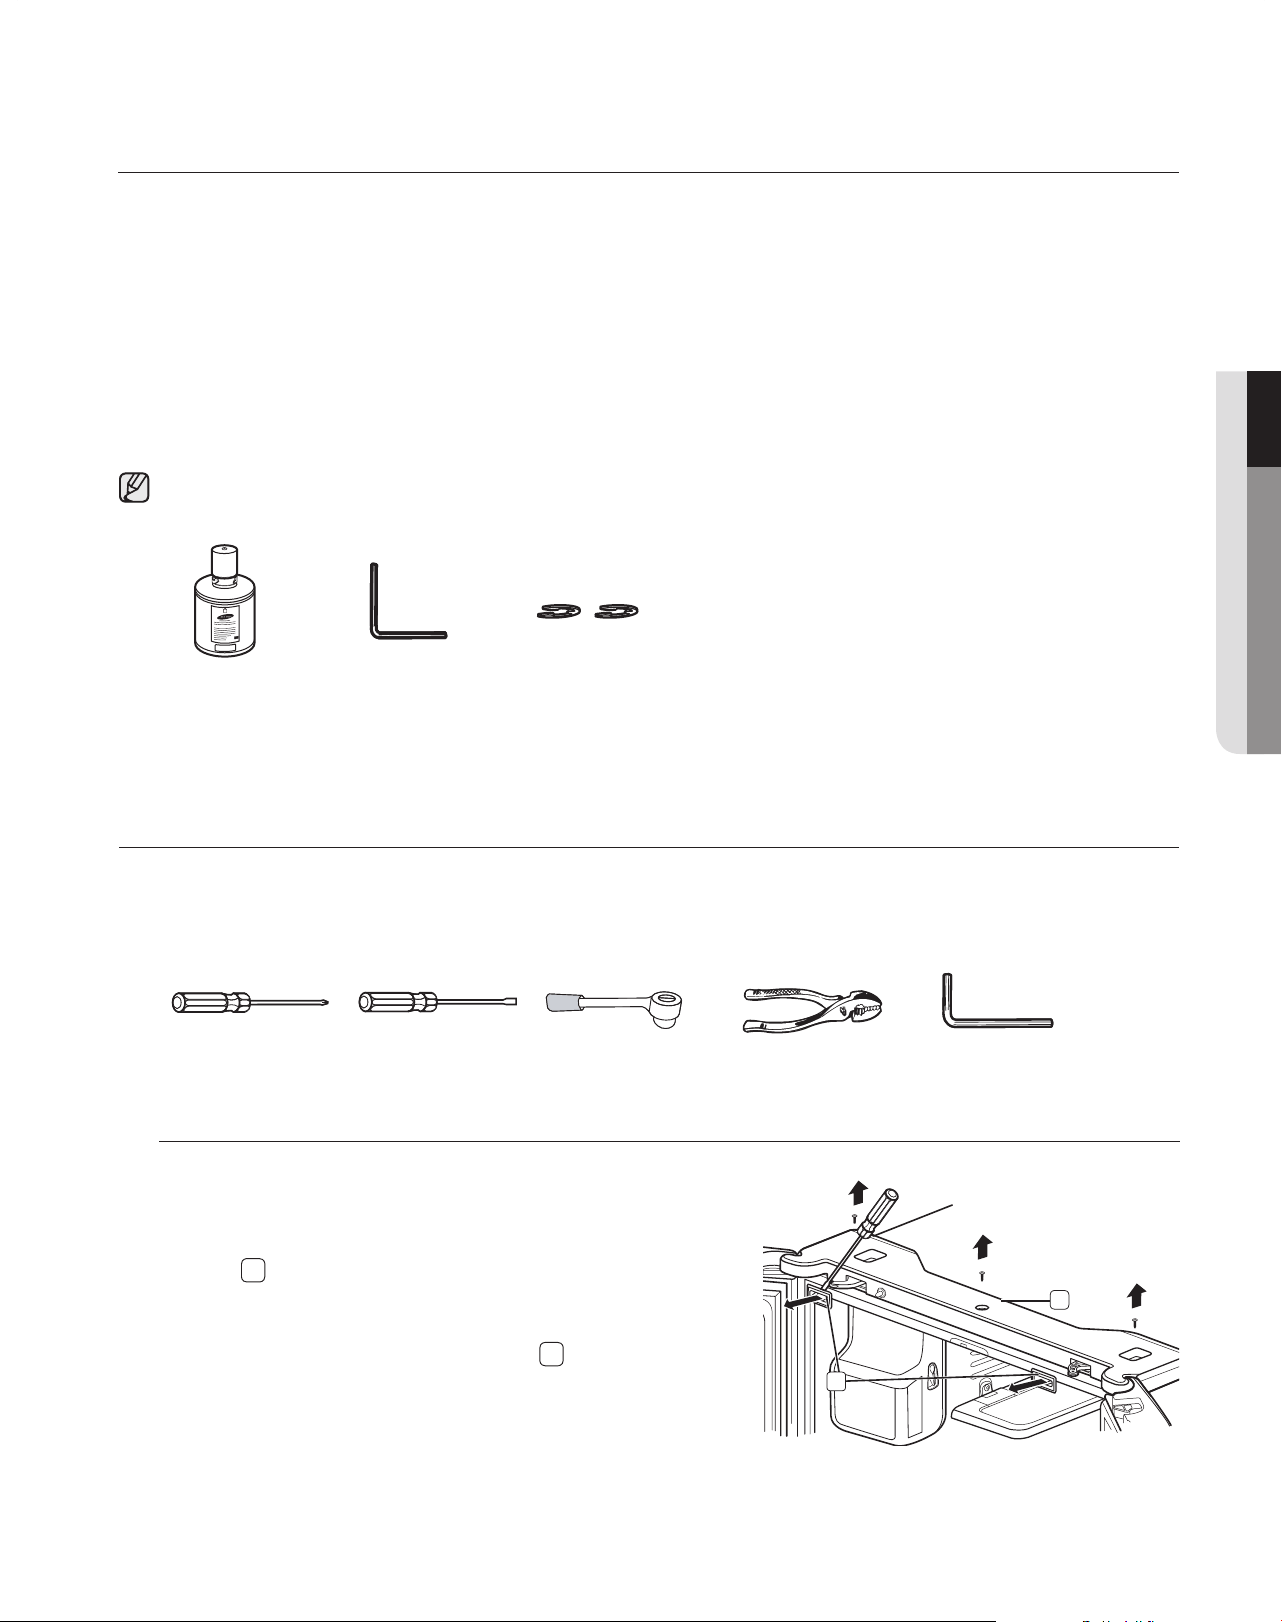
Disassemble the Refrigerator doors
1. With the door opened, remove the Hinge Cover
cap (
)with a Flat head screwdriver, and close
the door.
Remove the 3 screws holding down the Hinge
Cover and remove the Hinge Cover (
).
2
1
REMOVING THE REFRIGERATOR DOORS
If the Refrigerator is too large to pass through your doorway easily, you can remove the refrigerator doors.
Tools you will need
Philips screwdriver Flat-blade screwdriver Wrench(10mm) Pliers Allen wrench(3/16”)
(5mm)
SETTING UP THE REFRIGERATOR
Now that you have your new Refrigerator installed in place, you are ready to set up and enjoy the features and
functions of the appliance. By completing the following steps, your Refrigerator should be fully operational.
1. Place the Refrigerator in an appropriate location with reasonable clearance between the wall and the
Refrigerator. Refer to installation instructions in this manual.
2. Once the Refrigerator is plugged in, make sure the interior light comes on when you open the doors.
3. Set the Temperature control to the coldest temperature and wait for an hour. The Freezer will get slightly
chilled and the motor will run smoothly.
4. After powering the Refrigerator, it will take a few hours to reach the appropriate temperature. You can
store food and drinks in the Refrigerator after the temperature is sufficiently cool.
Check the accessory list below.
Water filter
(DA29-00003G)
Hex wrench
(DA80-00002C)
Fastener
(DA60-00143B)
Loading ...
Loading ...
Loading ...