Loading ...
Loading ...
Loading ...
5
GAS WALL OVEN INSTALLATION INSTRUCTIONS
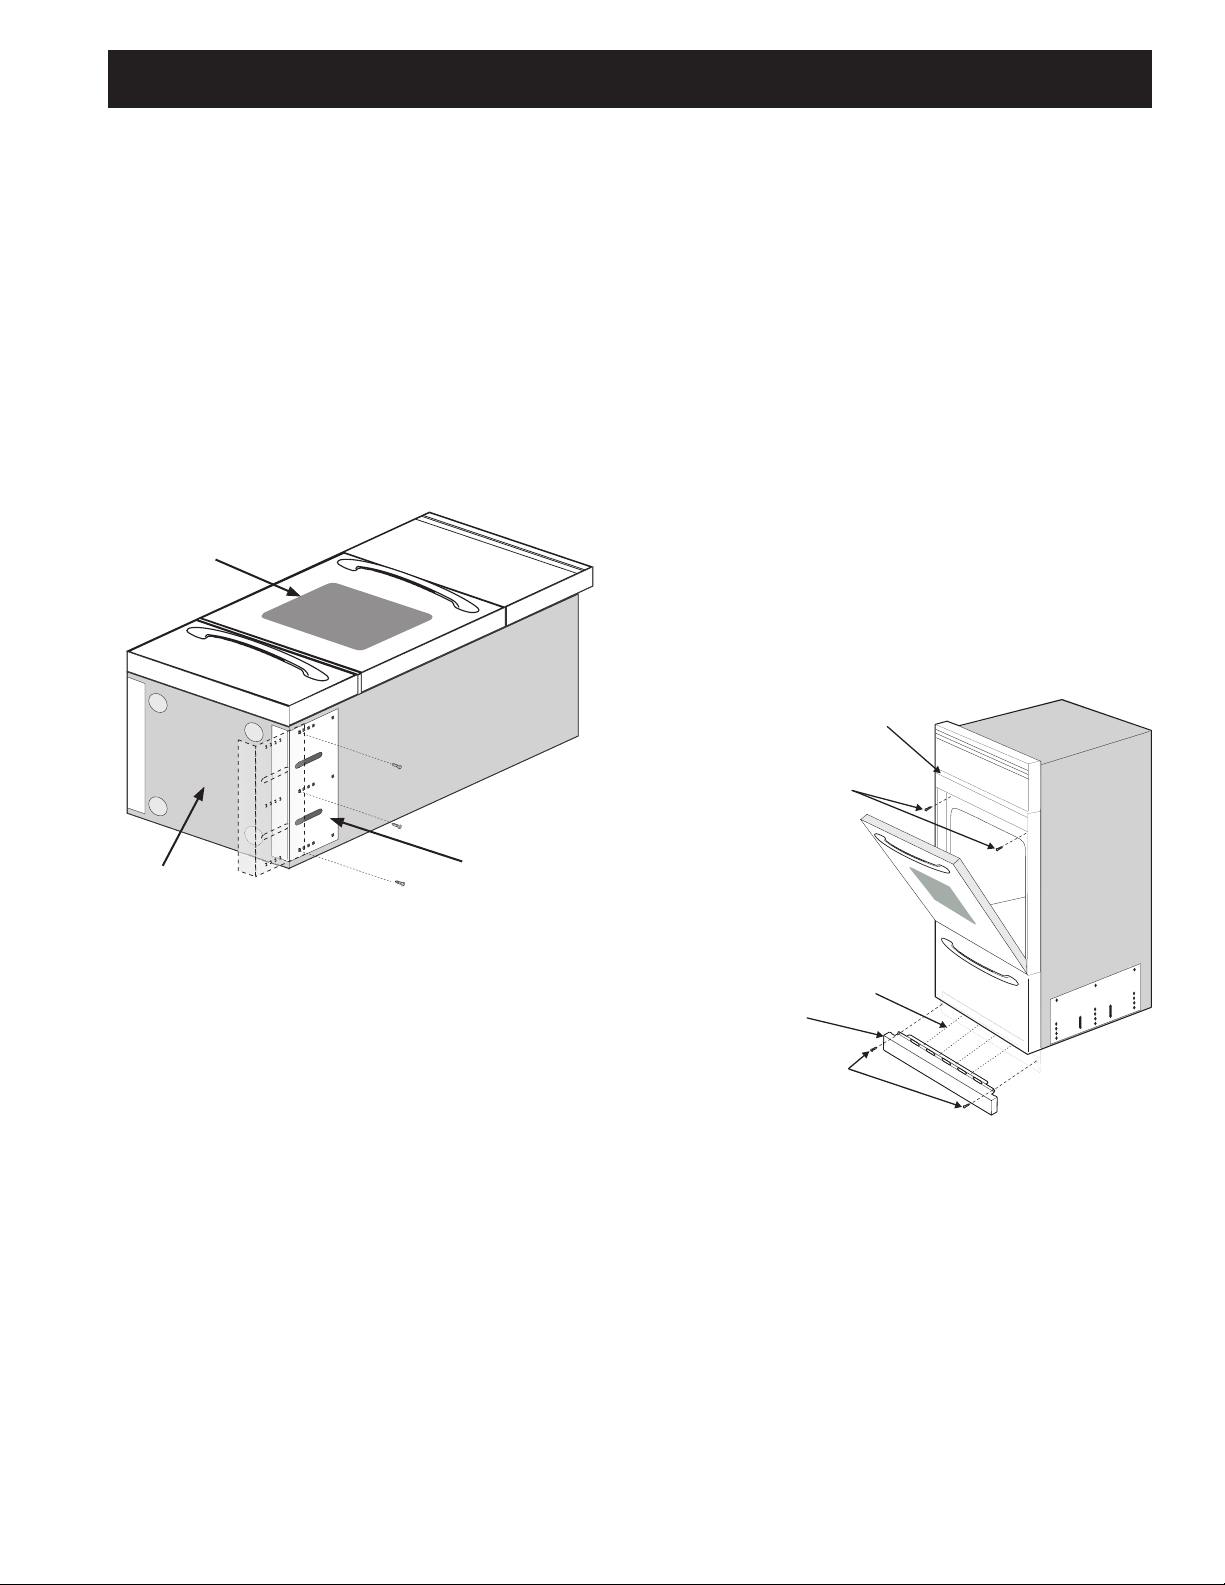
Oven Door
Oven Bottom
Extension Panel
Figure 6
Toadjustovenheight:
1. Lay oven on its back (see Figure 6).
2. Remove the 3 screws that fasten the side ex-
tension panel to the bottom sides of the oven.
3. Move each panel down to the position that
increases the oven height to t your opening.
Each position changes oven height approxima-
tely ½".
4. Line up the appropriate holes in the side exten-
sion panels and sides of the oven. Put the 3
screws back.
5. Proceed with oven installation. Return to
upright position.
5.CabinetInstallation
Insert appliance into cutout. Use the 2 mounting
screws provided to fasten the front frame of the
appliance to the cabinet (steps 1 below). Keep the
6 decorative screws to x the decorative trim to the
cabinet (step 2 below). The mounting holes in the
front frame of appliance may be used as a template
to locate the appliance mounting screw holes on
the cabinet.
To fasten the appliance to the cabinet (see
Figure 7):
1. Use 2 mounting screws supplied to secure the
appliance to the cabinetry. 2 holes are located
under the center vent trim on each side.
2. Install the decorative trim panel to appliance
bottom using the 6 supplied screws. Four
screws are installed along the front of the panel.
Two screw are installed at the opper corners of
the panel.
Figure7
Center Vent Trim
Decorative Trim
Mounting Screws
Decorative Screws
Decorative Screws
Loading ...
Loading ...
Loading ...