User manual Television
Using Windows 10
Start Menu
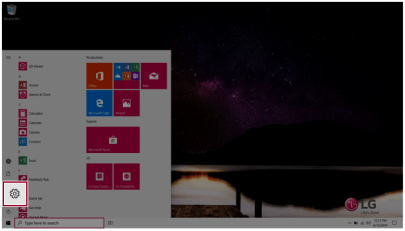
A New Start Menu
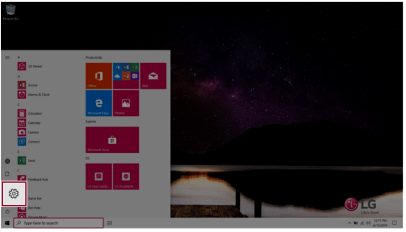
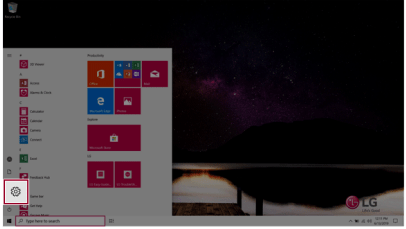
The Start menu in Windows 10 has been changed so you can use Windows quickly and easily.
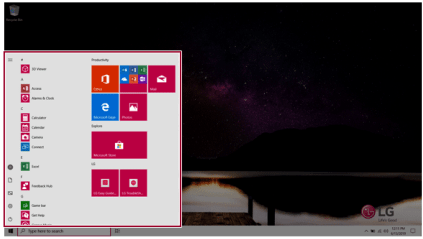
Press the [ ] button in the lower-left corner of the screen to display the Start menu.
TIP Press the [] key or [Ctrl] + [Esc] to display the Start menu.
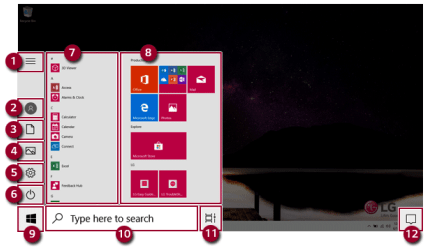
1 Expand: Displays the names of all menu items.
2 User Account: Displays the current user's information. You can use functions such as Change Account Settings, Lock or Logout.
3 Document: Opens the default document folder in Windows.
4 Pictures: Opens the default photo folder in Windows.
5 Settings: You can set up the system including the network settings.
6 Power: Sleep, System Shutdown, and Restart menus are available.
7 App List: Displays the app list.
8 App Tile: Apps added to the Start menu are displayed in tile format.
9 Start Button: Opens or closes the Start menu.
10 Windows Search: Searches for the text entered by the user in My Items (system) or the Internet.
11 Task View: You can add a Desktop screen or switch to the screen to display the history of recent PC usage.
12 Action Center: You can view the system-related notification messages and change PC settings.
TIP Press [] + [X], and then the [] button pop-up menu appears. You can use the pop-up menu to easily access the shortcuts such as Windows Explorer, Search, System Shutdown, and Desktop
Desktop Apps and Windows Apps
The Desktop apps remain unchanged from the previous Windows apps, but Windows apps have been changed to include various functions.
The Windows apps provide easy-to-use menus according to the window size and a variety of convenient functions such as Update and Alarm.
Toggling and Adding Apps/Desktops
In Windows 10, you can toggle the running apps easily and quickly, and add desktops to use them like multiple PCs.
TIP For an app that does not allow multitasking, you may be switched to the desktop where the app was executed, or you may have an error message.
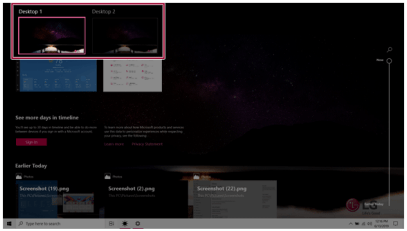
1. In the taskbar, press [ ].
].
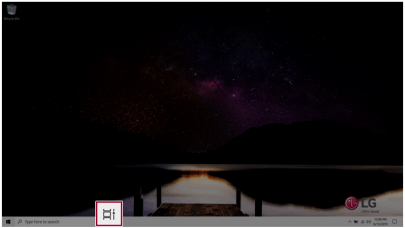
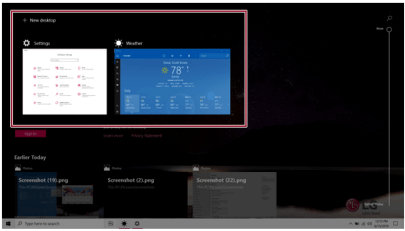
2 The screen to switch between apps and desktops appears and the running apps are displayed in the preview.
TIP
Press the [ ] button of an app in the preview to exit the app.
You can use the timeline displayed on the Desktop screen to check the history of PC usage.

3 Click the [New Desktop] tile.
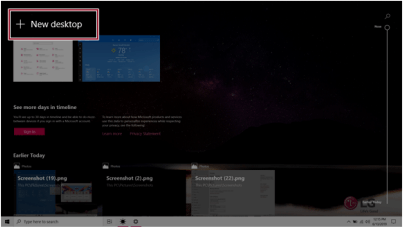
4 [Desktop 1] and [Desktop 2] are created.
5 Select an app in the preview or desktop
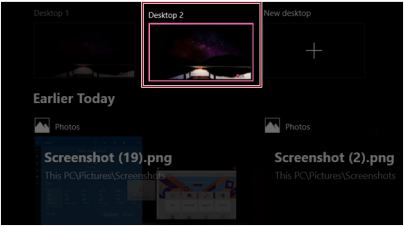
6 The screen is toggled to the selected app or desktop.
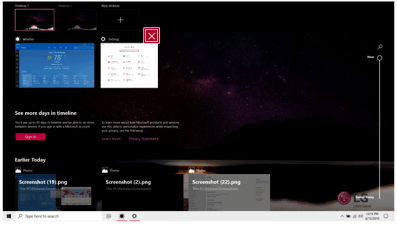
TIP Press the [] button in the app preview to exit the app.
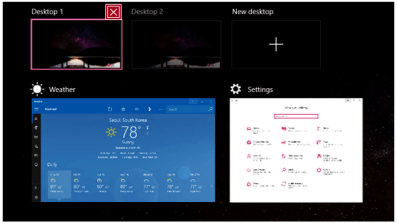
In the desktop preview, press the [] button to delete the desktop and move running apps to another desktop.
Using Shortcut Keys
Use the shortcut keys to quickly toggle between apps and desktops.
Hold down the [Alt] key and press the [Tab] key to view the running apps in the preview.
Press [Tab] repeatedly to select the app you wish to switch to and then release the [Alt] key.
The running apps on the screen are displayed in the preview. Select and switch to an app.
- [] + [Tab]
If the desktop toggling screen appears, select an app or desktop you wish to switch to.
Using the Store
You can purchase apps or get free apps from Windows Store.
TIP
- If a local account is being used, a window to switch to a Microsoft account appears while using Windows Store. Follow the instructions on the screen to switch the local account to a Microsoft account.
- You can also do so by selecting [Start menu] > [Account] > [Change Account Settings].
- If you switch to a Microsoft account, your PC settings (background, user settings, etc.) may be changed to the previous settings.
1. Press the [] button to move to the Start menu and select the [Microsoft Store] tile.
TIP Press the [] key or [Ctrl] + [Esc] to display the Start menu.
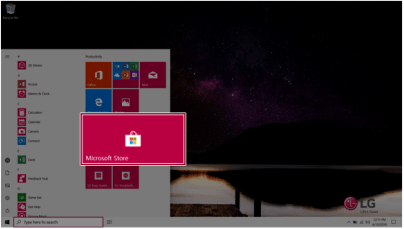
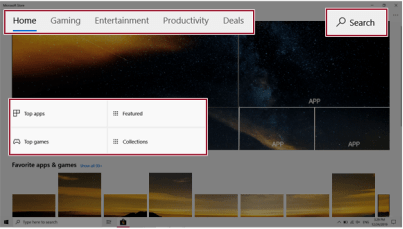
2 Select the app or use the search function on the store screen to install the desired app.
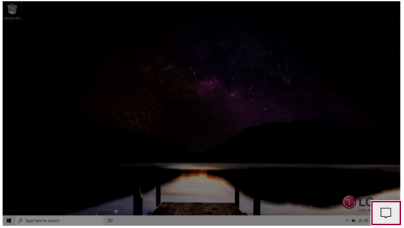
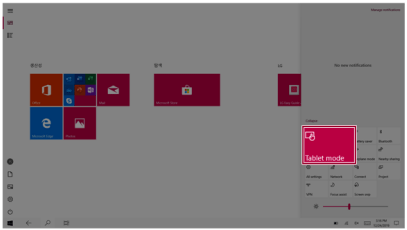
Switching to Tablet Mode
If you are using Windows on a tablet PC, you can easily switch to the tablet mode
1 Press the Action Center [ ] icon on the right side of the taskbar.
2 Select [Tablet Mode] to switch Windows to tablet mode
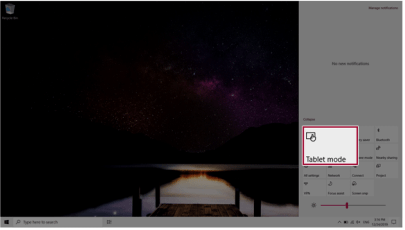
3 Select [Tablet Mode] again to deactivate the mode.
Unlocking the Screen
If the PC is not used for an extended period, it goes into a locked state.
When the PC is used again, a lock screen appears for security purposes and may be unlocked by using the following method.
1 From the lock screen, press any key on the keyboard or drag up while you click and hold the mouse button.
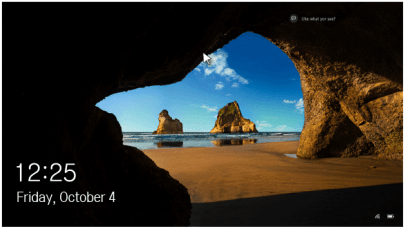
2 When the login window appears, enter the password and click [Enter]. (If no password is set, press the login button to immediately unlock the screen.)
Using the PC
Using an AC Adapter and a Battery
Connect the AC adapter to power and charge the product.
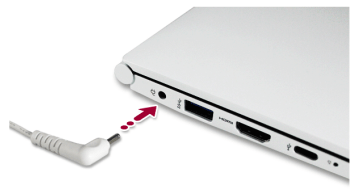
Using an AC Adapter
The AC Adapter can be used from 100 V to 240 V.
- Connect the AC adapter to a power outlet.
- Connect the AC adapter to the PC.
- Adjust the LCD to the most comfortable angle.
- Press the PC's power button to turn on the system.
Checking the Battery State
1 Connect the AC adapter to the power port in the PC.
2 Open the LCD and check the charging state. When the AC adapter lamp is blinking, charge it fully with the AC adapter before using it.
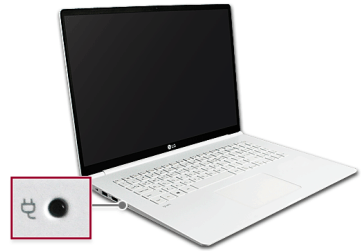
Operation Status Lamps
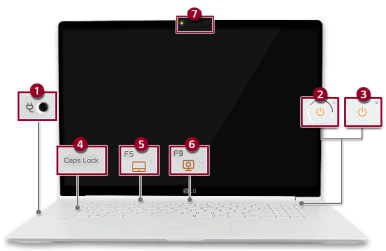
1 AC Adapter Lamp
- On: The AC adapter is connected.
- Off: The AC adapter is not connected.
If you try to turn on the system that has entered the Hibernate mode or been turned off after a low-battery alarm, the system will not be turned on but the lamp will blink three times. If this is the case, connect the AC adapter and charge the battery sufficiently before using it.
2 Power lamp (a model with fingerprint recognition system)
- On: The system is on and running by the AC adapter or battery.
- Off: When the system is turned off or in Hibernate mode
- Blinking: The system is in the standby mode.
3 Power lamp (a model without fingerprint recognition system)
- On: The system is on and running by the AC adapter or battery.
- Off: When the system is turned off or in Hibernate mode
- Blinking: The system is in the standby mode.
4 Caps Lock Lamp
- On: When the Caps Lock is activated
- Off: When the Caps Lock is deactivated
5 Touchpad Lamp
- On: When the touchpad is activated
- Off: When the touchpad is deactivated
6 Reader Mode Lamp
- On: When reader mode is activated
- Off: When reader mode is deactivated
7 Webcam Operation Status Lamp
- On: When the webcam is operating
- Off: When the webcam is not operating
Hearing Protection Feature
The product is equipped with a hearing protection feature to protect your ears from pressurized sound while using earphones or headphones.
The feature is set to off by default and can be manually turned on as follows:
1 Press the [ ] > [SmartAudio 2] button to execute SMART Audio.
TIP The feature may take a few minutes if it is the first time.

2 The on-screen picture turns to a headphone icon when you connect a headphone or earphones.
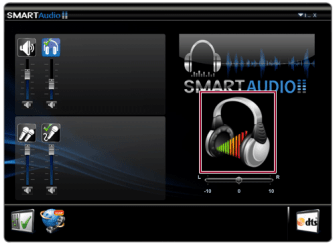
3 Toggle Hearing Protection Feature on and off by pressing the headphone icon.
- Hearing Protection Feature On

- Hearing Protection Feature Off
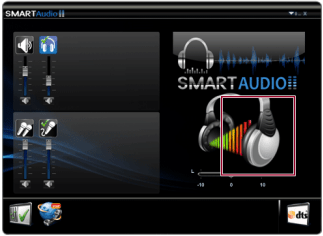
TIP A warning message will be displayed if the volume is high while this feature is on.
Using the Touchpad
The built-in touchpad provides the same functionality as an external mouse. You can use the touchpad and USB mouse simultaneously
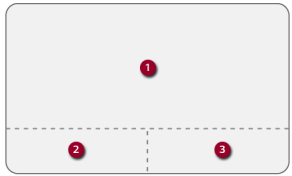
1 Touchpad
2 Left button
- Use to select or execute programs.
3 Right button
- Functions as the right button of a mouse in most cases. However, the usage may differ depending on programs.
TIP
The scroll function is provided as a gesture. Please refer to the Touchpad Gesture section of this document
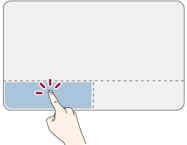
Precautions for Using the Touchpad
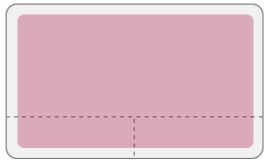
If you are using a touchpad, use the area marked with a red line shown below. Touching an edge or border of the touchpad may not work. (The functioning touch area may differ depending on the product.)
Moving the Cursor (Pointer) on the Screen
Place a finger on the touchpad and glide the finger.

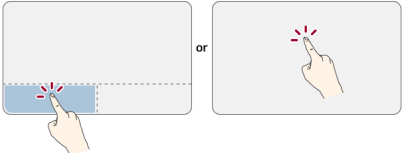
Click (Select)
Press and release the left button swiftly with a finger. (Or tap the touchpad once.)
Do this, for example, to select a menu or icon and to place the cursor to type on a word processor file.
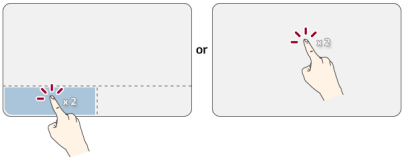
Double-click (Execute)
Press the left button twice consecutively and release the button. (Or tap the touchpad twice.)
Do this, for example, to run a program after selecting its execution file (or icon)
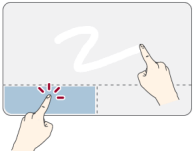
Right button
Press and release the right button swiftly.
Functions as the right button of a mouse, but the usage may differ depending on programs.

Drag & Drop
To drag, click and hold an icon, and move it to another location.
To drop, release the dragged icon in the location you want.
To move a file icon to another folder or to Recycle Bin, place the cursor (or the pointer) on the icon, press and hold the left button, and glide another finger on the touchpad until the icon reaches the aimed location. After reaching the destination, release the left button.
1 Drag
- Glide one finger on the pad with another finger pressing and holding the left button.
2 Drop
- Release the left button to drop it into the Recycle Bin. (By using this, you can drop a file into the Recycle Bin at will.)
ClickLock
When activated, this feature allows you to drag/scroll without pressing and holding the left button.
1 Click the [ ] button and select the [Settings] menu.
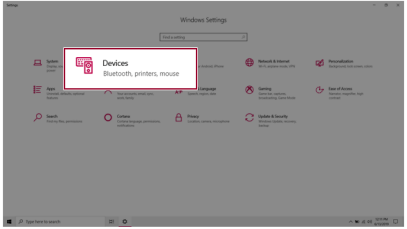
2 When the [Settings] screen appears, select [Devices].
3 Select [Mouse] > [Additional Mouse Options].

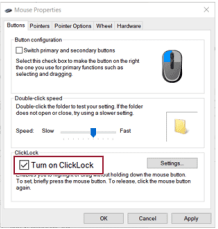
4 When [Mouse Properties] screen appears, select [Turn on ClickLock].
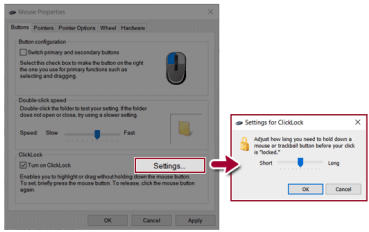
5 Press [Settings] to set the time for the ClickLock.
6 Press the left button of the touchpad and release it to change the button into the pressed state.
7 Move on the touchpad to use the drag/scroll feature.

8 Press the left mouse button to turn off the ClickLock.
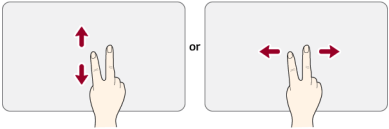
Touchpad Gesture
The touchpad gesture feature allows you to use Windows programs more easily by utilizing multitouch functions.
Windows 10 Touchpad Gestures allow you to use the PC more easily.
The touchpad gesture feature may not be supported in some models.
- Place two fingers on the touchpad and move up/down/left/right to scroll the screen. (It operates only on an app or screen which scrolling is available.)
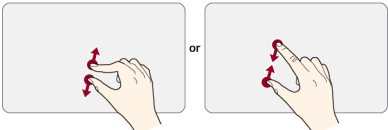
- Place two fingers on the touchpad and widen or narrow them to zoom out or in.
Setting Touchpad
You can change the touchpad features or enable/disable the gesture feature.
The figures herein may differ by language selection and are subject to change without prior notice.
1 Click the [ ] button and select the [Settings] menu.
TIP Press the [] key or [Ctrl] + [Esc] to display the Start menu.
2 When the [Settings] screen appears, select [Devices]
3 Change the settings as needed on the [Touchpad] menu.

Connecting an External USB-C™ (Thunderbolt™) Device
The USB-C™ port mounted on this product supports USB 3.1 Gen 2 standards.
Use the USB-C™ port to connect USB devices or to output a screen to an external display
OPTION Thunderbolt™ connection may not be supported in some models.
Connecting a USB Device
If a USB device is connected to a USB-C™ port, the port works as an ordinary USB port.
TIP To use a conventional USB device, a separate conversion adapter should be used. (Conversion adapters may be purchased separately.)
Outputting to an External Display
By connecting a display that supports USB-C™ Alternate Mode, you can use the USB-C™ port to output a screen to an external display
TIP
- The Alternate mode allows you to use the DP (Display Port) and HDMI outputs through the USB-C™ port.
- We support DP (Display Port) interface standards.
Connecting a Thunderbolt™ Device
You can connect to the USB-C™ port an external display or a high-performance data device that support the Thunderbolt™specifications.
Depending on the specifications of the device connected to the USB-C™ port, it acts as a USB 3.1 or Thunderbolt™ device.
TIP
- The Thunderbolt™ cable is not provided with the product. Make sure that you use a certified cable.
- Some functions may not be available depending on the product. For more information, refer to the user manual provided with the device to be connected.
Bluetooth
Bluetooth allows the user to access wirelessly various devices such as camera, cell phone, headset, printer, and GPS receiver that support Bluetooth  . It can also establish a network and exchange data with other Bluetooth -enabled PC or smartphone.
The figures herein may differ by language selection and are subject to change without prior notice.
For details on connecting a Bluetooth device, refer to the user manual that came with the Bluetooth device.
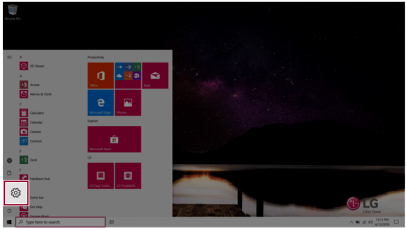
1 Click the [] button and select the [Settings] menu.
TIP Press the [] key or [Ctrl] + [Esc] to display the Start menu.
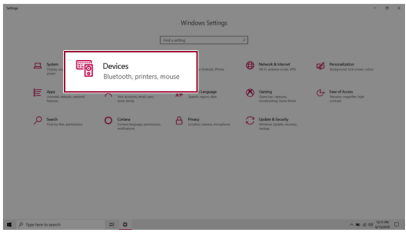
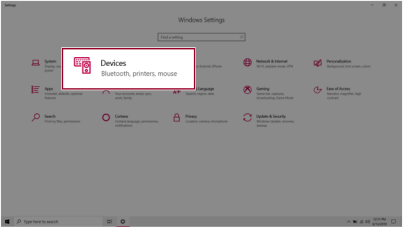
2 When the [Settings] screen appears, select [Devices].
3 Select [Bluetooth & other devices] > [Add Bluetooth or other device] > [Bluetooth] to search for Bluetooth devices.
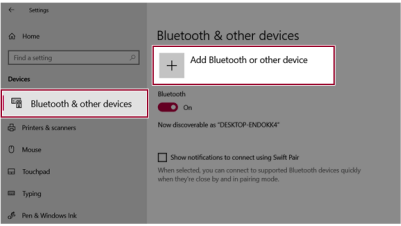

4 Select a device to connect to
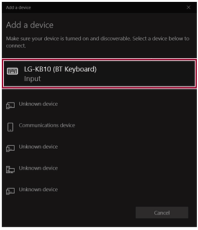
5 Complete the Bluetooth connection as directed.
Using a Wired/Wireless Router
A wireless / regular router connects several PCs and mobile devices to one internet line and enables the use of internet and the network.
A wireless / regular router has to be bought separately. Refer to the manual provided by the manufacturer for instructions.
Connecting a Wireless or Regular Router
If one internet line is used with a wired / wireless router and several devices are connected, this may result in a slower connection.
In case of a wireless LAN, it is recommended to change the network name and security settings for a more secure connection.
Network speed can differ according to operation environment and specifications.
1 Connect the internet cable of the modem that was provided by your internet provider to the router's WAN port.
2 Connect all devices (PC, IPTV, internet phone, etc.) with a LAN cable to LAN ports 1 to 4 of the router. The number of LAN ports can vary for each router model.
3 Please refer to the manual provided by the router manufacturer for setup of the network and internet.
FAQ
Using Instant Booting
Instant Booting allows the system to boot automatically when the notebook PC cover is opened, so that you can use the system without pressing the power button.
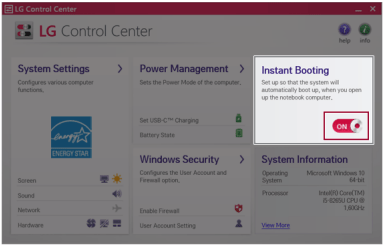
1 Select the [ ] button > [LG Software] to run [LG Control Center].
2 On LG Control Center screen, set the [Instant Booting] to [ON].
3 Shutdown the system and close the notebook PC cover.
4 When the cover is opened, the notebook PC turns on and the system starts to boot automatically.
Windows 10 Auto Scaling
The Windows 10 Auto Scaling feature for user's convenience may partially blur the screen or display some icons and texts larger.
Refer to the following information to change the DPI scaling to suit your needs.
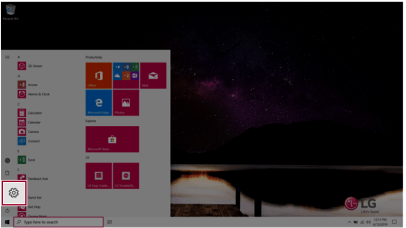
1 Press the [] button and select the [Settings] menu.
TIP Press the [] key or [Ctrl] + [Esc] to display the Start menu.
2 Select [System] > [Display]
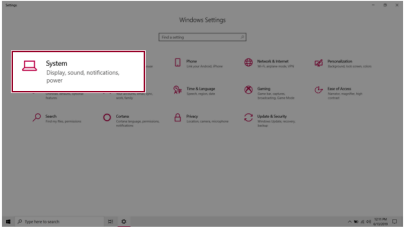
3 Modify the [Change the size of text, apps, and other items] value to change the Auto Scaling settings.
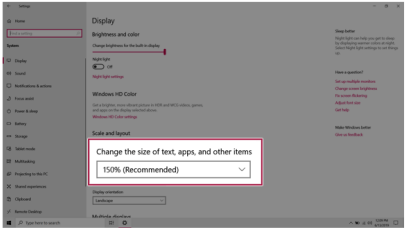
TIP After auto scaling, you may need to restart some apps to apply the new scale and layout.
Restoring the System
If the system has an error, you can use Windows 10's recovery function to recover or restore the system to its initial pre-purchase state.
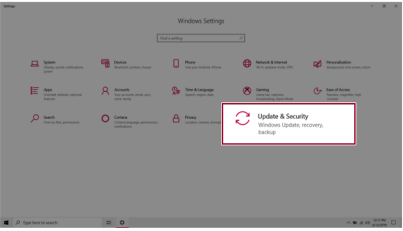
1 Click the [] button and select the [Settings] menu.
2 When the [Settings] screen appears, select [Update & Security].
3 Select the [Recovery] menu and press [Get started] in the Reset this PC menu.
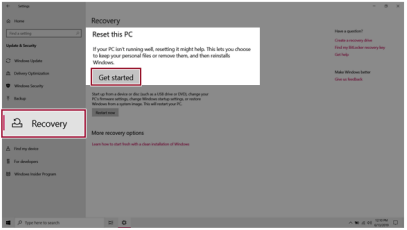
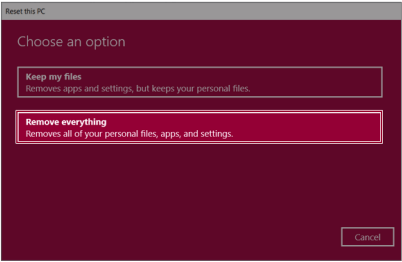
4 If the following screen appears, select a desired option to proceed with recovery.
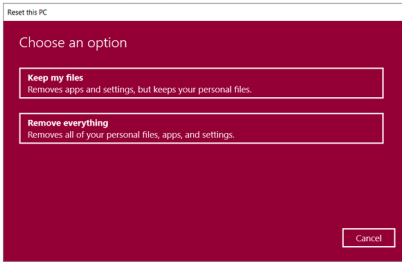
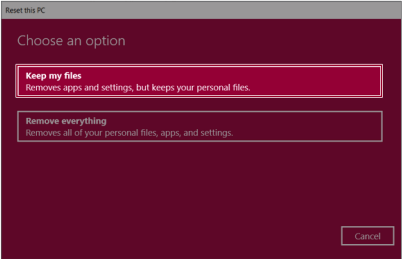
Keep My
Files It removes the apps and their settings without loss of personal files.
1 Select [Keep my files].
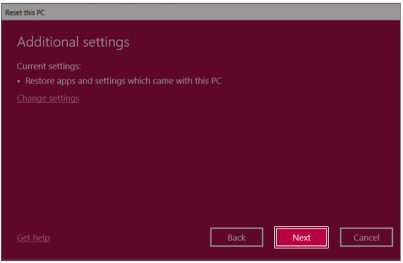
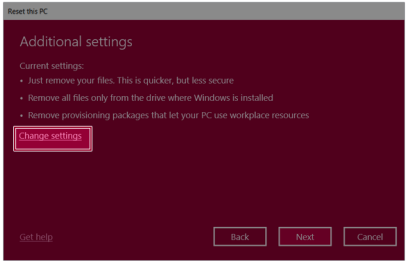
2 Check the current settings.
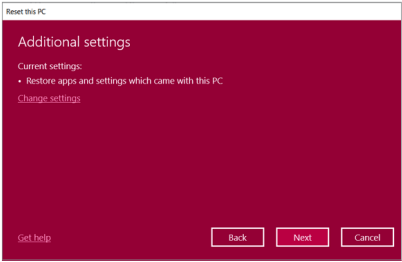
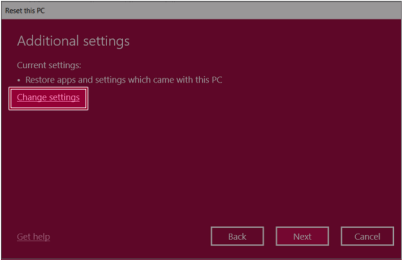
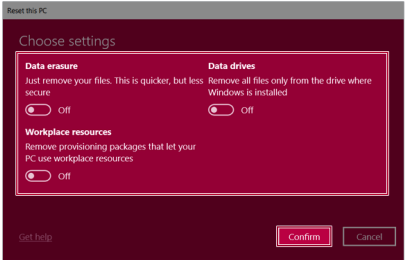
3 If you need to change the settings, press [Change settings] and press the [Confirm] button.
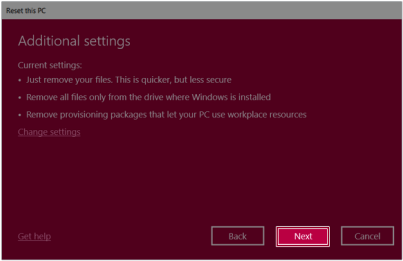
4 Press [Next] to proceed with installation as guided.
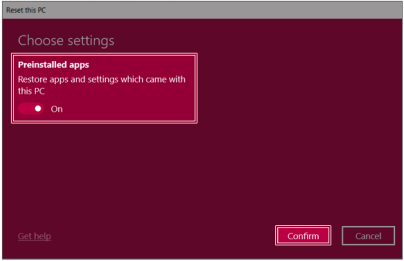
Remove everything
Removes all items from the system and restores the system to its initial pre-purchase state.
1 Select [Remove everything].
2 Check the current settings.
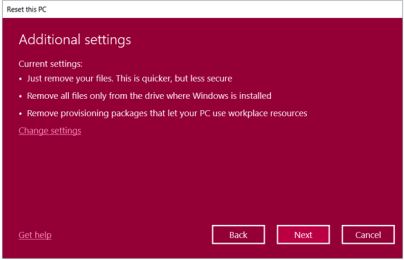
3 If you need to change the settings, press [Change settings] and press the [Confirm] button.
4 Press [Next] to proceed with installation as guided.
Connecting to External Display
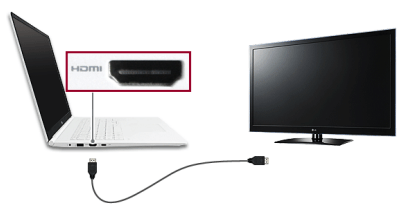
Connecting to the HDMI Port
HDMI is a high-speed multimedia interface that can transfer uncompressed full digital audio and video signals
In some models, DTS Audio may not work when you use HDMI.
TIP Ensure the monitor power is off before connecting the external monitor to the PC.
1 Connect the HDMI cable to the PC and the external device (TV, monitor) that supports HDMI.
2 HDMI port transfers both video and audio simultaneously. Hence, there is no need for a separate audio connection.
3 On the PC, press [Fn] + [F7] to display monitor (projector) toggling screen. Select the desired screen output.
TIP Every time [ ] + [P] keys are pressed, the screen output option changes. Release the keys to display the selected screen output.
CAUTION
- If you do not set Speaker as the default value after disconnecting the HDMI cable, the system may not produce any sound.
- If a program was running already, you must exit and restart the program to produce sound.
Using a Wired/Wireless Router
A wireless / regular router connects several PCs and mobile devices to one internet line and enables the use of internet and the network.
A wireless / regular router has to be bought separately. Refer to the manual provided by the manufacturer for instructions.
Connecting a Wireless or Regular Router
If one internet line is used with a wired / wireless router and several devices are connected, this may result in a slower connection.
In case of a wireless LAN, it is recommended to change the network name and security settings for a more secure connection.
Network speed can differ according to operation environment and specifications.
1 Connect the internet cable of the modem that was provided by your internet provider to the router's WAN port.
2 Connect all devices (PC, IPTV, internet phone, etc.) with a LAN cable to LAN ports 1 to 4 of the router. The number of LAN ports can vary for each router model.
3 Please refer to the manual provided by the router manufacturer for setup of the network and internet.
Wireless LAN
The wireless network (Wireless LAN) is the network environment that connects a PC with the internet provider or company network through an Access Point (wireless or regular router)
Turning On/Off Airplane Mode
Prior to using the wireless LAN, press [Fn] + [F6] to turn off Airplane Mode.
Pressing [Fn] + [F6] keys will turn on or off the Airplane Mode. If you are not going to use the product for a while, keep the Airplane Mode turned on to reduce the battery power consumption.
Using the Wireless LAN
If an Access Point (wired or wireless router) is in the vicinity of the PC, the wireless LAN can easily be accessed.
During the search for a wireless network (Wireless LAN), various Access Points may be found according to the location where the PC is used.
In case there are no accessible wireless networks (Wireless LAN) near the PC, no Access Points may be found.
A password protected Access Point cannot be accessed without the correct password.
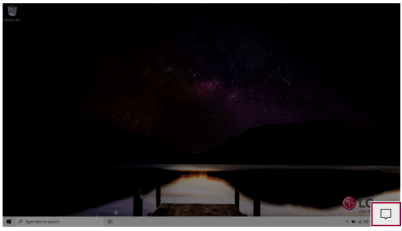
1 Press the Action Center [ ] icon on the right side of the taskbar.
2 Press the [Network] tile to search for a nearby Access Point.
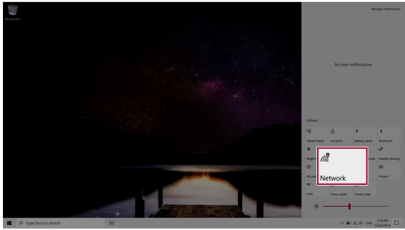
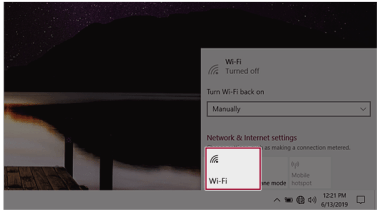
TIP If Wi-Fi is turned off, press the [Wi-Fi] tile.
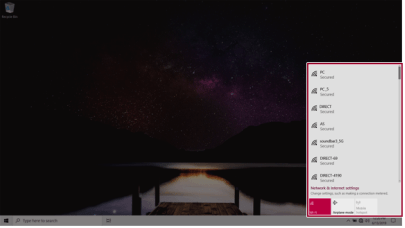
3 Select the Access Point you want to connect to and press [Connect].

4 If a connection is established, [Connected] appears below the Access Point name.
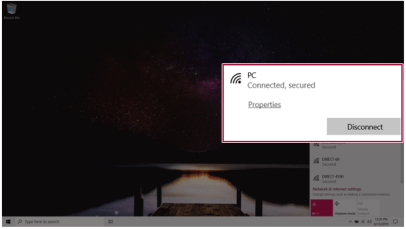
5 Click the Web Browser icon to check whether the internet is operating normally.