Loading ...
Loading ...
Loading ...
Rinnai 16 Dry-Soft® RD-400AU / RD-600AU Installation Manual
INSTALLATION
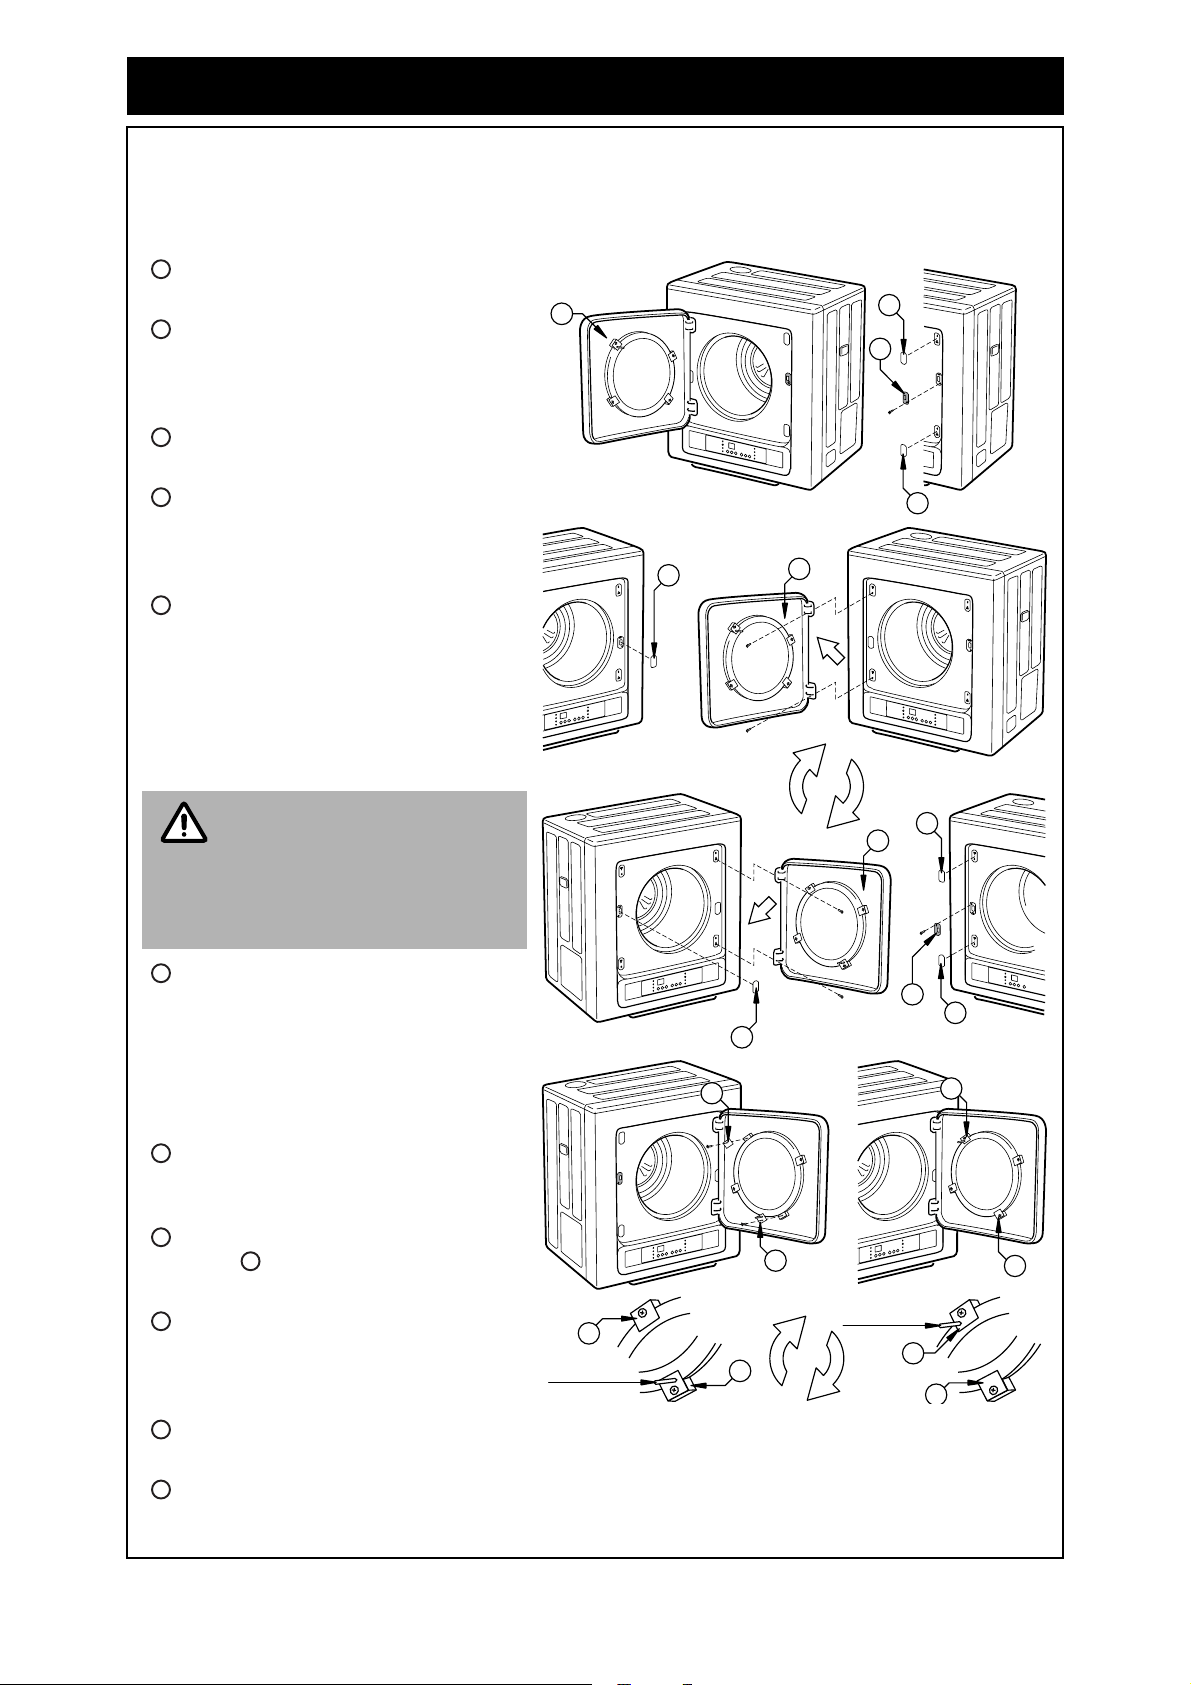
SWAPPING DOOR FROM LEFT TO RIGHT OPENING
The dryer access door may be swapped from a left handed opening as supplied from the factory to a
right handed opening. When changing door opening direction ensure the appropriate clearances are
provided. Refer to “POSITIONING OF THE APPLIANCE” on page 13 for clearance details.
Open the dryer door fully so that it
locks in the open position.
Remove the two plastic tabs from
the appliance body to reveal the
right hand door hinge attachment
points.
Unscrew and remove the door latch
from the left handed position.
Apply one of the three self-adhesive
plastic tabs (supplied with the
appliance) over the left handed door
latch attachment point.
With the door still locked in the open
position remove the retaining screws
for each of the upper and lower
hinges. Remove the door with the
hinges attached by using an upward
motion to disengage the ‘T’ shaped
slots of the left handed hinge
attachment points.
After removing the door the
from the appliance the upper
hinge will be locked into
position. However care must
be taken as the lower hinge is
only held in place by gravity.
Rotate the door by 180°, ensuring
that the lower hinge is held in place
and re-attach the door to the right
hand attachment points by engaging
the ‘T’ shaped slots with a downward
motion. Secure both the upper and
lower hinges with a retaining screw.
Remove the plastic tab from the
appliance body to reveal the right
hand door latch attachment point.
Attach the door latch removed in
step to the above attachment
point.
Using the remaining two self-
adhesive plastic tabs cover up the
left hand door hinge attachment
points.
Remove both the door window retaining bracket that has the 25mm pin and the door window
retaining bracket that is diagonally opposite.
Reverse the above brackets by 180° and re-attach them to the door so that the pinned bracket
is now in the upper most position.
1
2
3
4
5
1
2
2
3
4
5
6
9
9
8
10
10
11
11
7
10
25mm pin
10
11
11
25mm pin
180°
180°
NOTE
6
7
8
3
9
10
11
Loading ...
Loading ...
Loading ...