Loading ...
Loading ...
Loading ...
6
ENGLISHESPAÑOL
RQTX1150
Using the clock and timers
Setting the clockSetting the clock
This is a 24-hour clock.
1 Press [CLOCK/TIMER].
Each time you press the button:
#
PLAY ON SLEEP
CLOCK
Original display
2 Within 5 seconds or so
Press [–/2] or [6/+] to set the time.
Holding down the button will speed up the time selection.
3 Press [CLOCK/TIMER] to fi nish setting the time.
Displaying the clock
Press [CLOCK/TIMER] to display the clock for few seconds.
✒
Note
• Reset the clock regularly to maintain accuracy.
• When the unit is in standby mode and it is powered by batteries, clock will not
be displayed.
Using the play timerUsing the play timer
You can set the timer to come on at a certain time to wake you up.
✒
Preparation
• Turn the unit on and set the clock.
• Prepare the music source you want to listen to; disc or radio source, and set
the volume.
1 Press [CLOCK/TIMER] repeatedly to select the play timer.
2 Within 5 seconds or so
Press [–/2] or [6/+] to set the
starting time.
3 Press [CLOCK/TIMER] to confi rm.
4 Repeat steps 2 and 3 to set the fi nishing
time.
To activate the timer
5 Press and hold [–# PLAY] to turn on the timer.
# PLAY
No display (off)
6 Press [TAPE/OFF] to turn off the unit.
Change the
settings
Repeat steps 1 to 4 and 6 (Z see above).
Change the source
or volume
1. Press and hold [– # PLAY] to clear the timer
indicator from the display.
2. Make changes to the source or volume.
3. Perform steps 5 and 6 (Z see above).
Check the settings
(when the unit is on
or in standby mode)
Press [CLOCK/TIMER] repeatedly to select # PLAY.
Cancel
Press and hold [–# PLAY] to clear the timer indicator
from the display.
✒
Note
• The play timer will start at the preset time, with the volume increasing
gradually to the preset level.
• The timer comes on at the set time every day if the timer is on.
• The unit must be in the standby mode for the timer to function.
• If you turn the unit off and on again while a timer is functioning, the fi nish time
setting will not be activated.
Using the sleep timerUsing the sleep timer
This function enables you to turn off the unit automatically after the set time
except in tape mode.
1 Press [CLOCK/TIMER] repeatedly to select “SLEEP”.
2 Press [–/2] or [6/+] to select your desired time (in minutes).
To cancel
Press [CLOCK/TIMER] repeatedly to show the remaining time, and press
[–/2] or [6/+] to select “OFF”.
Changing the remaining time
Press [CLOCK/TIMER] repeatedly to show the remaining time, and press
[–/2] or [6/+] to select your desired time.
✒
Note
• The play and sleep timer can be used together.
• The sleep timer always has priority. Be sure not to overlap timer settings.
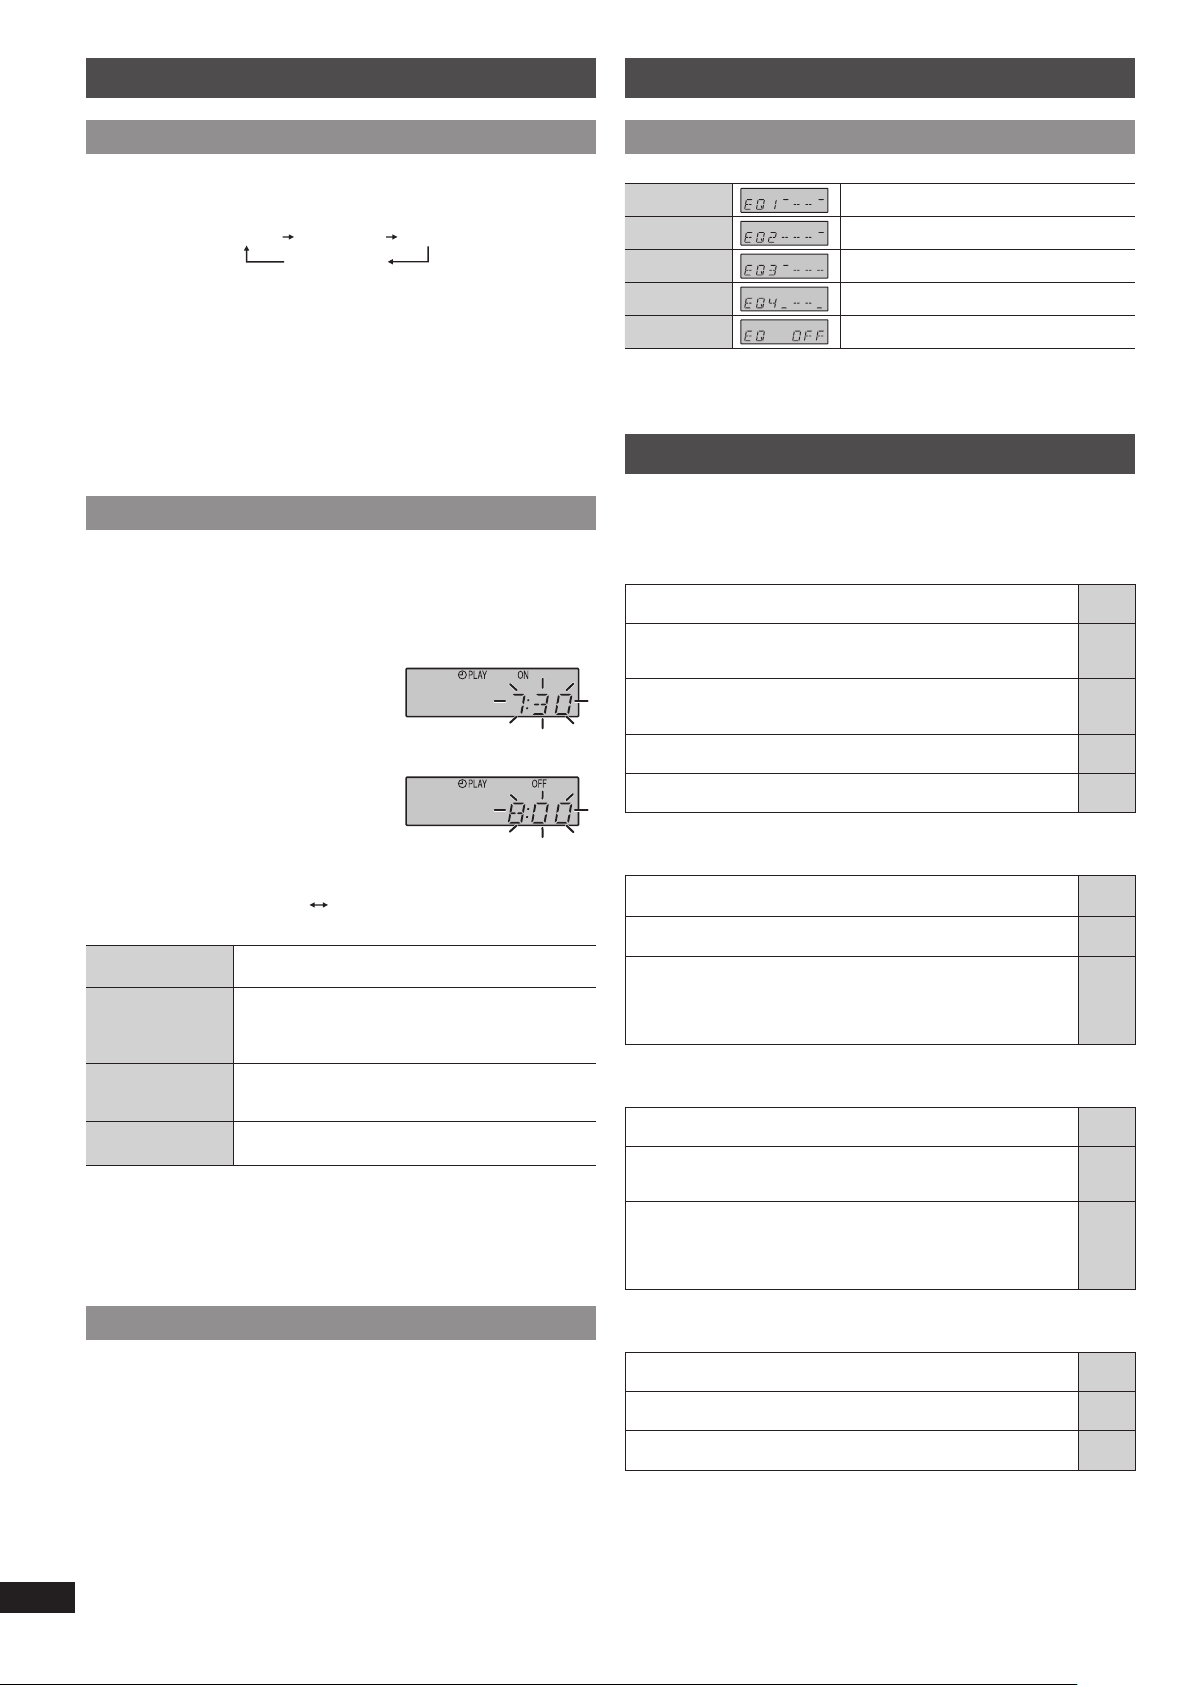
Using sound effects
Changing the sound quality: Sound EQChanging the sound quality: Sound EQ
Press [SOUND EQ] repeatedly to select your desired setting.
EQ1 (HEAVY)
Adds punch to rock
EQ2 (CLEAR)
Clarifi es higher frequencies
EQ3 (SOFT)
For background music
EQ4 (VOCAL)
Adds gloss to vocal
EQ OFF
Cancels the EQ selection
Troubleshooting guide
Before requesting service, make the following checks. If you are in doubt about
some of the check points, or if the solutions indicated in the chart do not solve
the problem, consult your dealer for instructions.
■
Common problems Page
Distorted sound or no sound.
• Turn the volume up.
—
A “humming” sound can be heard during play.
• An AC mains lead or fl uorescent light is near the unit. Keep other
appliances and cords away from the unit.
—
Clock display is not shown when the unit is powered by
batteries and is in standby mode.
• Connect to the household AC power in order to view the display.
3
“UO1” is displayed.
• Replace the batteries or use household AC power.
—
“F76” is displayed.
• There is a power supply problem. Consult the dealer.
—
■
Discs
“ERROR”
• Incorrect operation performed. Read the instructions and try again.
—
“NOPLAY”
• Incorrect disc format. Insert the correct disc.
—
Incorrect display or play will not start.
• You have not inserted the disc correctly; insert it correctly.
• Disc may be dirty. Wipe it clean.
• Replace the disc if it is scratched, warped, or non-standard.
• Condensation has formed: Wait 1 to 2 hours for it to evaporate.
—
—
—
—
■
Cassette tape
Poor sound quality.
• Clean the heads.
2
Recording cannot be performed.
• If the erasure prevention tabs have been removed, cover the holes
with adhesive tape.
5
The cassette cannot be ejected or the deck cannot be closed
when loading a cassette.
• The batteries are fl at. Replace the batteries or connect to
household AC power.
• Press [4, PLAY] then [8/x, STOP/EJECT].
—
—
■
Radio
Distorted sound or noise is heard.
• Use an outdoor antenna.
—
A beat sound is heard.
• Turn the television off or move it away from the unit.
—
A low hum is heard during AM broadcast.
• Separate the antenna from other cables and cords.
—
RQTX1150-L_gb.indd 6RQTX1150-L_gb.indd 6 4/6/2010 11:11:32 AM4/6/2010 11:11:32 AM
Loading ...
Loading ...